Difference between revisions of "Team:Aachen/Hardware"
Prannoy.Seth (Talk | contribs) |
Prannoy.Seth (Talk | contribs) |
||
| Line 108: | Line 108: | ||
<h2 style="border-bottom: 5px solid #005b04;padding-left: 1.0cm;">Characterization</h2><br> | <h2 style="border-bottom: 5px solid #005b04;padding-left: 1.0cm;">Characterization</h2><br> | ||
<p align="justify" style="padding-left: 1.0cm; padding-right: 1.0cm;font-size:16px;"> | <p align="justify" style="padding-left: 1.0cm; padding-right: 1.0cm;font-size:16px;"> | ||
| − | The parts that needed to be characterized in the Dark Bench are the optical window and safelights. The | + | The parts that needed to be characterized in the Dark Bench are the optical window and safelights. The <a href="https://www.thorlabs.com/images/tabImages/LED4D_625nm.gif"><span style="color:#0000EE">spectrum</span></a> and chromaticity of red LED elements are studied extensively and reported in the datasheet of the product. From the spectrum given in the datasheet, it is clear that the range is restricted well below 500 nm. The performance of the optical window was evaluated by acquiring the absorption spectrum of the window. A specimen of size 1X4 cm was cut in transparent plexiglas and the absorption profile was studied with and without protection foil. |
</p> | </p> | ||
<center><img src="https://static.igem.org/mediawiki/2016/3/30/T--Aachen--Hardware_DB_3.png"></center> | <center><img src="https://static.igem.org/mediawiki/2016/3/30/T--Aachen--Hardware_DB_3.png"></center> | ||
| Line 148: | Line 148: | ||
<h2 style="border-bottom: 5px solid #005b04;padding-left: 1.0cm;">Light source</h2><br> | <h2 style="border-bottom: 5px solid #005b04;padding-left: 1.0cm;">Light source</h2><br> | ||
<p align="justify" style="padding-left: 1.0cm; padding-right: 1.0cm;font-size:16px;"> | <p align="justify" style="padding-left: 1.0cm; padding-right: 1.0cm;font-size:16px;"> | ||
| − | The caged amino acids O-(2-Nitrobenzyl)-L-tyrosine (ONBY) require exposure to a particular wavelength of 365 nm for photo cleavage [<a href="# | + | The caged amino acids O-(2-Nitrobenzyl)-L-tyrosine (ONBY) require exposure to a particular wavelength of 365 nm for photo cleavage [<a href="#ref_1"><u style="color:#0000EE">1</u></a>]. The other factors which affects the efficiency and rate of uncaging are the light intensity and exposure time. So, as to have a quick uncaging, we used 365 nm high-power <a href="https://www.thorlabs.com/images/tabImages/LED4D_625nm.gif"><span style="color:#0000EE">UV-A LED</span></a>. The LED was mounted at a height of 5.5 cm from the base of activation chamber and the maximum intensity at base is found to be 15mW/cm<sup>2</sup>. |
</p> | </p> | ||
<h2 style="border-bottom: 5px solid #005b04;padding-left: 1.0cm;">Pumps</h2><br> | <h2 style="border-bottom: 5px solid #005b04;padding-left: 1.0cm;">Pumps</h2><br> | ||
<p align="justify" style="padding-left: 1.0cm; padding-right: 1.0cm;font-size:16px;"> | <p align="justify" style="padding-left: 1.0cm; padding-right: 1.0cm;font-size:16px;"> | ||
| − | The two peristaltic pumps powered by DC motors are used to pump the samples into the activation chamber for irradiation and to pump out the activated samples. The simple peristaltic pump was preferred over the high accuracy pump, which was realized by the stepper motor like our | + | The two peristaltic pumps powered by DC motors are used to pump the samples into the activation chamber for irradiation and to pump out the activated samples. The simple peristaltic pump was preferred over the high accuracy pump, which was realized by the stepper motor like our <a href="https://2015.igem.org/Team:Aachen/Notebook/Construction_Manuals/Pumps"><span style="color:#0000EE">last year’s team</span></a>, for the cost, size, and switching simplicity. The outlet pump also pneumatically stirs the sample by pumping in air during irradiation step to have uniform exposure. The pumping rate of the pumps was calibrated with respect to the duty cycle of the PWM signal and found to be 8-54 ml/min. |
</p> | </p> | ||
| Line 373: | Line 373: | ||
<tr> | <tr> | ||
| − | <td style="border:1pt solid black;"> | + | <td style="border:1pt solid black;"><a href="http://www.uvps.com/product.asp?code=FILTER+++B.html"><span style="color:#0000EE">UV foil</span></a></td> |
<td style="border:1pt solid black;">blocks λ<540 nm,<br>50X30cm</br></td> | <td style="border:1pt solid black;">blocks λ<540 nm,<br>50X30cm</br></td> | ||
<td style="border:1pt solid black;">1</td> | <td style="border:1pt solid black;">1</td> | ||
| Line 393: | Line 393: | ||
<tr> | <tr> | ||
| − | <td style="border:1pt solid black;"> | + | <td style="border:1pt solid black;"><a href="http://www.miniinthebox.com/5m-300x3528-smd-warm-white-red-green-blue-yellow-led-strip-light-dc12v_p2256338.html?category_id=4653&prm=2.4.1.1"><span style="color:#0000EE">LED Strips</span></a></td> |
<td style="border:1pt solid black;">625 nm, 150 cm, <br>12V, 2.7W</br></td> | <td style="border:1pt solid black;">625 nm, 150 cm, <br>12V, 2.7W</br></td> | ||
<td style="border:1pt solid black;">1</td> | <td style="border:1pt solid black;">1</td> | ||
| Line 403: | Line 403: | ||
<tr> | <tr> | ||
| − | <td style="border:1pt solid black;"> | + | <td style="border:1pt solid black;"><a href="http://www.mouser.de/ProductDetail/CUI/SWI6-12-E-P5/?qs=sGAEpiMZZMtz8P%2feuiupSRmvr4QPIAOoyU1Pml94Egk%3d.html"><span style="color:#0000EE">Regulated Power Supply</span></a></td> |
<td style="border:1pt solid black;">12V, 600mA</td> | <td style="border:1pt solid black;">12V, 600mA</td> | ||
<td style="border:1pt solid black;">1</td> | <td style="border:1pt solid black;">1</td> | ||
| Line 510: | Line 510: | ||
<tr> | <tr> | ||
| − | <td style="border:1pt solid black;"> | + | <td style="border:1pt solid black;"><a href="https://www.amazon.de/Modul-ATmega328P-CH340G-Arduino-kompatibel/dp/B01C7UFYSS/ref=pd_lpo_147_bs_t_2?ie=UTF8&psc=1&refRID=X5JCK396G718Q4KW051E"><span style="color:#0000EE">Arduino nano <br>development board </span></a></td> |
<td style="border:1pt solid black;">-</td> | <td style="border:1pt solid black;">-</td> | ||
<td style="border:1pt solid black;">1</td> | <td style="border:1pt solid black;">1</td> | ||
| Line 520: | Line 520: | ||
<tr> | <tr> | ||
| − | <td style="border:1pt solid black;"> | + | <td style="border:1pt solid black;"><a href="http://www.ebay.com/itm/12V-DC-Dosing-Pump-Peristaltic-Dosing-Head-For-Aquarium-Lab-Analytical-Water-DIY-/161303613819"><span style="color:#0000EE">Peristaltic pump</span></a></td> |
<td style="border:1pt solid black;">12V DC</td> | <td style="border:1pt solid black;">12V DC</td> | ||
<td style="border:1pt solid black;">2</td> | <td style="border:1pt solid black;">2</td> | ||
| Line 530: | Line 530: | ||
<tr> | <tr> | ||
| − | <td style="border:1pt solid black;"> | + | <td style="border:1pt solid black;"><a href="http://www.mouser.com/ds/2/228/LZ1-00UV00-257812.pdf"><span style="color:#0000EE">UV LED </span></a></td> |
<td style="border:1pt solid black;">LZ1-00UV00</td> | <td style="border:1pt solid black;">LZ1-00UV00</td> | ||
<td style="border:1pt solid black;">1</td> | <td style="border:1pt solid black;">1</td> | ||
| Line 540: | Line 540: | ||
<tr> | <tr> | ||
| − | <td style="border:1pt solid black;"> | + | <td style="border:1pt solid black;"><a href="http://www.onsemi.com/pub_link/Collateral/LM2575-D.PDF"><span style="color:#0000EE">Switching regulator</span></a></td> |
<td style="border:1pt solid black;">LM2575-ADJ </td> | <td style="border:1pt solid black;">LM2575-ADJ </td> | ||
<td style="border:1pt solid black;">1</td> | <td style="border:1pt solid black;">1</td> | ||
| Line 550: | Line 550: | ||
<tr> | <tr> | ||
| − | <td style="border:1pt solid black;"> | + | <td style="border:1pt solid black;"><a href="http://www.vishay.com/docs/91328/91328.pdf"><span style="color:#0000EE">MOSFET </span></a></td> |
<td style="border:1pt solid black;">IRLZ44n </td> | <td style="border:1pt solid black;">IRLZ44n </td> | ||
<td style="border:1pt solid black;">1</td> | <td style="border:1pt solid black;">1</td> | ||
| Line 560: | Line 560: | ||
<tr> | <tr> | ||
| − | <td style="border:1pt solid black;"> | + | <td style="border:1pt solid black;"><a href="http://www.ti.com/lit/ds/symlink/l293.pdf"><span style="color:#0000EE">Dual H-Bridge Motor <br>Driver</span></a></td> |
<td style="border:1pt solid black;">L283D</td> | <td style="border:1pt solid black;">L283D</td> | ||
<td style="border:1pt solid black;">1</td> | <td style="border:1pt solid black;">1</td> | ||
| Line 580: | Line 580: | ||
<tr> | <tr> | ||
| − | <td style="border:1pt solid black;"> | + | <td style="border:1pt solid black;"><a href="https://www.sparkfun.com/datasheets/LCD/Monochrome/Nokia5110.pdf"><span style="color:#0000EE">LCD module</span></a></td> |
<td style="border:1pt solid black;">1.6" 5110</td> | <td style="border:1pt solid black;">1.6" 5110</td> | ||
<td style="border:1pt solid black;">1</td> | <td style="border:1pt solid black;">1</td> | ||
| Line 740: | Line 740: | ||
<tr> | <tr> | ||
| − | <th style="border:0pt solid black; | + | <th style="border:0pt solid black;border-left:1pt solid black;background-color:#7fb983;">Other Components</th> |
| − | + | ||
<th style="border:0pt solid black;background-color:#7fb983;"></th> | <th style="border:0pt solid black;background-color:#7fb983;"></th> | ||
<th style="border:0pt solid black;background-color:#7fb983;"></th> | <th style="border:0pt solid black;background-color:#7fb983;"></th> | ||
| Line 747: | Line 746: | ||
<th style="border:0pt solid black;background-color:#7fb983;"></th> | <th style="border:0pt solid black;background-color:#7fb983;"></th> | ||
<th style="border:0pt solid black;background-color:#7fb983;"></th> | <th style="border:0pt solid black;background-color:#7fb983;"></th> | ||
| + | <th style="border:0pt solid black;border-right:1pt solid black;background-color:#7fb983;"></th> | ||
</tr> | </tr> | ||
<tr> | <tr> | ||
| Line 862: | Line 862: | ||
<h2 style="border-bottom: 5px solid #005b04;padding-left: 1.0cm;">References</h2><br> | <h2 style="border-bottom: 5px solid #005b04;padding-left: 1.0cm;">References</h2><br> | ||
<p align="justify" style="padding-left: 1.0cm; padding-right: 1.0cm;font-size:16px;"> | <p align="justify" style="padding-left: 1.0cm; padding-right: 1.0cm;font-size:16px;"> | ||
| − | |||
| − | |||
| − | |||
| − | |||
| − | |||
| − | |||
| − | |||
| − | |||
| − | |||
| − | |||
| − | |||
| − | |||
| − | |||
| − | |||
| − | |||
| − | |||
| − | |||
| − | |||
| − | |||
| + | <a name="ref1glossary" class="anchor"></a>[1] <span id="ref_1">M. S. Kim and S. L. Diamond, “Photocleavage of o-nitrobenzyl ether derivatives for rapid biomedical release applications,” Bioorg. Med. Chem. Lett., vol. 16, no. 15, pp. 4007–4010, Aug. 2006.<br> | ||
| + | </p> | ||
</div> | </div> | ||
Revision as of 14:44, 19 October 2016
Hardware
To learn more about this years hardware project
|
|
|
Dark Bench
Introduction
In the past, only the photographers and radiographers were in need of dark rooms for film processing. Nowadays, outburst of new applications in the fields of photochemistry, photobiology and photolithography forced even researchers to work in such light controlled environments. But, not all institutions are equipped with dark room facilities because of spatial and economic constraints. This serves as the motivation for developing an affordable and less-space-demanding light-proof workbench called “Dark Bench”.
Description
|
As mentioned above, the Dark Bench is a light controlled space which facilitates the handling of the photo-sensitive materials which undergoes photo-damage in the UV and blue region of the electromagnetic spectrum. The Dark Bench was entirely made using laser-cut parts and readily available resources to make it a Do-It-Yourself and inexpensive device. As all the parts are assembled with help of angles and hinges, the Dark Bench can be dismantled and assembled with little effort. |
|

Sliding Drawer
Another challenging task in building a dark chamber was to maintain the darkness even while transporting materials. In the photographic darkrooms, this is achieved by double door system or using a revolving cylindrical chamber. But both designs were unrealistic in our Dark Bench because the double door system needs more space for operation and one of the doors must remain closed; while the revolving doors can’t be implemented with the laser cutter. So we modeled a sliding drawer with a single door and a roller plate for smooth operation.
Optical window and Safelight
As the entire working space is covered with opaque plexiglas sheet, one has to think of integrating an optical window and a light source in the device to look through it. The optical window is a light filter that eliminates the undesirable part of the spectrum which would alter the compound. For the optical window, we covered the transparent plexiglas with UV protection foil on both sides for better absorption. The protection foil not only absorbs the UV region of spectrum but also the wavelengths less than 500 nm which makes the Dark Bench more versatile. Instead of using an expensive fluorescent lamp and then filter the undesirable spectrum out, we used the red LED strips for illuminating the Dark Bench. As both of our light sensitive compounds are insensitive to wavelengths around 625 nm and also because two-photon excitation is not possible under such low intensities, the LED lightings we chose were ideal.

Characterization
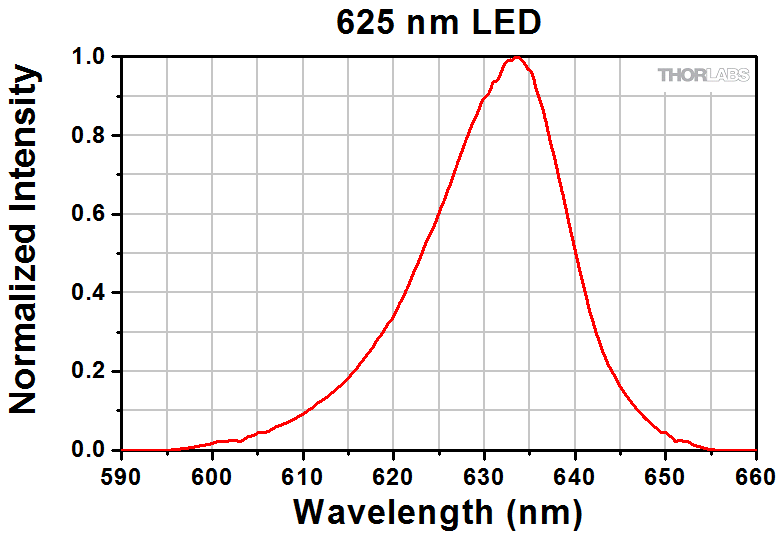
The parts that needed to be characterized in the Dark Bench are the optical window and safelights. The spectrum and chromaticity of red LED elements are studied extensively and reported in the datasheet of the product. From the spectrum given in the datasheet, it is clear that the range is restricted well below 500 nm. The performance of the optical window was evaluated by acquiring the absorption spectrum of the window. A specimen of size 1X4 cm was cut in transparent plexiglas and the absorption profile was studied with and without protection foil.

As evident from the graph above, even the transparent plexiglas has an intrinsic UV rejection property. We further improved the performance by adding two layers of filters, which strongly attenuate the UV and blue regions of the spectrum. The absorbance of the specimen in the UV-A region has a value of 4 units. Or to make it sound more convincing, we could say that it allows only 0.01% or block 99.99% of incident intensity. Similarly in the blue region, the two-layer filter blocks almost 99% of radiation which can be improved further by adding more layers of the filter.
Discussion
Even though we could manage to build a fully functional Dark Bench, there is always room for further improvements. The rubber foam sheet we used instead of thick rubber gloves needs some refinement as it wears off with long term usage. To add functionality, we can include temperature and humidity sensors to standardize the working environment.
LIPs-Stick
Introduction
In the final stage of the project, we were in need of a device with which we can study the photo cleavage reaction of caged amino acid and activate the inhibited enzymes by irradiating it with light of a specific wavelength. In most cases, a suitable light source with filter, inside the concealed box will be sufficient. But the real-world application of our project is to activate the light inducible proteases (LIPs) in the liquid detergent which demands the development of a new compact exposure device called “LIPs-Stick”.
Description
|
The LIPs-Stick is an irradiating device for liquid samples, which allows you to set the volume of sample to be activated, radiation intensity and exposure time. The device can handle up to a volume of 100ml at once. |
|
Light source
The caged amino acids O-(2-Nitrobenzyl)-L-tyrosine (ONBY) require exposure to a particular wavelength of 365 nm for photo cleavage [1]. The other factors which affects the efficiency and rate of uncaging are the light intensity and exposure time. So, as to have a quick uncaging, we used 365 nm high-power UV-A LED. The LED was mounted at a height of 5.5 cm from the base of activation chamber and the maximum intensity at base is found to be 15mW/cm2.
Pumps
The two peristaltic pumps powered by DC motors are used to pump the samples into the activation chamber for irradiation and to pump out the activated samples. The simple peristaltic pump was preferred over the high accuracy pump, which was realized by the stepper motor like our last year’s team, for the cost, size, and switching simplicity. The outlet pump also pneumatically stirs the sample by pumping in air during irradiation step to have uniform exposure. The pumping rate of the pumps was calibrated with respect to the duty cycle of the PWM signal and found to be 8-54 ml/min.
Control circuit
The control circuit is constructed around the Arduino Nano development board which gets the input from the user through the keypad and actuates the pumps and UV LED accordingly. It also displays the user settings and status of the activation process through a graphic LCD module. In addition to controlling all components, the control circuit comprises of constant voltage supply for the power LED. As the difference between LED forward voltage and source voltage is large, the power dissipation of almost 6 W makes it impossible to work with the Linear voltage regulators. This overheating issue is brought under control by employing a switching mode power supply(SMPS). Since the output voltage of the regulator can be varied from 2.5 V to 6 V, almost any wavelength LED up to 3 W can be powered with the circuit. Furthermore, we designed a PCB (Printed Circuit Board) to miniaturize the circuit and for easy prototyping.

3D structures
We designed and printed a cylindrical activation chamber, on which we can connect the pumps and mount the LED. Since the photon flux density decreases away from the centre, the diameter of the chamber was restricted to 3cm to have uniform and high intensity irradiation, which in turn reduce the effective volume of the container to 15 ml. So we modelled another collector container to store the unexposed solution while the sample is getting activated in parts of 15ml. The circuit, pumps and the 3D structures are housed inside a laser-cut case.

Microcontroller firmware
The main task of the microcontroller firmware is to translate user inputs like pump rate, time, etc. to corresponding machine level variables to sequentially energize the actuators and constantly updates the status to the user. One of the thing that is worth noticing is that the PWM frequency is increased from 490 Hz to 1 kHz to save the H-bridge motor driver from current surges. Instead of activating the samples in 15 ml batches, it is also possible to continuously pump it at a much slower rate and collect it simultaneously by uploading another firmware.

Characterisation
The intensity of the high-power LED is modulated by changing the current that flows through it with the PWM technique. But the intensity is also a function of distance between the source and irradiating surface. In order to assess the intensity, we measured the intensity of the UV light at 365 nm by thermal power sensor (S302C, Thorlabs, Germany). As the sensor didn’t fit inside the chamber, we simulated the real conditions by fixing the led at the same height as in activation chamber from the sensor surface. The following plot shows that the intensity is linearly related to the current and the maximum intensity recorded was 15.42 mW/cm2

Next, we wanted to evaluate whether our device can effectively activate the caged amino acid. For this experiment, three samples were prepared by dissolving 10 mg of O-(2-Nitrobenzyl)-L-tyrosine (ONBY) in 1ml of acetonitrile and 200 µl of 1M HCL excluding the blank and then it was exposed to three different intensities 9.4 mW/cm2, 12.7 mW/cm2 and 15.4 mW/cm2 respectively. As the photo cleavage reaction is associated with a color change, the visible spectrophotometry was done to track the rate of reaction for different radiation intensities at various time points. The graph below proves that the photo decaging is possible with our device and reveals its rate dependency on intensity. However, the cleavage product couldn’t be quantified due the non-availability of standard 2-nitroso benzaldehyde.

Discussion
As the constant voltage source is used to power the power LED, thermal breakdown of the LED may occur if it is operated at its full rating for a long duration. A current limiter or constant current source should be used for such long exposure applications. We also had an idea of miniaturizing it further so that it can be incorporated on the washing machine detergent drawer.
Construction Manual for Dark Bench
The cost estimation and detailed instruction for constructing your own Dark Bench can be found here:
- Cost Estimation
- Assembly
- Assembly Video
- Download Gallery
Cost Estimation
| Component | Specifications | Quantity | Costs* [€/piece] |
Costs* [$/piece] |
Final* [€] |
Final* [$] |
|---|---|---|---|---|---|---|
| Opaque plexiglas 4mm | 50X100 cm | 5 | 22.45 | 24.63 | 112.25 | 123.15 |
| Transparent plexiglas 3mm | 25X50 cm | 1 | 7.5 | 8.23 | 7.5 | 8.23 |
| Screws | M3X10 | 155 | 0.05 | 0.05 | 7.75 | 7.75 |
| Screws | M3X16 | 10 | 0.08 | 0.09 | 0.8 | 0.9 |
| Screws | M3X20 | 25 | 0.09 | 0.10 | 2.25 | 2.5 |
| Washer | 3.2mm | 200 | 0.02 | 0.02 | 4 | 4 |
| Angles | 3X3X3cm | 18 | 0.41 | 0.45 | 7.38 | 8.1 |
| Hinges | 4X2.5cm | 18 | 0.82 | 0.90 | 14.76 | 16.2 |
| Door Knob | - | 1 | 2.39 | 2.62 | 2.39 | 2.62 |
| Long sleeve gloves | - | 1 | 1.69 | 1.85 | 1.69 | 1.85 |
| Adhesive | - | 1 | 1.05 | 1.15 | 1.05 | 1.15 |
| Cable ties and Mounts | 1.9X1.9cm | 1 | 2.29 | 2.51 | 2.29 | 2.51 |
| Foam Rubber sheet 3mm | 10X60cm | 1 | 1.13 | 1.24 | 1.13 | 1.24 |
| Foam rubber Sheet 6mm | 30X30cm | 1 | 1.71 | 1.88 | 1.71 | 1.88 |
| Plastic Sheet | 50X100cm | 1 | 1.25 | 1.37 | 1.25 | 1.37 |
| UV foil | blocks λ<540 nm, 50X30cm |
1 | 3.87 | 4.25 | 3.87 | 4.25 |
| Neodymium cube magnets | 4X4X4mm | 2 | 0.29 | 0.32 | 0.58 | 0.64 |
| LED Strips | 625 nm, 150 cm, 12V, 2.7W |
1 | 1.47 | 1.61 | 1.47 | 1.61 |
| Regulated Power Supply | 12V, 600mA | 1 | 9.35 | 10.26 | 9.35 | 10.26 |
| Switch | 1A | 1 | 1 | 1.10 | 1 | 1.10 |
| Total* | 184.47 | 202.37 |
Dark Bench
The Dark Bench that we have constructed is of the size 75cmX44cmX50cm. For the construction of Dark Bench, we used 5 pieces of 50X100cm white plexiglas sheets. However, you can use any color of your choice; the only thing that should be considered is that the sheets should be completely opaque. The largest part of the Dark Bench is of dimension 50cmX75cm. If the laser cutter can’t handle such large dimensions, you can also cut the bottom and back plate with a powered hand saw. When assembling the parts, you have to use rubber foam or flexible plastic sheet to seal the gap between the pieces.
Safe light
The red LED strips that we used has its peak emission at 625 nm and it is desirable to have epoxy coating to protect the LED from the humidity inside the box. The LED reel is cut into 3-4 pieces of length 40-45 cm and then is connected in parallel through a switch to the female DC socket.
Sliding drawer and Roller plate
The tricky part to assemble is the roller plate, as all the rollers have to be fixed at the same height for a smooth sliding of the drawer. The parts of the drawer are glued together so that it doesn’t come apart while using and the cube magnets are fixed to the door and the drawer to keep the door closed when pulling it out. The assembly of the other parts are clearly shown in the assembly video.
Assembly Video
| Dark Bench Steps to build your own Dark Bench |
Download Gallery
Construction Manual for LIPs-Stick
The cost estimation and detailed instruction for constructing your own LIPs-Stick can be found here:
- Cost Estimation
- Assembly
- Assembly Video
- Download Gallery
Cost Estimation
| Component | Specifications | Quantity | Costs* [€/piece] |
Costs* [$/piece] |
Final* [€] |
Final* [$] |
|---|---|---|---|---|---|---|
| Electronics | ||||||
| Double sided PCB | 6.1x7cm | 1 | 10 | 10.97 | 10 | 10.97 |
| Arduino nano development board |
- | 1 | 7.49 | 8.22 | 7.49 | 8.22 |
| Peristaltic pump | 12V DC | 2 | 9.38 | 10.29 | 18.76 | 20.58 |
| UV LED | LZ1-00UV00 | 1 | 32.45 | 35.6 | 32.45 | 35.6 |
| Switching regulator | LM2575-ADJ | 1 | 2.6 | 2.85 | 2.6 | 2.85 |
| MOSFET | IRLZ44n | 1 | 3.51 | 3.85 | 3.51 | 3.85 |
| Dual H-Bridge Motor Driver |
L283D | 1 | 1.95 | 2.14 | 1.95 | 2.14 |
| Schotty Diode | 1N5819 | 1 | 0.5 | 0.55 | 0.5 | 0.55 |
| LCD module | 1.6" 5110 | 1 | 3.37 | 3.7 | 3.37 | 3.7 |
| Membrane keypad | 4X4 Matrix | 1 | 3.42 | 3.75 | 3.42 | 3.75 |
| Heat sink | 21mm | 1 | 1.94 | 2.13 | 1.94 | 2.13 |
| Toggle Switch | - | 1 | 0.9 | 0.99 | 0.9 | 0.99 |
| Potentiometer Preset | 5KΩ | 1 | 1 | 1.10 | 1 | 1.10 |
| Inductor | 330uH,1A | 1 | 0.9 | 0.99 | 0.9 | 0.99 |
| Electrolytic Capacitor | 1000uF,16V | 1 | 0.8 | 0.88 | 0.8 | 0.88 |
| Electrolytic Capacitor | 330uF, 16V | 1 | 0.6 | 0.66 | 0.6 | 0.66 |
| Resistor | 2.4KΩ,1/4W | 5 | 0.05 | 0.05 | 0.25 | 0.25 |
| Resistor | 4.7KΩ,1/4W | 5 | 0.05 | 0.05 | 0.25 | 0.25 |
| Resistor | 330Ω,1/4W | 1 | 0.05 | 0.05 | 0.05 | 0.05 |
| Female DC Socket | 2.5mm | 1 | 0.85 | 0.93 | 0.85 | 0.93 |
| IC base | 16 Pin | 1 | 0.9 | 0.99 | 0.9 | 0.99 |
| Female berg strips | 20 Pin | 2 | 0.5 | 0.55 | 1 | 1.1 |
| Male berg strips | 20 Pin | 1 | 0.5 | 0.55 | 0.5 | 0.55 |
| Multistrand connecting wires |
2m | 1 | 0.85 | 0.93 | 0.85 | 0.93 |
| Other Components | ||||||
| Opaque plexiglas 4mm | 50X25cm | 1 | 5.62 | 6.17 | 5.62 | 6.17 |
| Cardboard 4mm | 5X10cm | 1 | 0.2 | 0.22 | 0.2 | 0.22 |
| Silicone tube | 4mm Diameter, 1.5m long |
1 | 1.5 | 1.65 | 1.5 | 1.65 |
| Screws | M3X10 | 8 | 0.05 | 0.05 | 0.4 | 0.4 |
| Screws | M2X10 | 4 | 0.05 | 0.05 | 0.2 | 0.2 |
| Regulated Power Supply | 12V, 2A | 1 | 8 | 8.78 | 8 | 8.78 |
| Total* | 110.76 | 121.51 |
The Circuit
The control circuit connects all components like pumps, UV LED, LCD display, and matrix keypad with the microcontroller. As we milled the double layer PCB with the available facility in our university, the board is designed with vias to connect the top and bottom tracks. In general, it is good practice to use IC bases or female berg strips for all ICs and I/O device to avoid overheating of chips while soldering and for easy replacement. The circuit requires 12 V, 2 A regulated power supply for reliable functioning. The potentiometer of the switching regulator should be adjusted to match the forward voltage of the power LED. The designed EAGLE circuit schematic and board files can be found in download section. The pin protocol for the microcontroller and the other connections can be inferred from the figure below.

Graphic LCD module and Keypad
The Nokia 5110 graphic LCD of 84X48 resolution was used to display the settings and status. The LCD can be powered by 5 V supply but the signal lines only accepts 3.3 V logic levels. The voltage divider is used to interface the 3.3 V level LCD module to the 5 V output logic level of microcontroller. Since not all 16 keys are not required, only 8 keys are connected to the controller.
Calibration of pumps
Although the pumping rate doesn’t vary much between the pumps, it is better to calibrate the pump before use. For the batch activation program, only the maximum pumping rate is required while for the continuous mode activation program, relation between PWM value and pumping rate should be fed to the program after a simple curve fitting.
Activation chamber
Both of the 3D structures are printed in a professional 3D printer to make it a water-proof design. It is preferable to have the activation chamber to be opaque or it should be shielded to avoid UV radiation leakage. In the project, the UV LED with Metal PCB was attached to a heat sink and glued on top of the cap of a 50 ml Falcon with laser cut cardboard pieces for thermal insulation. So that the LED can be mounted just like closing the model with a cap. After connecting the 3D structures to the pumps, the joints are checked for leakage and sealed with silicone. Once the chassis is laser-cut, you can start constructing by following the assembly video.
Assembly Video
| LIPs Stick Steps to build your own LIPs Stick |
Download Gallery
1. Eagle schematic and Board files
2. STL files for 3D structures
References
[1] M. S. Kim and S. L. Diamond, “Photocleavage of o-nitrobenzyl ether derivatives for rapid biomedical release applications,” Bioorg. Med. Chem. Lett., vol. 16, no. 15, pp. 4007–4010, Aug. 2006.