(→syringe pump) |
(→syringe pump) |
||
| Line 77: | Line 77: | ||
#'''trapezoidal nut:''' This is the counterpart of the trapezoidal threaded spindle. Usually, for motor applications ball screws that work in the same manner as ball bearings, are used. Because of the small speeds needed while operating the printer, we could use a simple trapezoidal nut that's cheaper and smaller. | #'''trapezoidal nut:''' This is the counterpart of the trapezoidal threaded spindle. Usually, for motor applications ball screws that work in the same manner as ball bearings, are used. Because of the small speeds needed while operating the printer, we could use a simple trapezoidal nut that's cheaper and smaller. | ||
#'''end stops:''' Because of the gear reduction the spindle provides, the small motor can cause enormous forces. To prevent the syringe pump from destroying itself when hitting its walls we build in end stops, that are switches that tell the software, when the syringe carrier has reached its end possition. The motor is then only permitted to move in the other direction. Usually, there are special end stops with a mechanical appliance that keeps them safe when hit by a moving component. Again, due to the low speeds we were able to use simple push buttons that saved us money and space. | #'''end stops:''' Because of the gear reduction the spindle provides, the small motor can cause enormous forces. To prevent the syringe pump from destroying itself when hitting its walls we build in end stops, that are switches that tell the software, when the syringe carrier has reached its end possition. The motor is then only permitted to move in the other direction. Usually, there are special end stops with a mechanical appliance that keeps them safe when hit by a moving component. Again, due to the low speeds we were able to use simple push buttons that saved us money and space. | ||
| + | #'''rods:'''Steel rods with splendid surface quality where the ball bearings can glide on and minimize friction. | ||
| + | #'''cylinder head screws with hexagon socket:'''These M3x5 cylinder head screws with hexagon socket (DIN 7984) arrest the motor. | ||
| + | #'''cover:'''This 3D prnted part has solely aesthetic purposes and covers the motor compartment. | ||
| + | #'''3 ml syringe:'''This is a BD 3ml syringe with Luer-Lok, although all similarily sized syringes should work. This serves as a container for the bioink. | ||
| + | #'''hooks:'''These 3D printed hooks can be used to hang the pump to the side of your printer. | ||
=print head= | =print head= | ||
Revision as of 13:11, 13 October 2016
Kopiervorlagen
Seitenverantwortliche/r: Michael Wichtig: Alle Bilder auf dem iGEM Mediawiki hosten, nur was dort gehostet ist zählt. Bitte Bildernnamen Muc16_ vorstellen.
Literaturreferenz
Literaturreferenz[1]
Bei Google Scholar bitte das APA-Ziteirformat verwenden.
Textformatierung
kursiv
fett
Strich
Links
Wikiinterner Link Team:LMU-TUM_Munich/Materials (As described in the Materials section)
Wikiexterner Link Visit W3Schools
Visit W3Schools
Bilder
Introduction
Do you need an organ for transplantation? Print one. You’d like to test pharmaceutical drugs not on animals, but directly on an organ? Print one. You need a biological system with a certain size and function? Print one. This might sound like the year 2100, and you are right, at the moment, 3D printing cell tissue isn’t an easy endeavor. At the moment cells have to be printed with the help of scaffolds that support the cells until they grow and attach to each other. This process takes several days, it’s difficult to maintain a complex geometry and removing the scaffolds without destroying the tissue is still a major problem. So we just went ahead and solved all problems. Our synthetic biology department developed a possibility to 3D print cells almost as you would with plastic. You practically just get them near each other and they connect all by themselves in no time. The exact explanation of that can be found in our wiki.
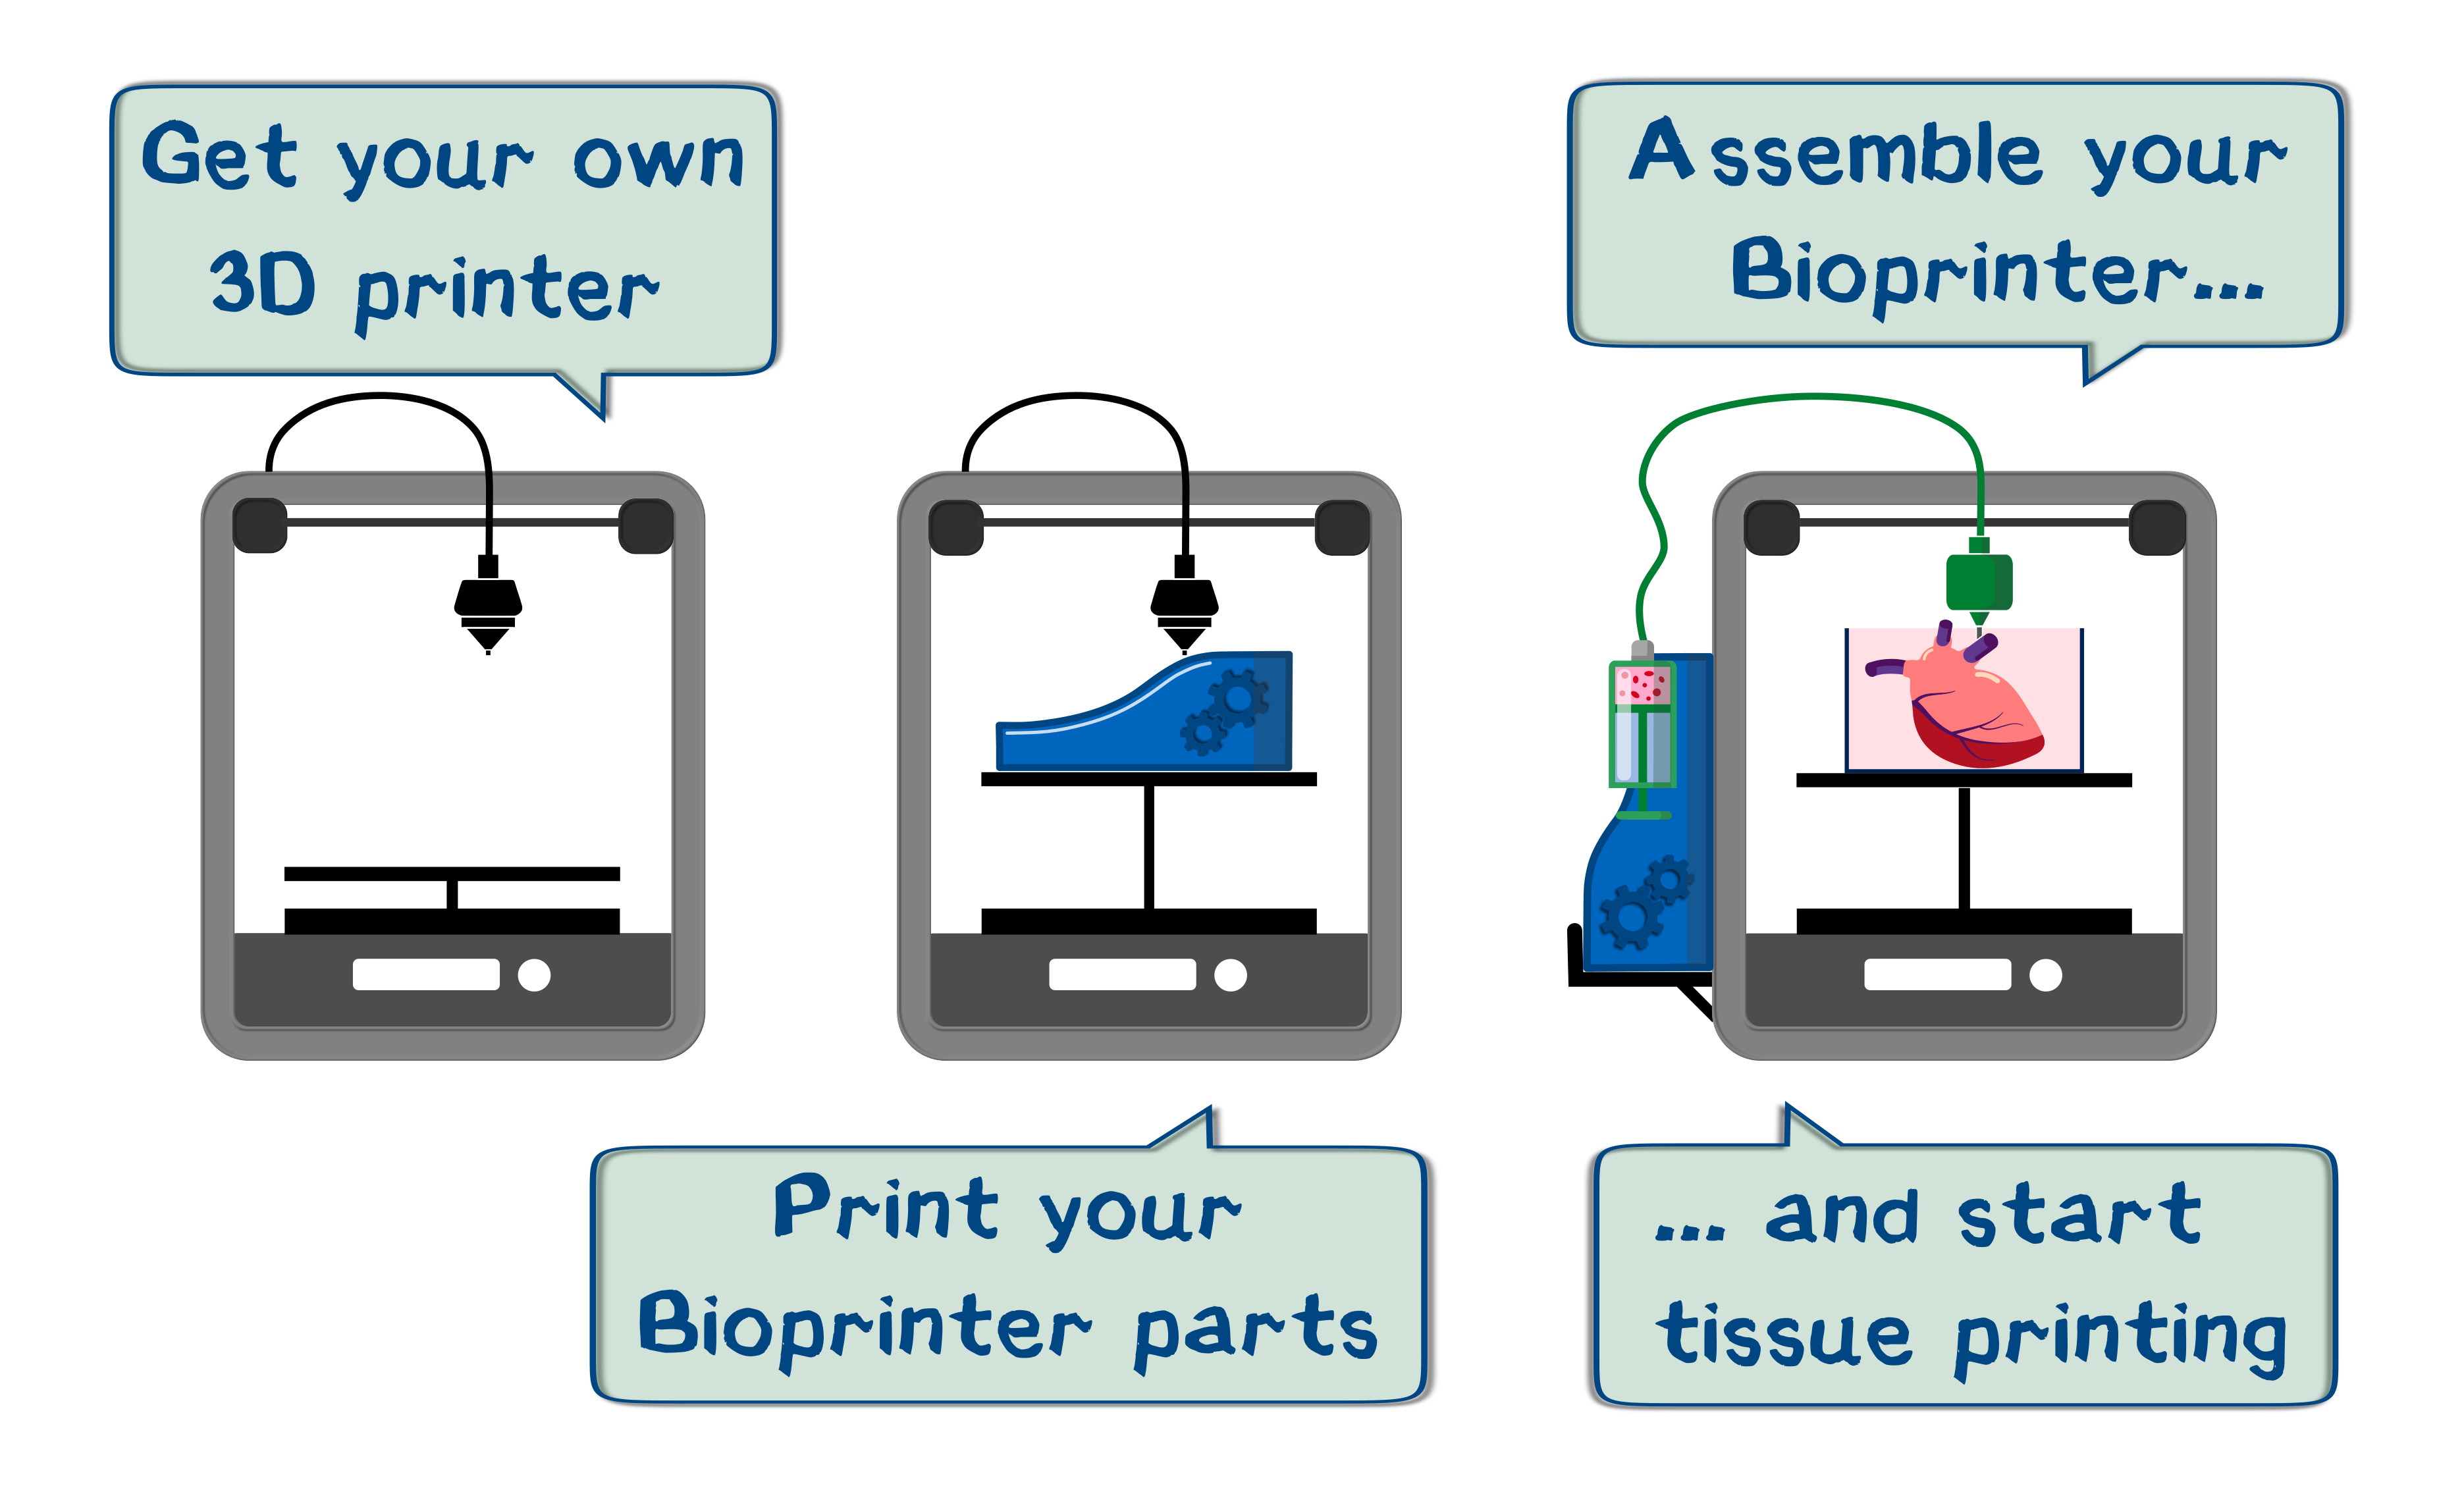
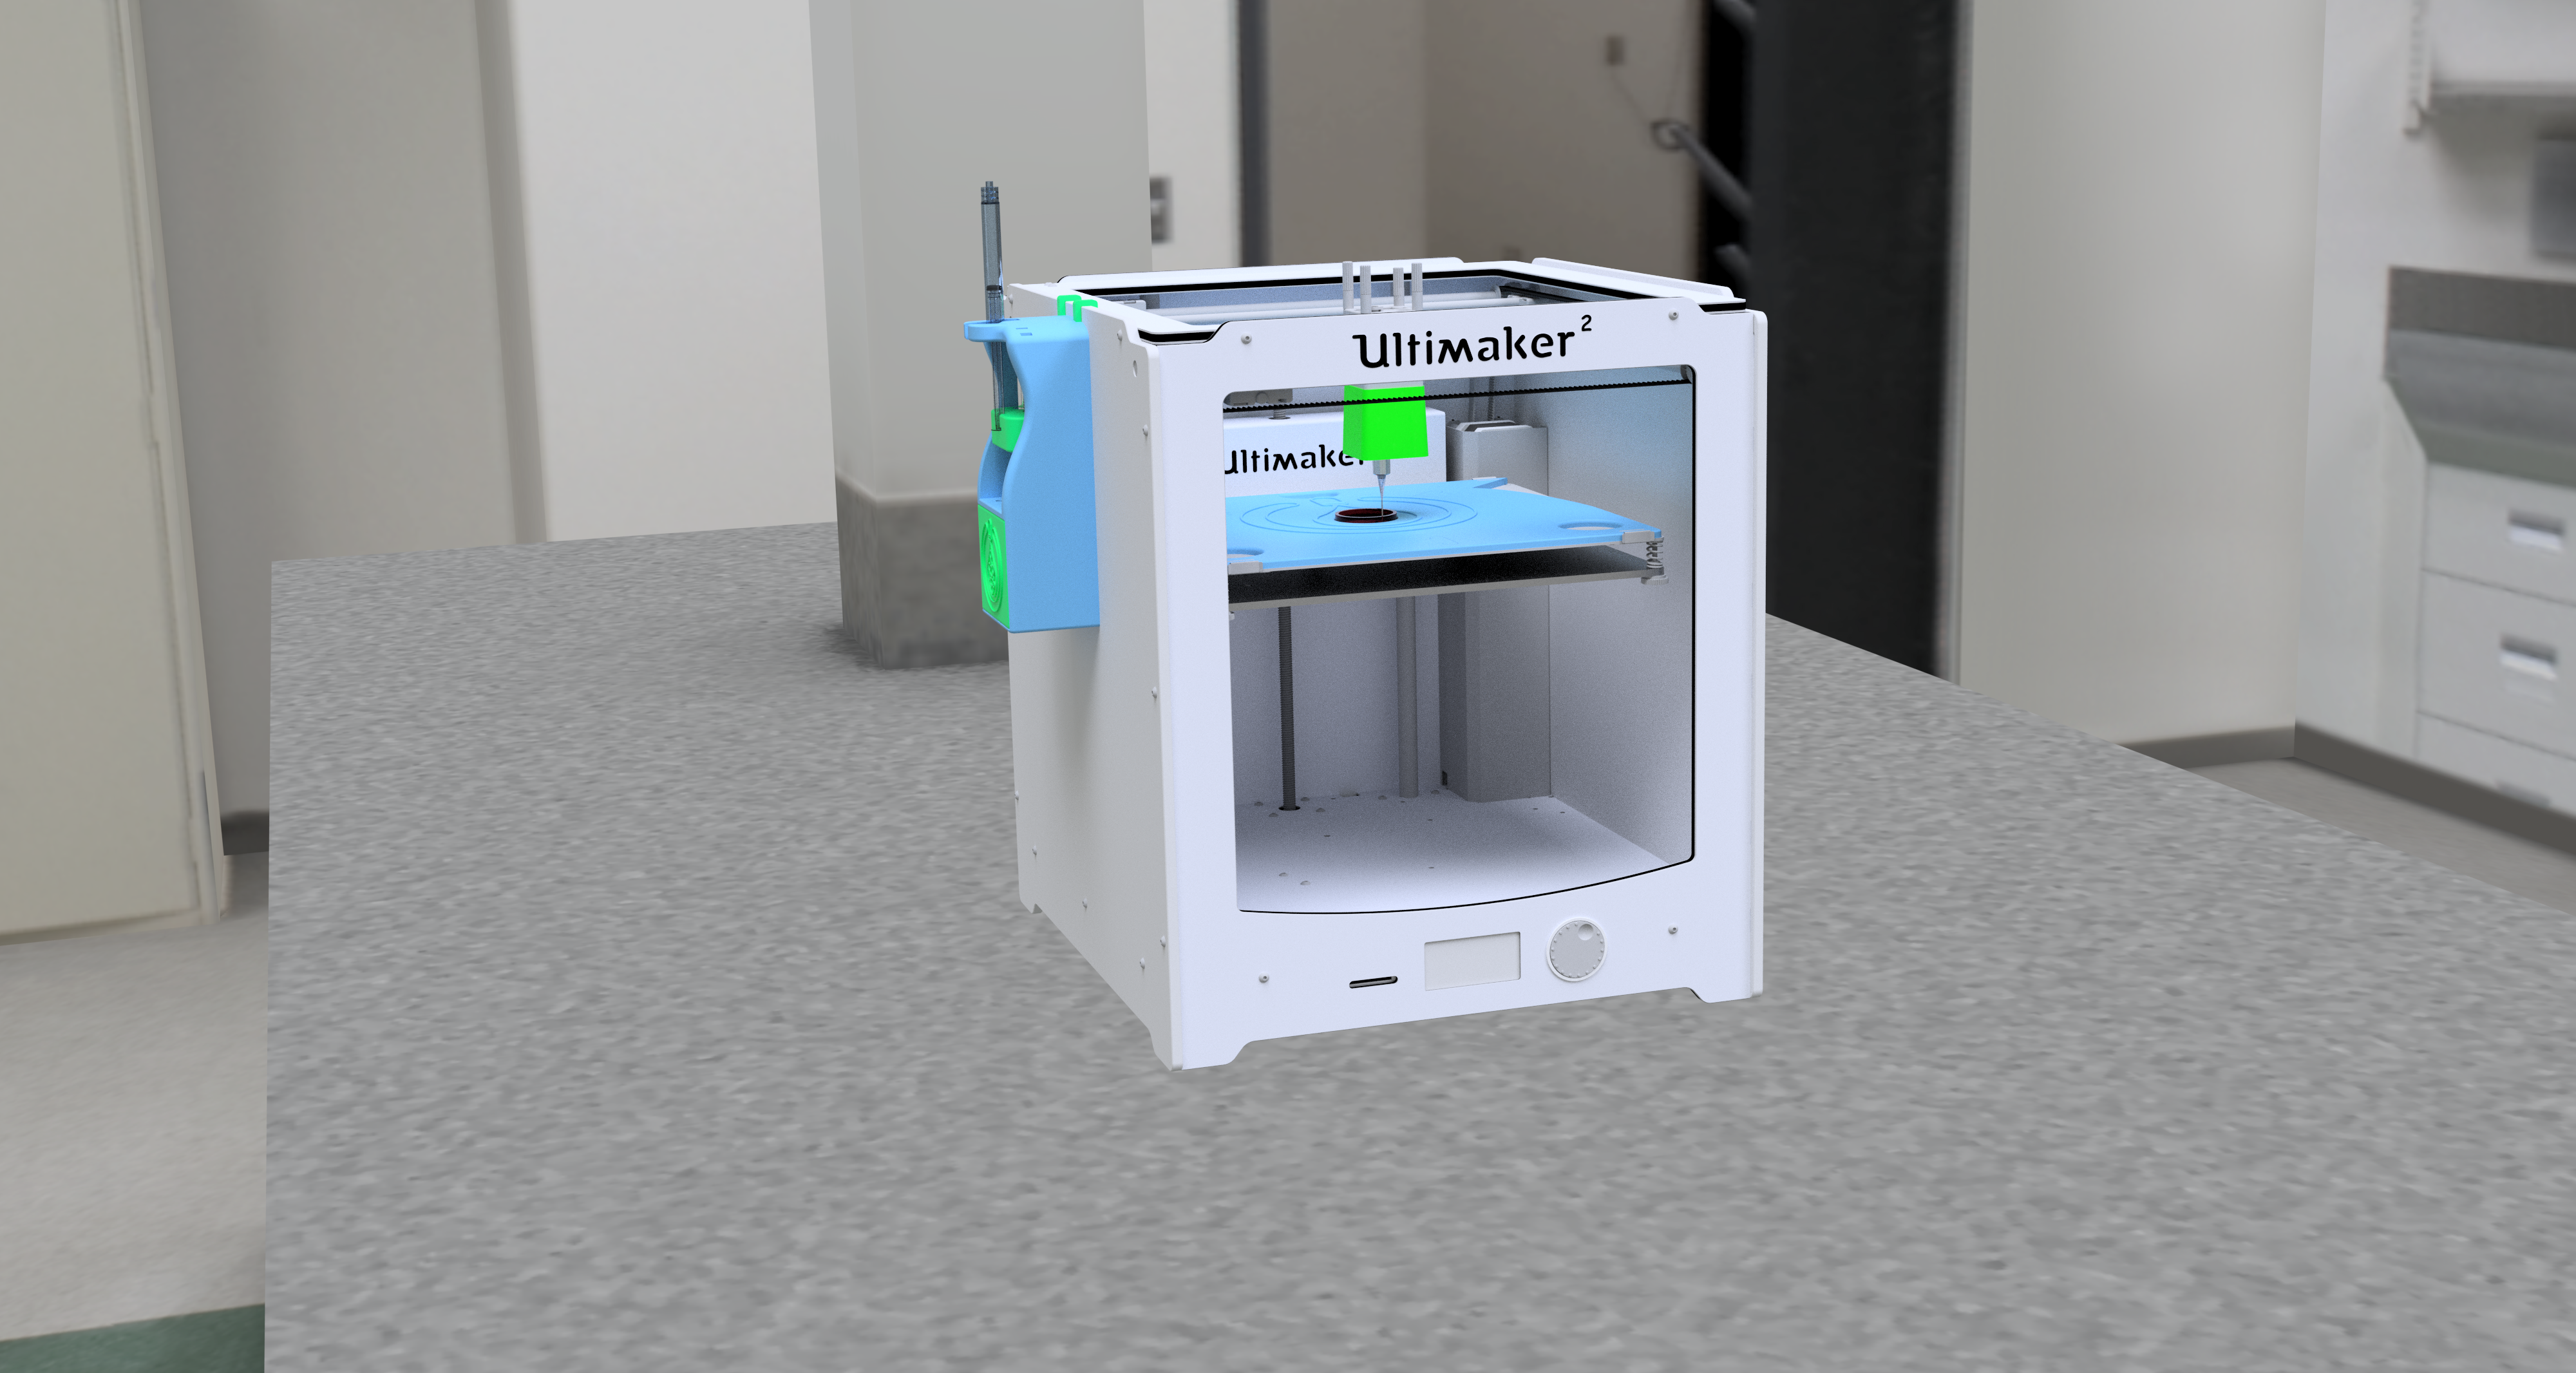
Since the cells come in a fluid that's called bioink, we had to find a way to precisely print liquids. That wasn’t our only aspiration. We wanted an affordable, open source product that’s easy to use for basically everyone. We immediately thought about using a commercial syringe pump, but that absolutely didn’t come to terms with affordability, because prices for equipment like this usually start from around a thousand dollars. Not only that, also the communication between the printer and pump would be hard to achieve with a commercial product. Since we would need a CNC printing system anyway, we decided that it would be best if the printer just printed its own extension pack. Developing a whole new FDM printer and optimizing the printing process would have been a task for a much larger engineering team. That’s why we decided to go for an Ultimaker 2 plus and modify it. It’s one of the most precise printers in its price segment and it’s also easily customizable. Additional to that, many tech-savvy people own that model.
This way, our syringe pump can be easily spread on open source platforms to get user feedback and maybe it even pushes research in the bio printing segment to a new level. Unfortunately, a 3D printer can’t be expected to work in tolerances as small as in steel constructions, so some parts (like threaded spindles) have to be bought. We found a similar project of an open source syringe pump, which we’d like to give credit here[2], for we reverse engineered that design and constructed our own, improved version. But after lots and lots of construction and prototyping, we proudly present to you a precisely functioning liquid printer that couldn’t be easier to set up and use. Currently, our friends at TU Darmstadt are testing our device and so do a lot of users on open source platforms, and so can you. How you get from printing plastic to printing cells will be explained step by step in the following manual and description.
basic principle
The basic function of our printer is easy to understand: A syringe filled with bioink is placed in the syringe pump, which then precisely moves the plunger. The thereby displaced cells are pushed through a capillary into a canulla that is mounted on the print head. By using the printer's electromechanics, the printing motion is achieved. The Ultimaker already has an opportunity to install a second extruder motor, which is usually responsible for conveying the plastic filament to the hot end printing nozzle. By using that second output, the printer is able to communicate with our syringe pump by making minor changes to the firmware, which can be downloaded and easily installed. This is explained in the software tab. This way, you can use Cura, which is a software to convert 3D models into the printer's language (the so called G-code), to tell the printer to print any geometry made of bioink directly into an ibidi slide. This dish is held in place by a retainer, that replaces the glass on the Ultimaker's build plate.
component description
In the following paragraphs the basic function and interaction of the single components will be explained.
syringe pump
The syringe pump is the main part of our printer extension. Its purpose is to deliver a precise and constant volume flow of liquid according to the printer's information.
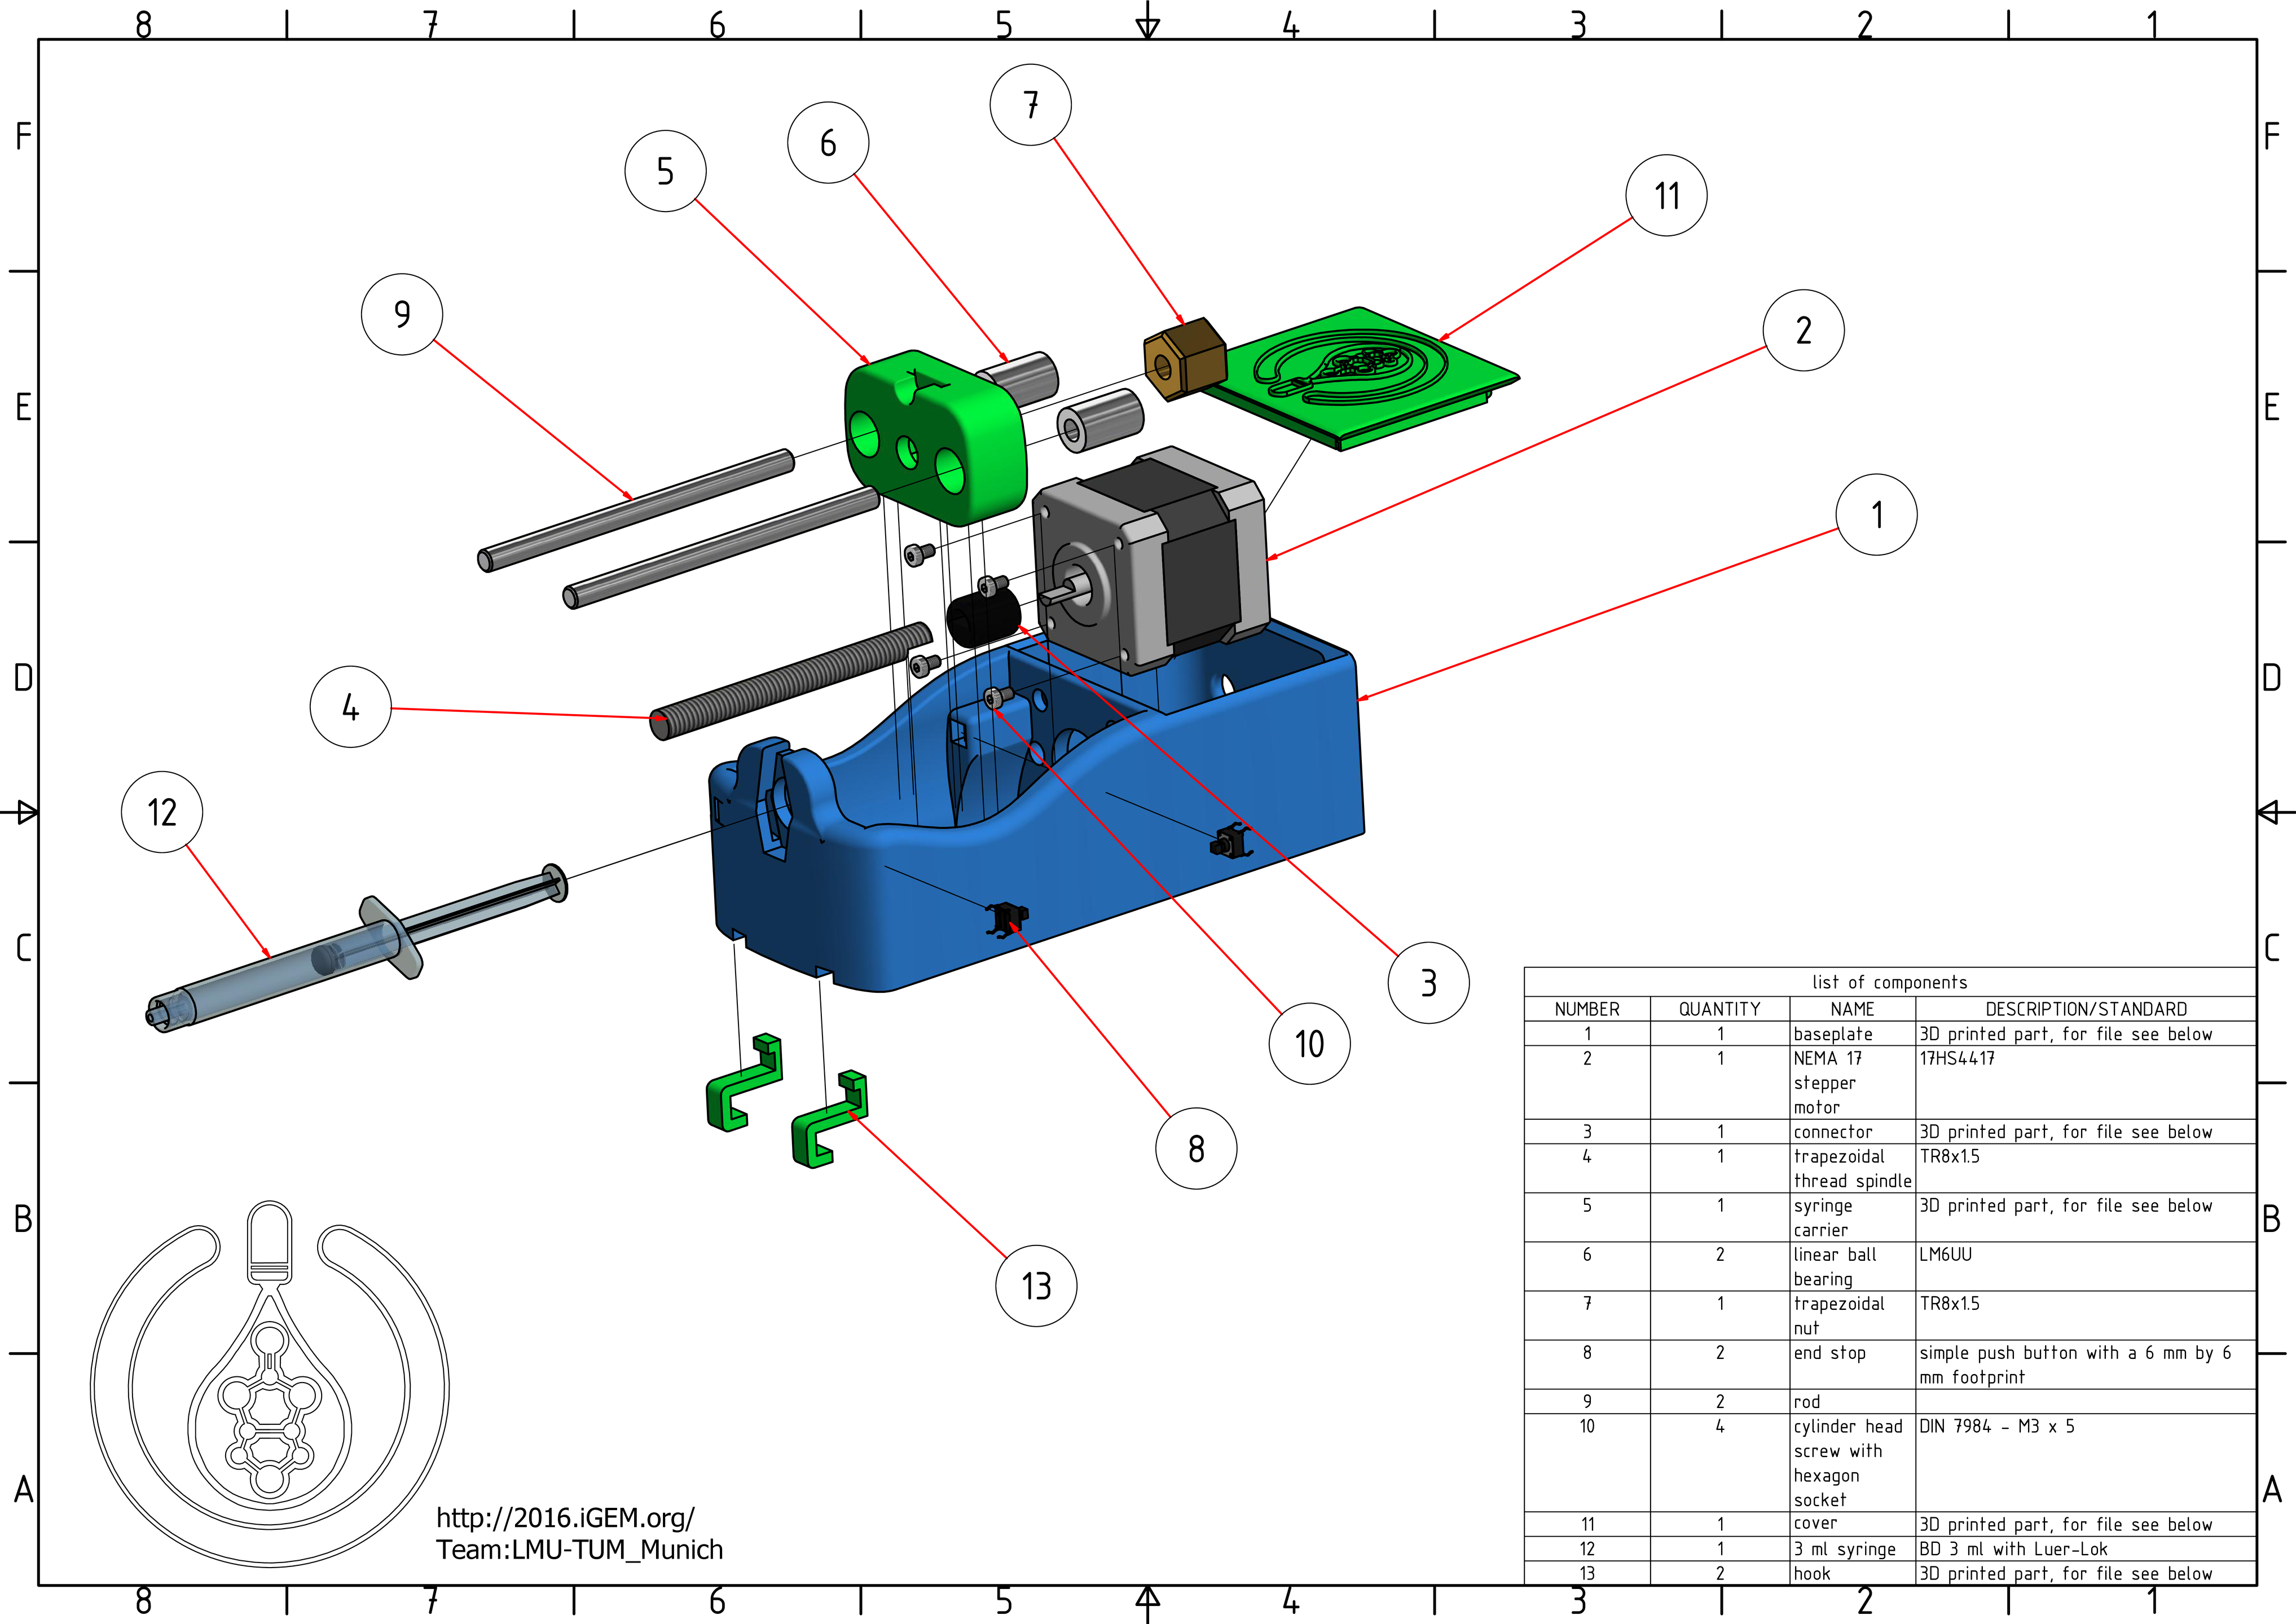
- baseplate: The Baseplate is the main part of the syringe pump. This 3D printed part is designed to retain all the other components and withstand the mechanical loads. The syringe is to be mounted with the help of a bayonet system that lets you lock it with a simple 35° turn.
- stepper motor: The stepper motor supplies the torque needed to move the syringe. The difference to the DC motor, which is the best known kind of electrical motor, is that the configuration of the coils inside divides the motor's rotation into steps. Most motor controllers are capable of microstepping, which means, that the motor only moves a fracture of a step at a time. Commonly used is one sixtienth of a step. Since our stepper motor is divided into 200 steps, and we use one sixtienth microstepping, it allows us to move the motor as precisely as 0.1125° while providing a smooth running behavior, which is crucial for our print result.
- connector: The connector's job is the force transmission from the motor to the spindle. It's 3D printed.
- trapezoidal threaded spindle: With the help of the spindle, the rotation of the motor is converted to a translational movement. The standardized designation 'TR8x1.5' contains the diameter of the spindle (8mm) and its lead (1.5mm). A lead of 1.5 mm means, that the spindle converts a rotation of 360° to 1.5mm of translation. We used the smallest lead we could find, for it determines the accuracy of the pump even further. With the current setup, the syringe plunger would move 468 nm per microstep, which is the wavelength of blue light. At this point, the limitation for our precision becomes the manufacturing accuracy of the mechanical parts.
- syringe carrier: The syringe carrier is a 3D printed part, with an indentaion that holds the back of the syringe's plunger and makes it possible to move it bidirectionally. That makes it possible to empty or fill the syringe.
- linear ball bearings: The linear ball bearings are glued into holes in the syringe carrier. Thanks to the steel balls inside, they make sure that the syringe carrier doesn't cant and moves with the least friction possible.
- trapezoidal nut: This is the counterpart of the trapezoidal threaded spindle. Usually, for motor applications ball screws that work in the same manner as ball bearings, are used. Because of the small speeds needed while operating the printer, we could use a simple trapezoidal nut that's cheaper and smaller.
- end stops: Because of the gear reduction the spindle provides, the small motor can cause enormous forces. To prevent the syringe pump from destroying itself when hitting its walls we build in end stops, that are switches that tell the software, when the syringe carrier has reached its end possition. The motor is then only permitted to move in the other direction. Usually, there are special end stops with a mechanical appliance that keeps them safe when hit by a moving component. Again, due to the low speeds we were able to use simple push buttons that saved us money and space.
- rods:Steel rods with splendid surface quality where the ball bearings can glide on and minimize friction.
- cylinder head screws with hexagon socket:These M3x5 cylinder head screws with hexagon socket (DIN 7984) arrest the motor.
- cover:This 3D prnted part has solely aesthetic purposes and covers the motor compartment.
- 3 ml syringe:This is a BD 3ml syringe with Luer-Lok, although all similarily sized syringes should work. This serves as a container for the bioink.
- hooks:These 3D printed hooks can be used to hang the pump to the side of your printer.
print head
dish retainer
assembly
syringe pump
print head
dish retainer
developement and construction
Proof of concept
Demonstrate
Discussion
References
- ↑ https://hackaday.io/project/14501-biotink-the-bioprinter-of-tomorrow
- ↑ http://www.instructables.com/id/3D-Printed-Syringe-Pump-Rack/


