Contents
Introduction
Do you need an organ for transplantation? Print one. You’d like to test pharmaceutical drugs not on animals, but directly on an organ? Print one. You need a biological system with a certain size and function? Print one. This might sound like the year 2100, and you are right, at the moment, 3D printing cell tissue is not an easy endeavor. At the moment cells have to be printed with the help of scaffolds that support the cells until they grow and attach to each other. This process takes several days, it is difficult to maintain a complex geometry, and removing the scaffolds without destroying the tissue is still a major problem. So we just went ahead and solved all problems. Our synthetic biology department developed a possibility to 3D print cells almost as you would with plastic. You practically just get them near each other and they connect all by themselves in no time. The exact explanation of that can be found in our wiki.
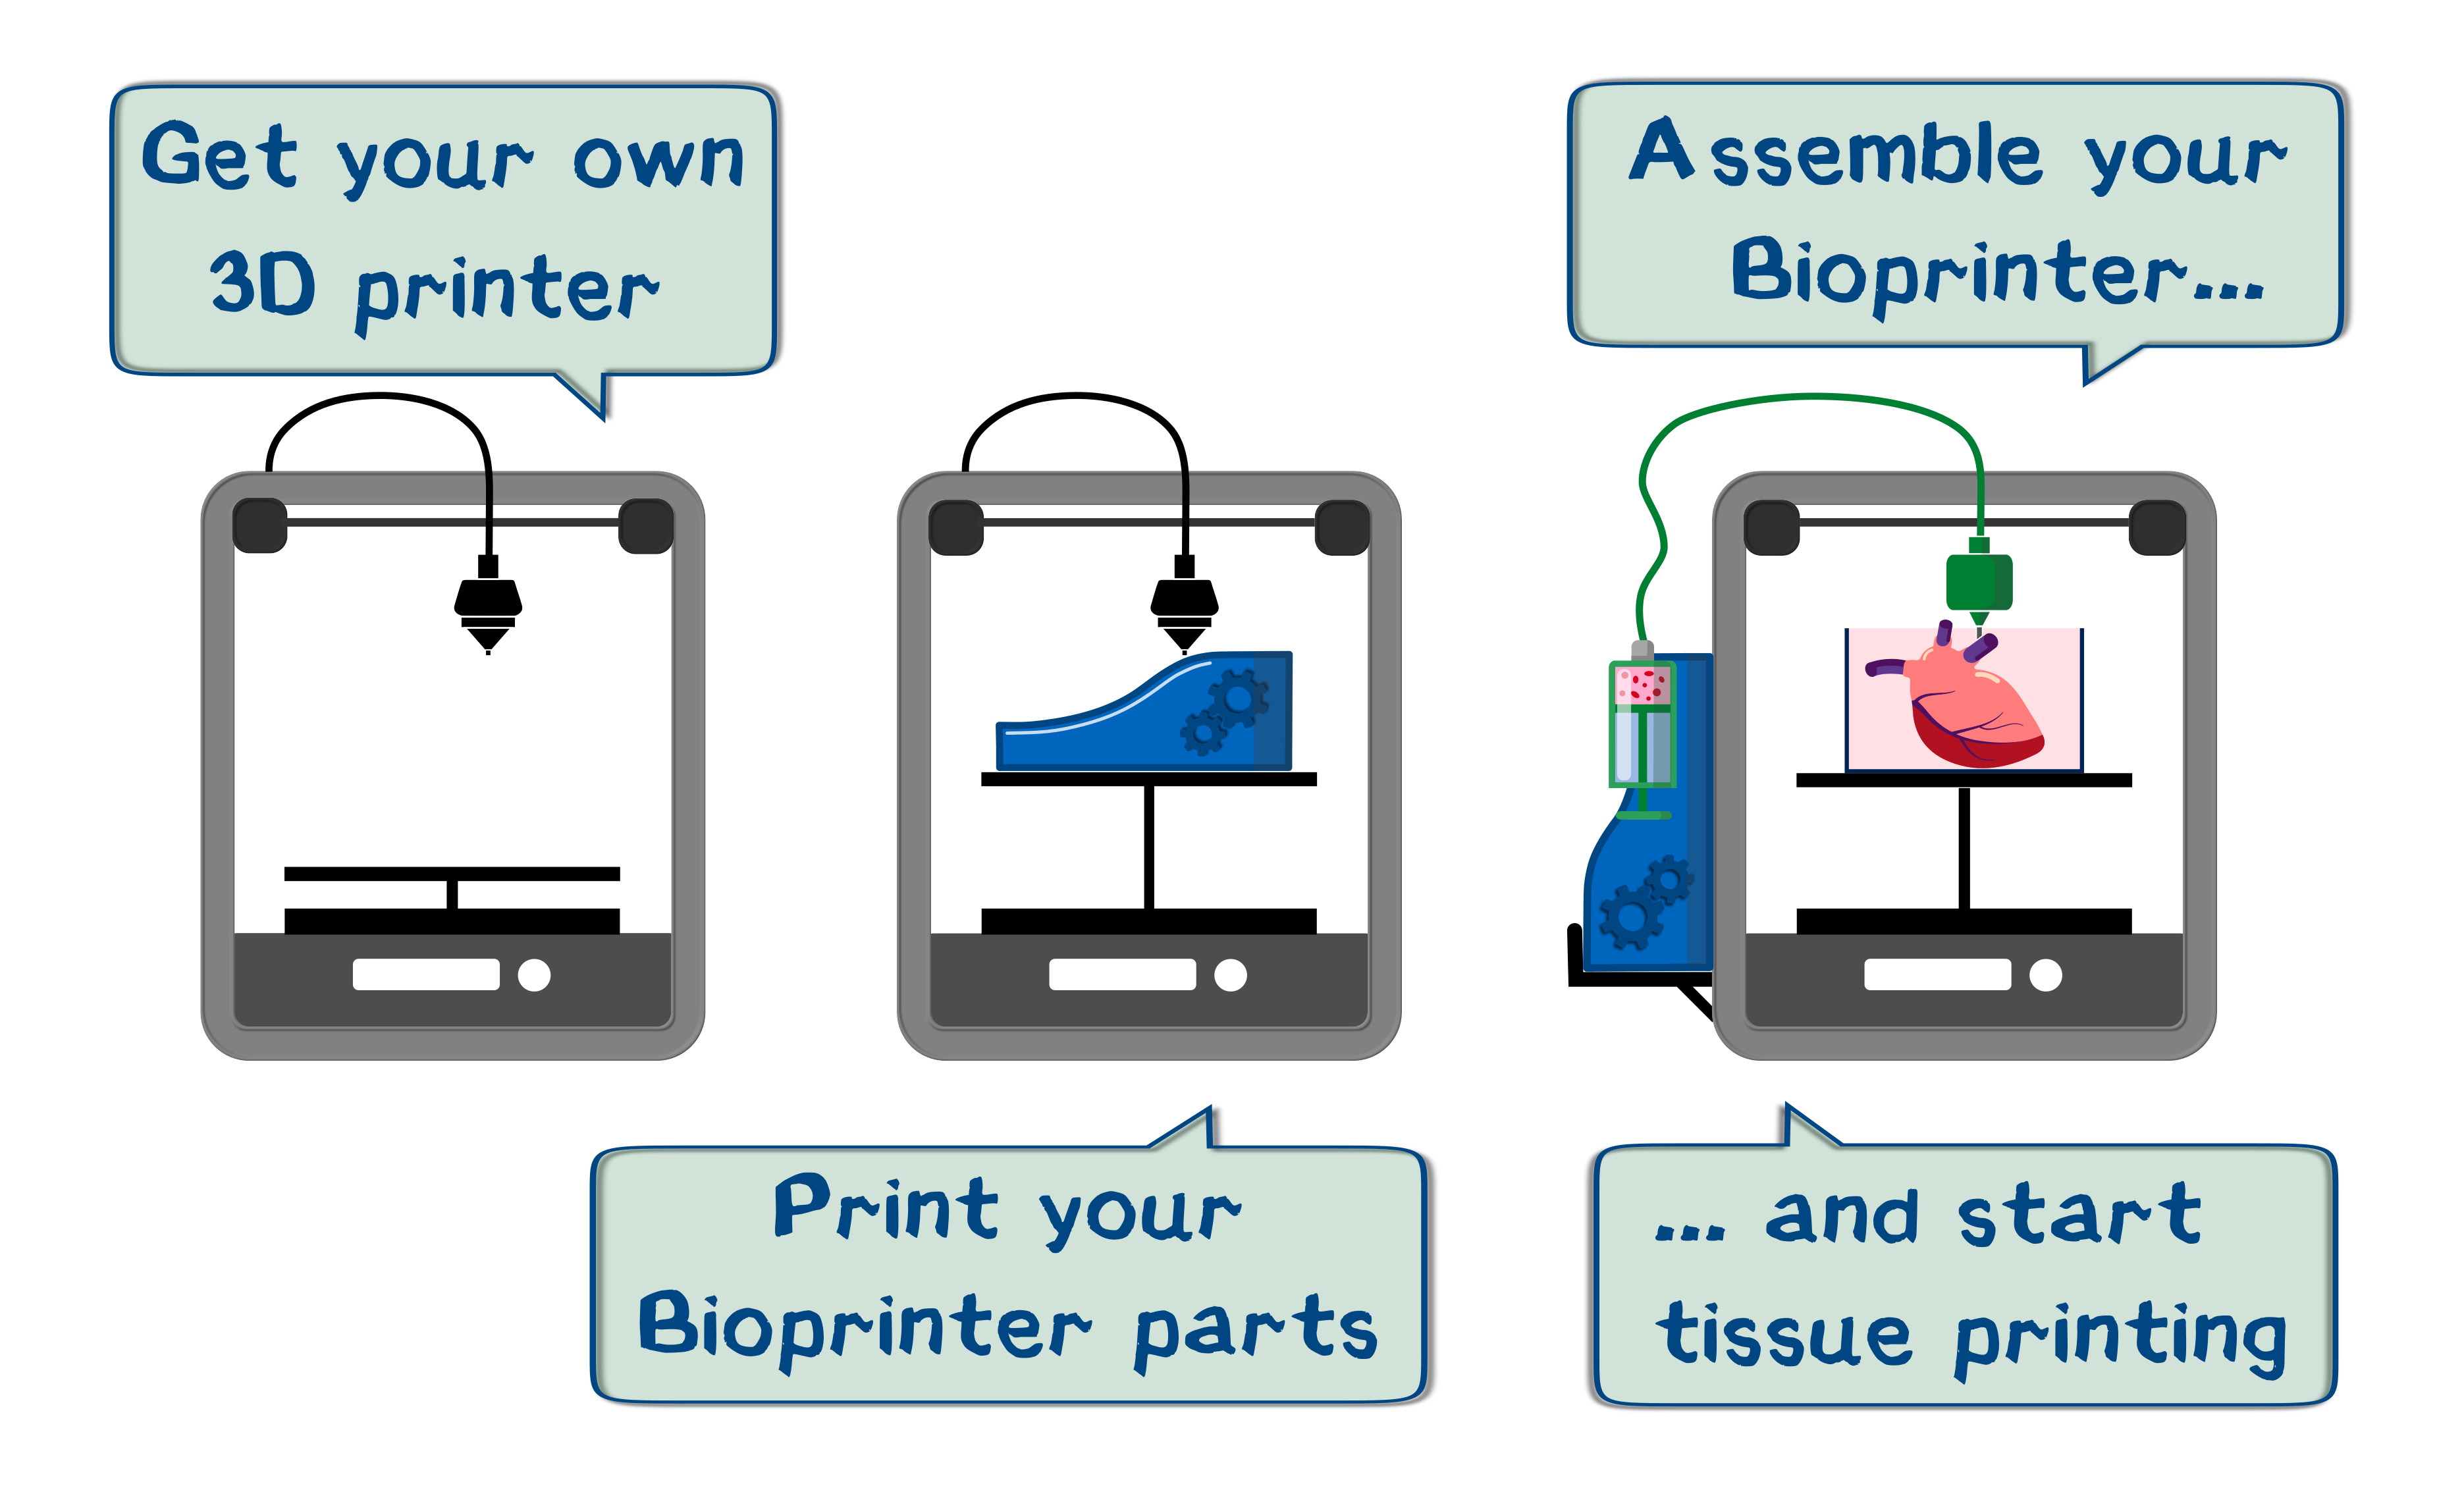
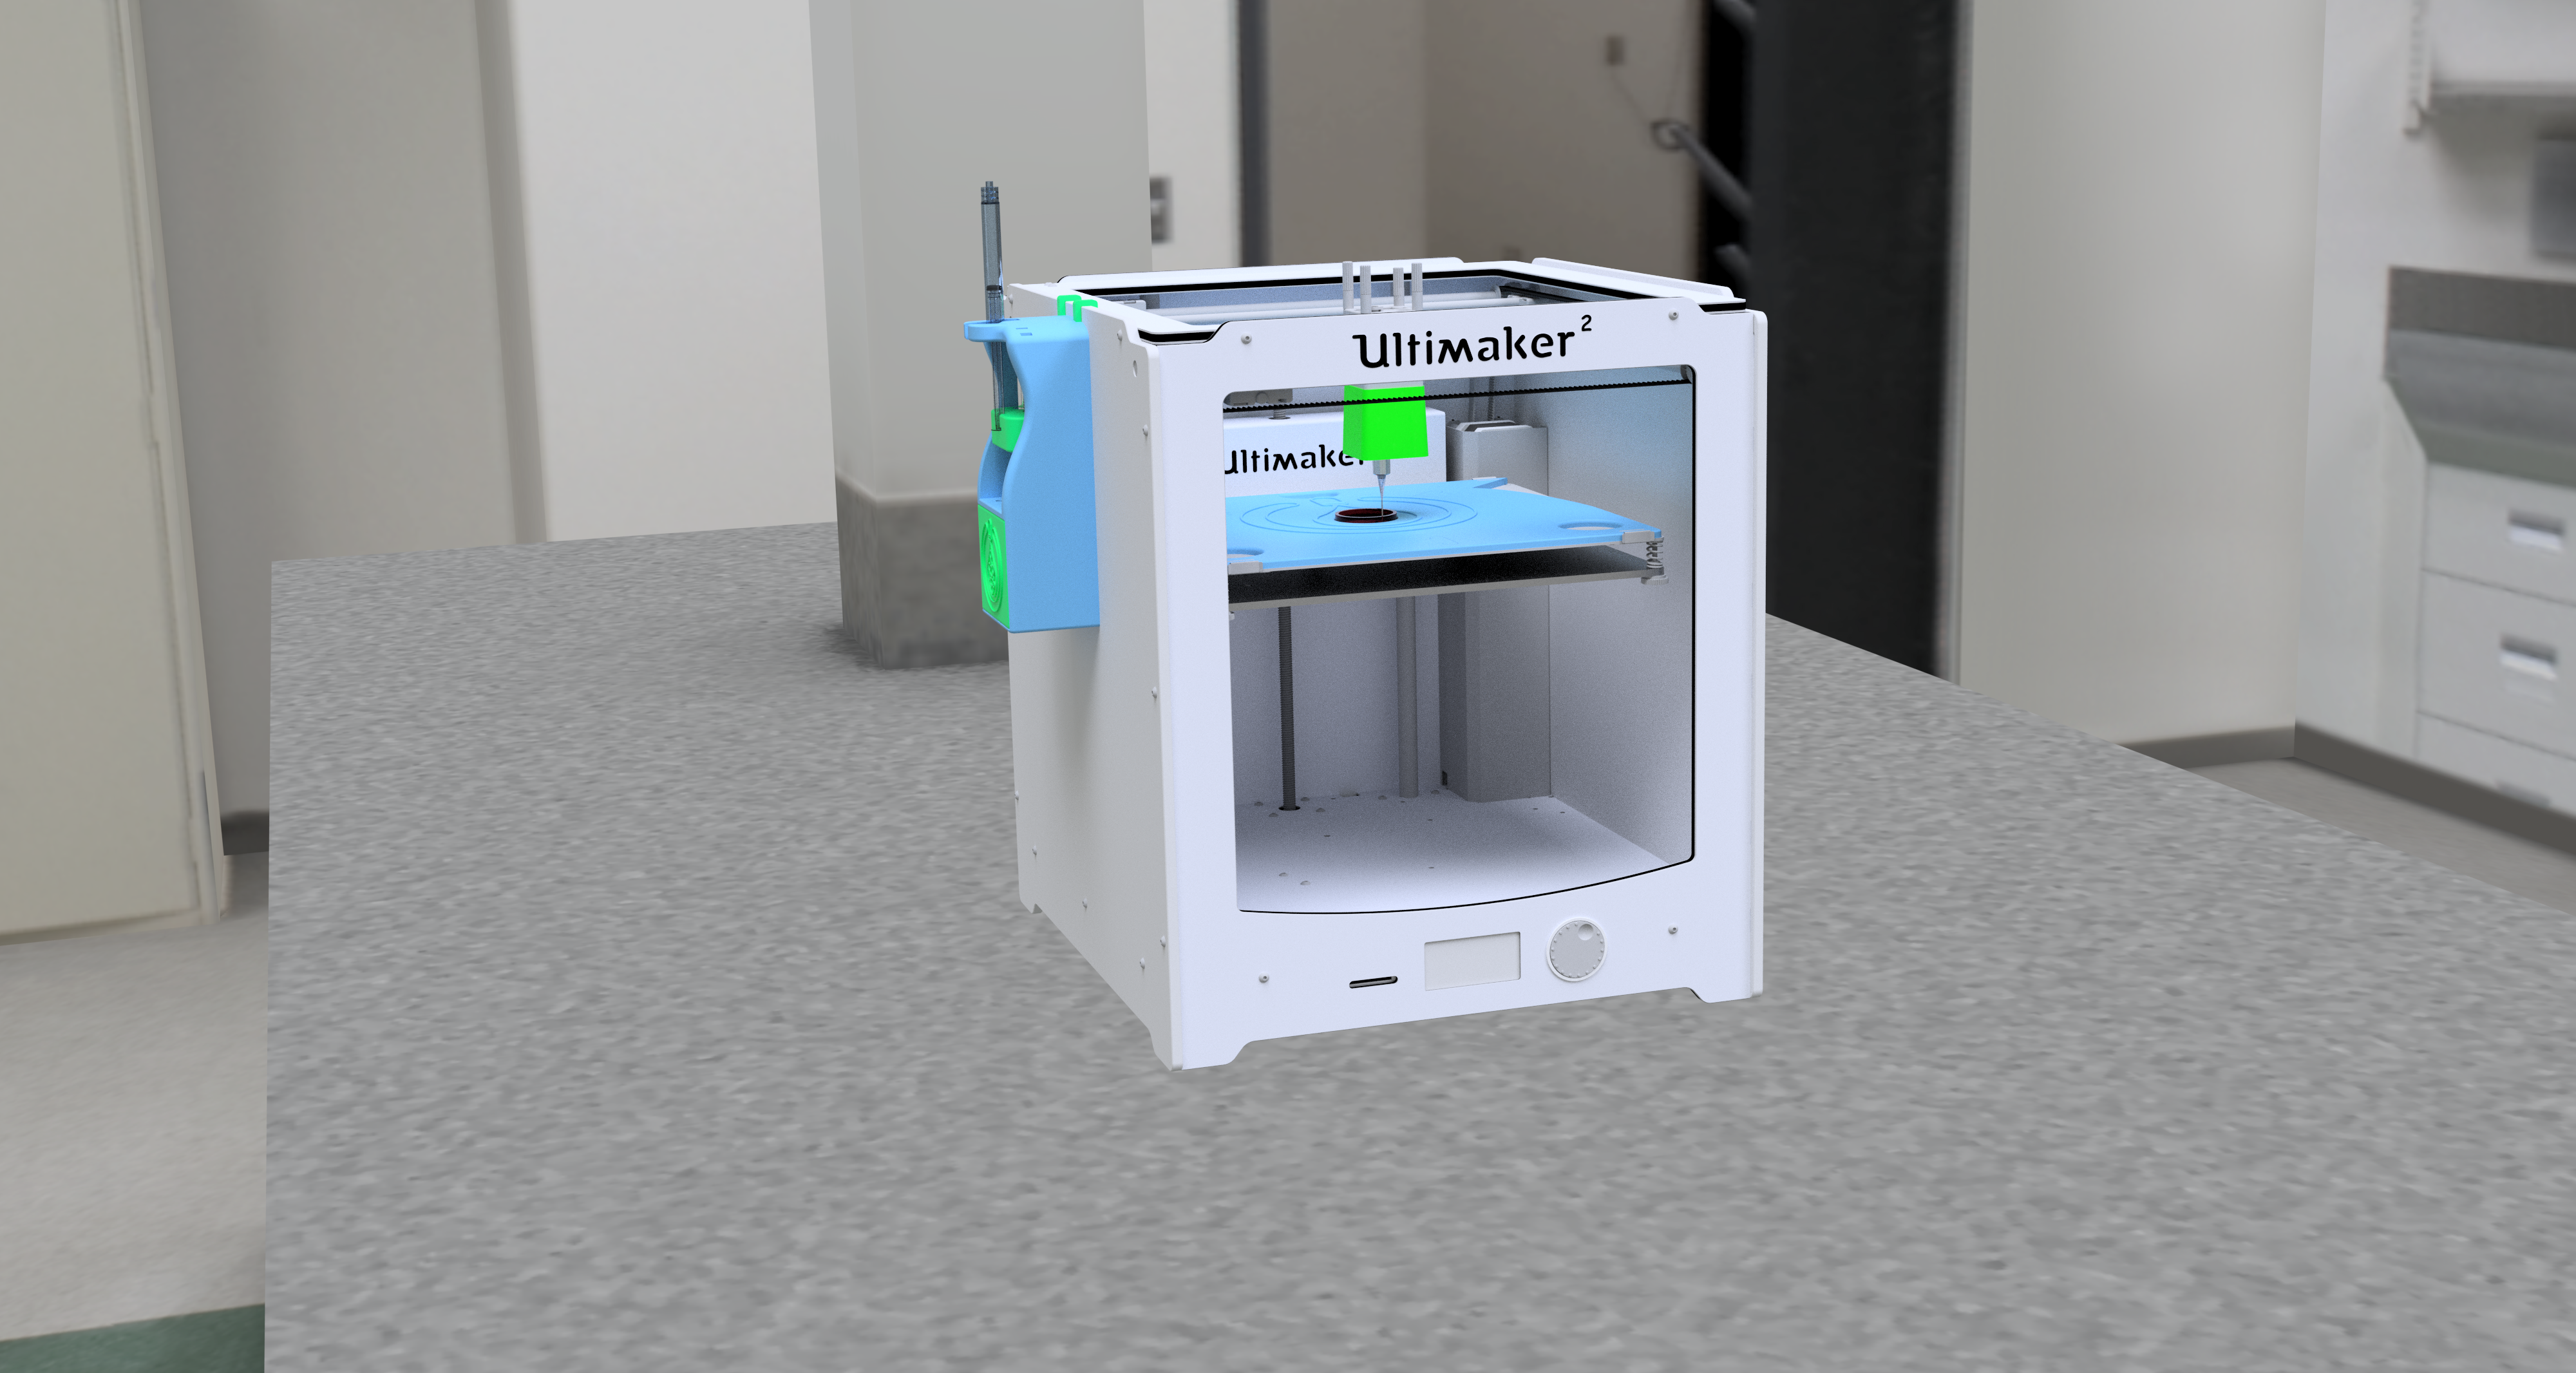
Since the cells come in a fluid called bioink, we had to find a way to precisely print liquids. That was not our only aspiration. We wanted an affordable, open source product that is easy to use for everyone. We immediately thought about using a commercial syringe pump, but that absolutely did not come to terms with affordability, because prices for equipment like this usually start from around a thousand dollars. Not only that, also the communication between the printer and pump would be hard to achieve with a commercial product. Since we would need a CNC printing system anyway, we decided that it would be best if the printer just printed its own extension pack. Developing a whole new FDM printer and optimizing the printing process would have been a task for a much larger engineering team. That is why we decided to go for an Ultimaker 2 plus and modify it. It is one of the most precise printers in its price segment and also easily customizable. Additionally, many tech-savvy people own that model.
This way, our syringe pump can be easily spread on open source platforms to get user feedback and maybe it even push research in the bioprinting segment to a new level. Unfortunately, a 3D printer cannot be expected to work in tolerances as small as in steel constructions, so some parts (like threaded spindles) have to be bought. We found a similar project of an open source syringe pump, which we would like to give credit to here[1], for we reverse engineered that design and constructed our own, improved version. After lots and lots of construction and prototyping, we proudly present to you a precisely functioning liquid printer that could not be easier to set up and use. Currently, our friends at TU Darmstadt are testing our device and so do a lot of users on open source platforms, and so can you. How you get from printing plastic to printing cells will be explained step by step in the following manual and description.
Basic principle
The basic function of our printer is easy to understand: A syringe filled with bioink is placed in the syringe pump, which then precisely moves the plunger. The thereby displaced cells are pushed through a capillary into a cannula that is mounted on the print head. By using the printer's electromechanics, the printing motion is achieved. The Ultimaker already has an opportunity to install a second extruder motor, which is usually responsible for conveying the plastic filament to the hot end printing nozzle. By using that second output, the printer is able to communicate with our syringe pump by making minor changes to the firmware, which can be downloaded and easily installed. This is explained in the software tab. This way, you can use Cura, which is a software to convert 3D models into the printer's language (the so called G-code), to tell the printer to print any geometry made of bioink directly into an ibidi slide. This dish is held in place by a retainer that replaces the glass on the Ultimaker's build plate.
Component description
In the following paragraphs the basic function and interaction of the single components will be explained.
Syringe pump
The syringe pump is the main part of our printer extension. Its purpose is to deliver a precise and constant volume flow of liquid according to the printer's information.
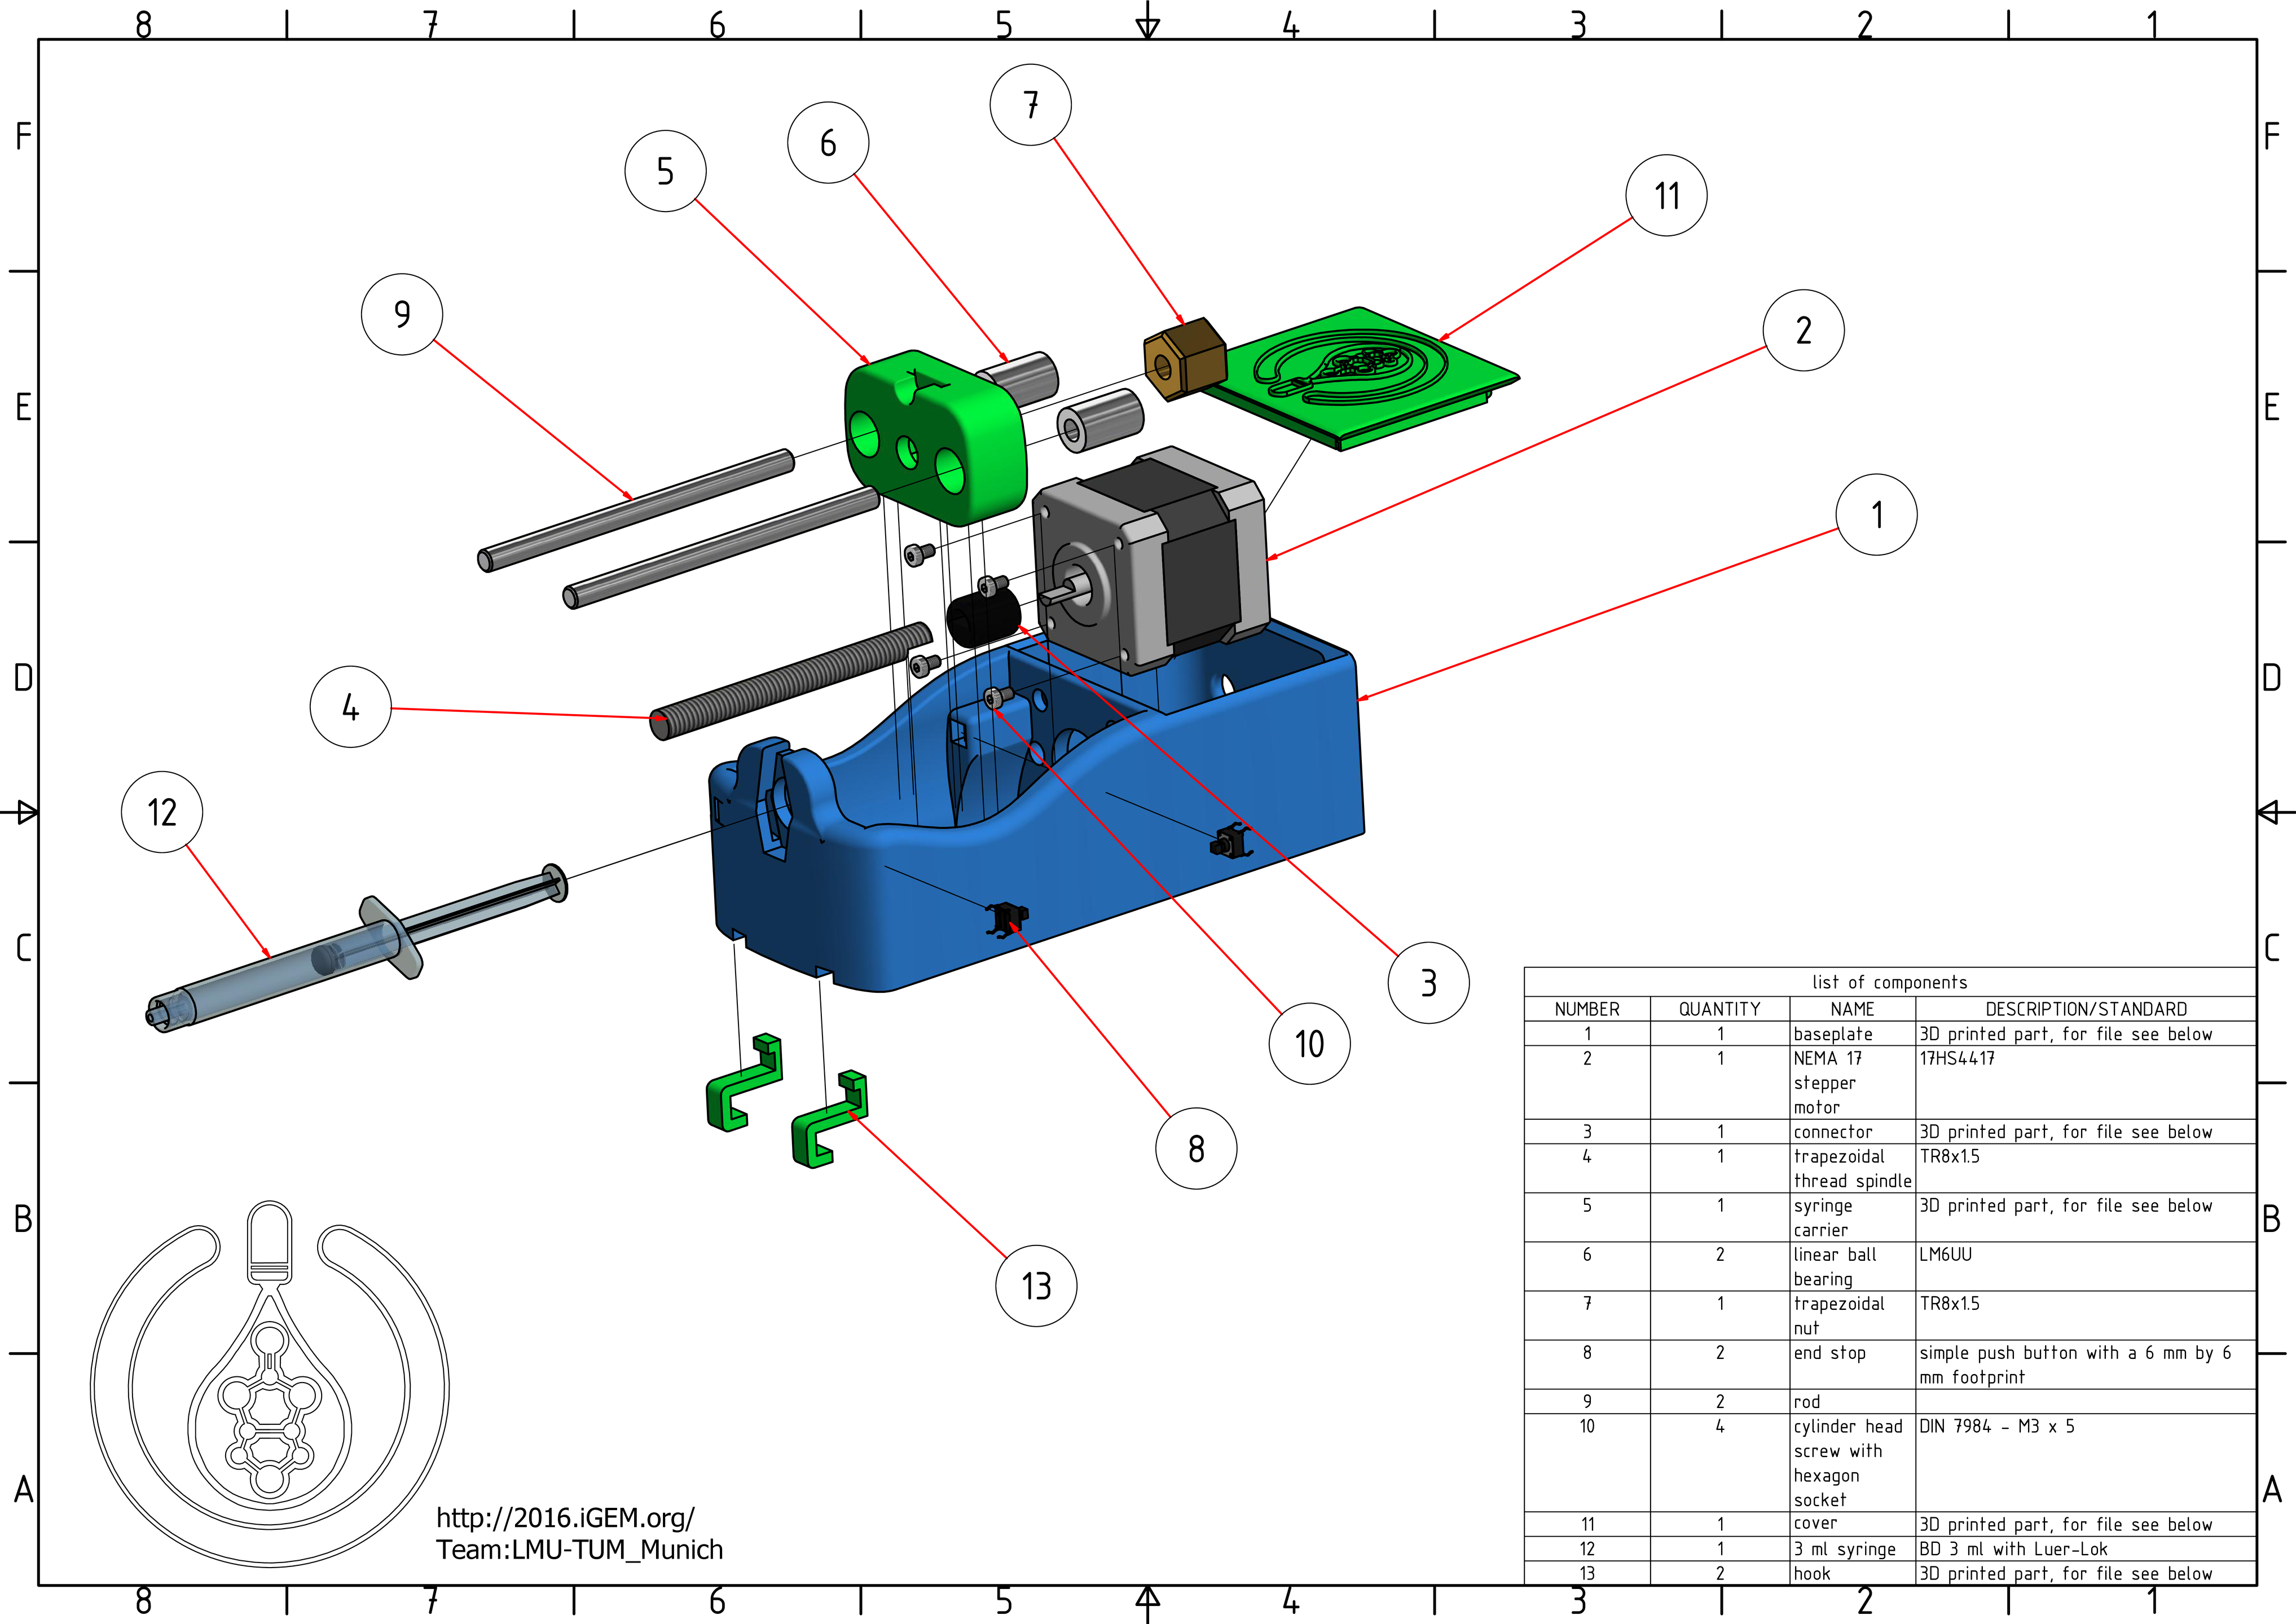
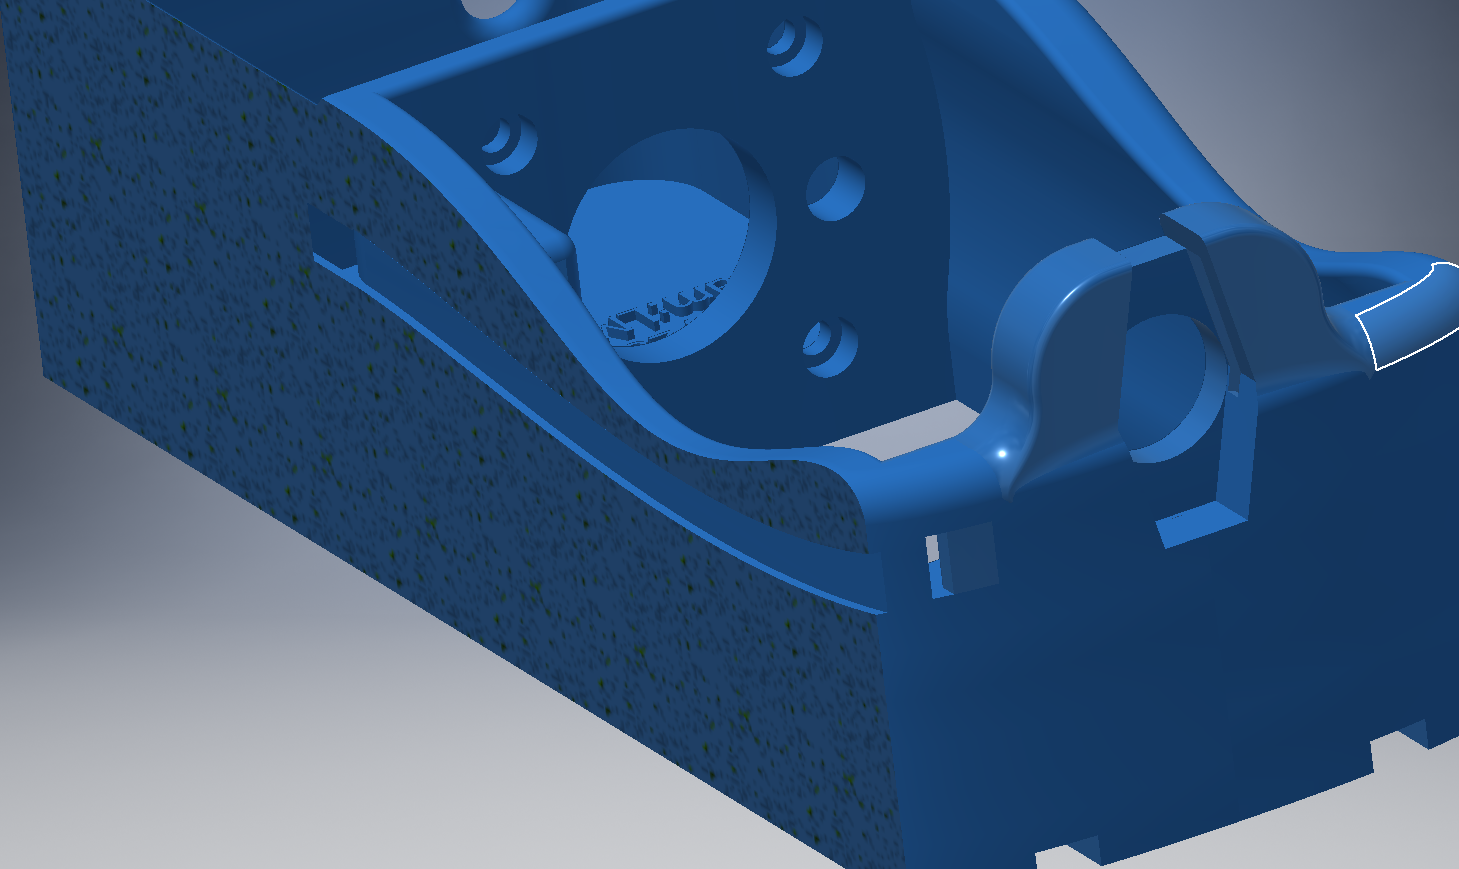
- baseplate: The Baseplate is the main part of the syringe pump. This 3D printed part is designed to retain all the other components and withstand the mechanical loads. The syringe is to be mounted with the help of a bayonet system that lets you lock it with a simple 35° turn.
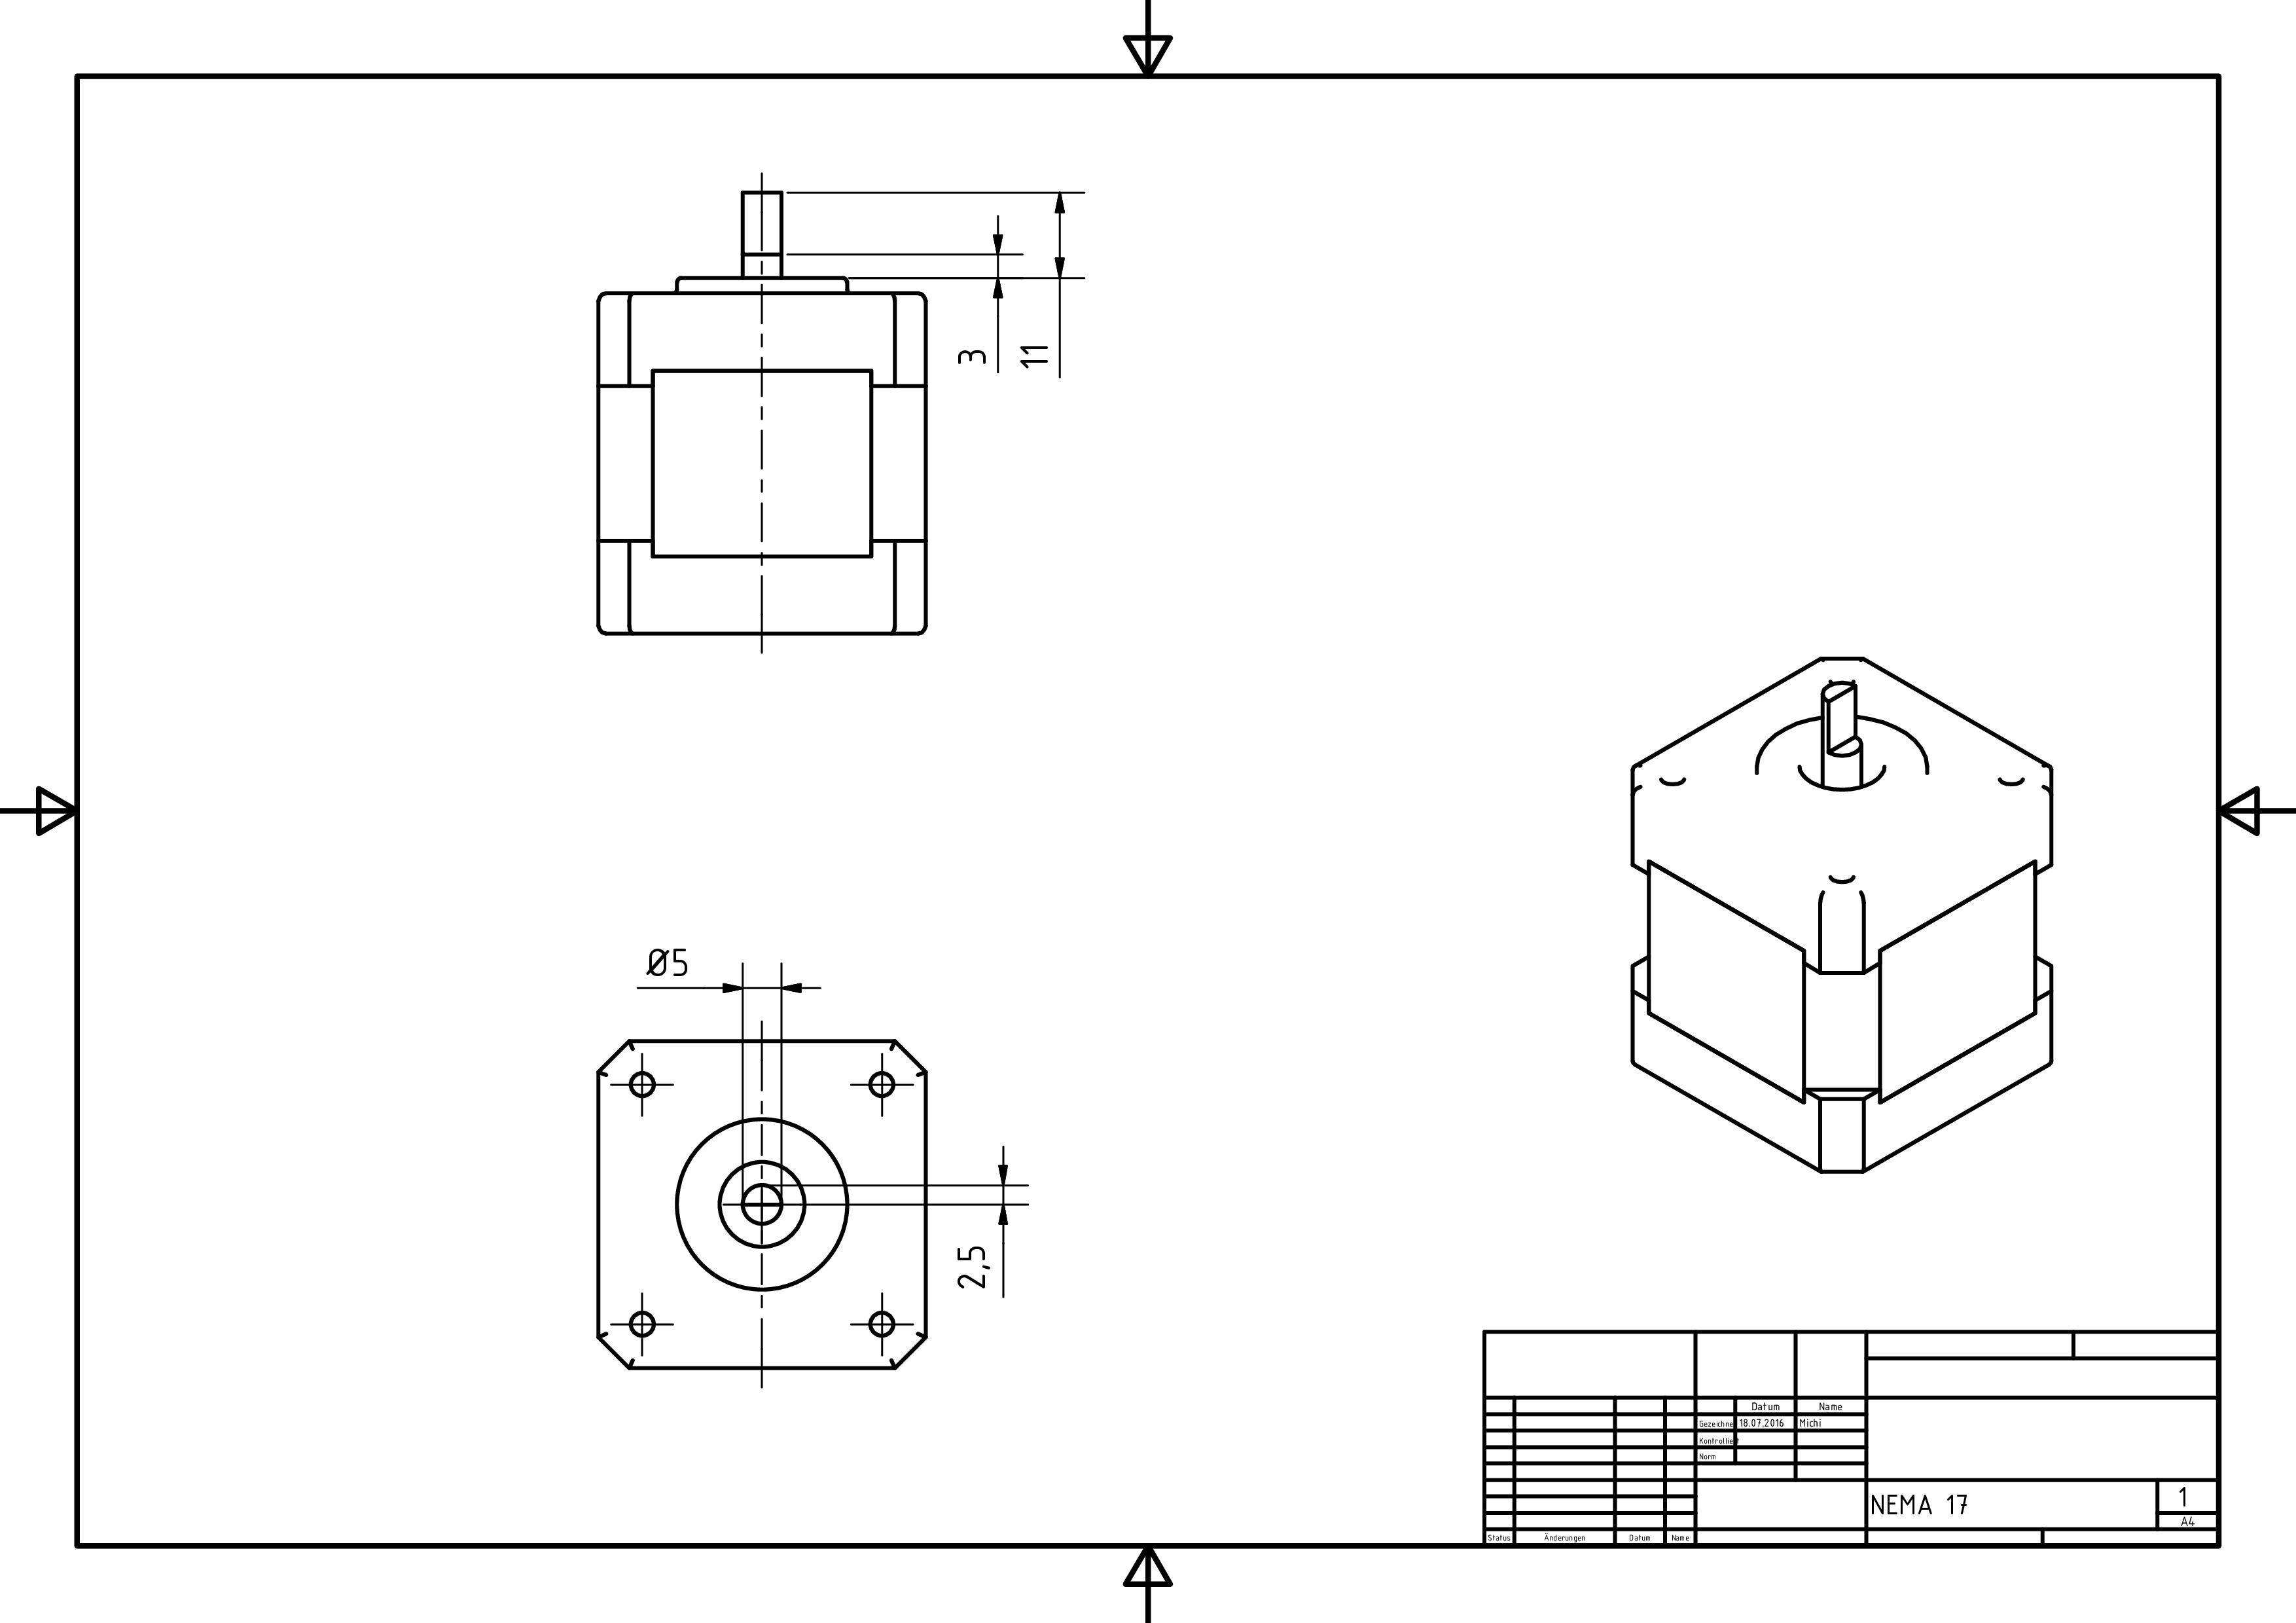
- stepper motor: The stepper motor supplies the torque needed to move the syringe. The difference to the DC motor, which is the best known kind of electrical motor, is that the configuration of the coils inside divides the motor's rotation into steps. Most motor controllers are capable of microstepping, i.e. the motor only moves a fraction of a step at a time. Commonly used is one sixtienth of a step. Since our stepper motor is divided into 200 steps, and we use one sixtienth microstepping, it allows us to move the motor as precisely as 0.1125° while providing a smooth running behavior, which is crucial for our print result.
- connector: The connector's job is the force transmission from the motor to the spindle. It is 3D printed.
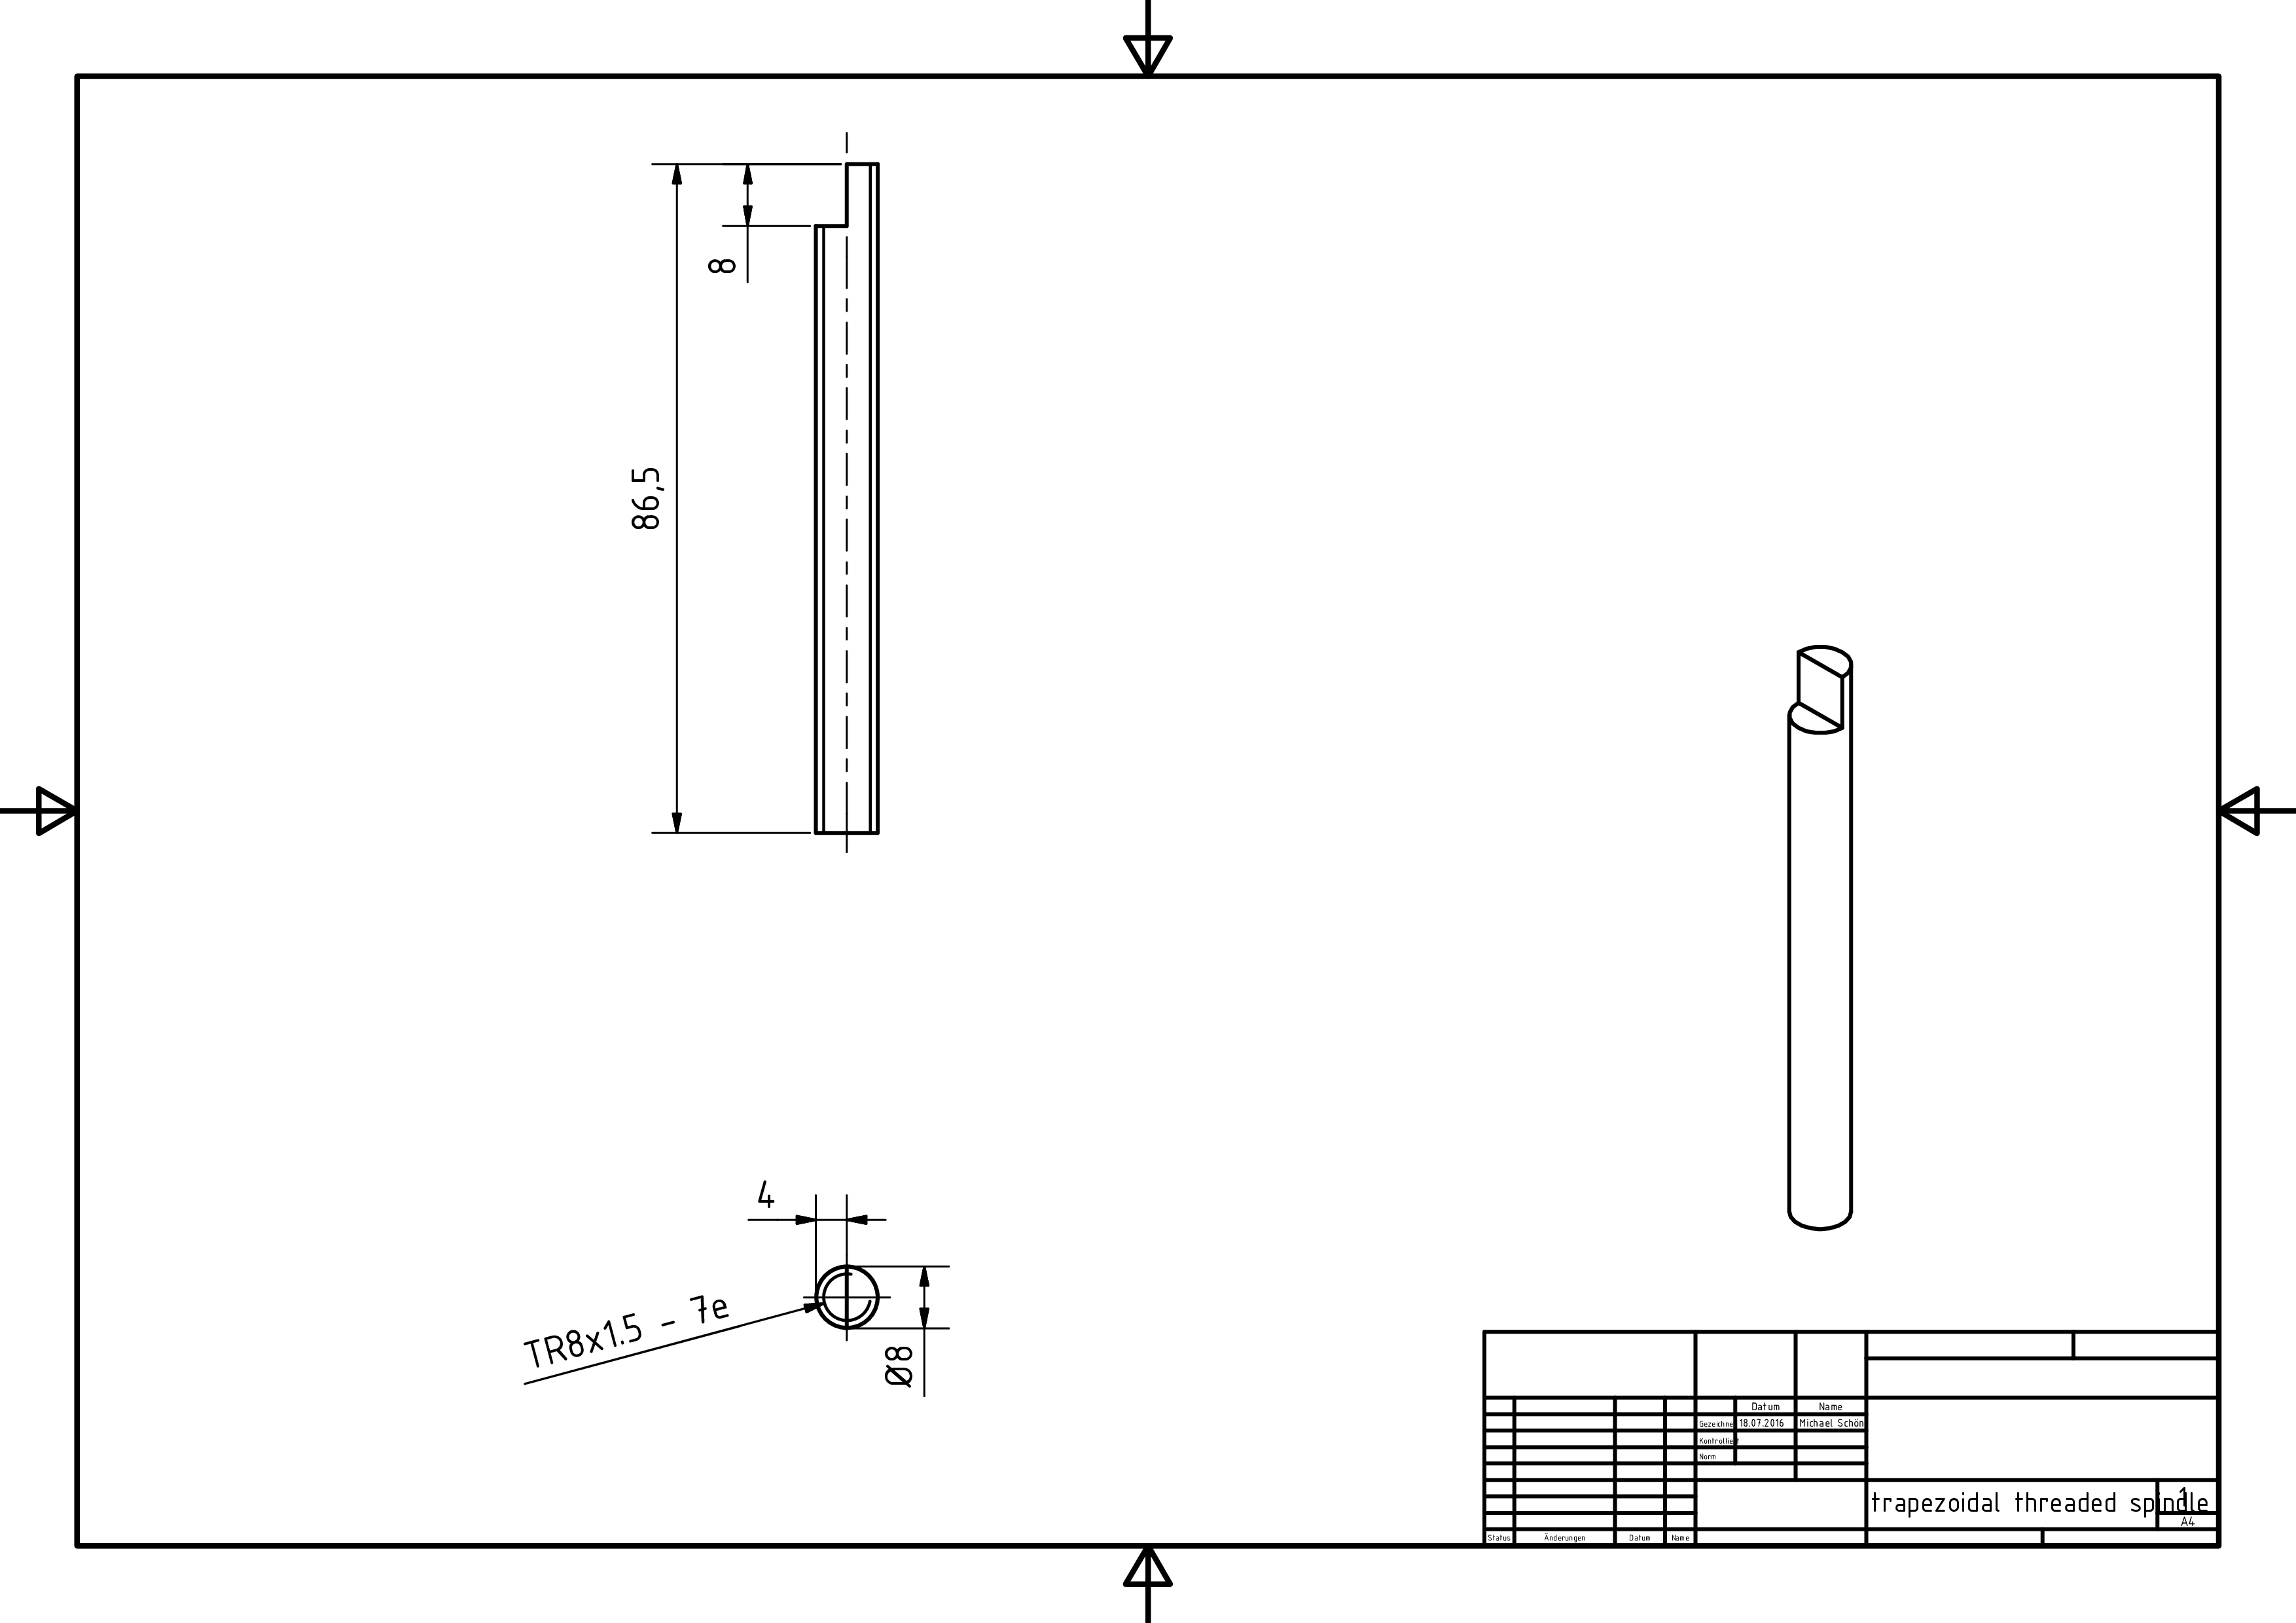
- trapezoidal threaded spindle: With the help of the spindle, the rotation of the motor is converted to a translational movement. The standardized designation 'TR8x1.5' contains the diameter of the spindle (8mm) and its lead (1.5mm). A lead of 1.5 mm means that the spindle converts a rotation of 360° to 1.5 mm of translation. We used the smallest lead we could find, for it determines the accuracy of the pump even further. With the current setup, the syringe plunger would move 468 nm per microstep, which is the wavelength of blue light. At this point, the limitation for our precision becomes the manufacturing accuracy of the mechanical parts.
- syringe carrier: The syringe carrier is a 3D printed part, with an indentaion that holds the back of the syringe's plunger and makes it possible to move it bidirectionally. That makes it possible to empty or fill the syringe.
- linear ball bearings: The linear ball bearings are glued into holes in the syringe carrier. Thanks to the steel balls inside, they make sure that the syringe carrier does not cant and moves with the least friction possible.
- trapezoidal nut: This is the counterpart of the trapezoidal threaded spindle. Usually, for motor applications ball screws that work in the same manner as ball bearings are used. Because of the small speeds needed while operating the printer, we could use a simple trapezoidal nut that is cheaper and smaller.
- end stops: Because of the gear reduction the spindle provides, the small motor can cause enormous forces. To prevent the syringe pump from destroying itself when hitting its walls we build in end stops, which are switches that tell the software when the syringe carrier has reached its end position. The motor is then only permitted to move in the other direction. Usually, there are special end stops with a mechanical appliance that keeps them safe when hit by a moving component. Again, due to the low speeds we were able to use simple push buttons that saved us money and space.
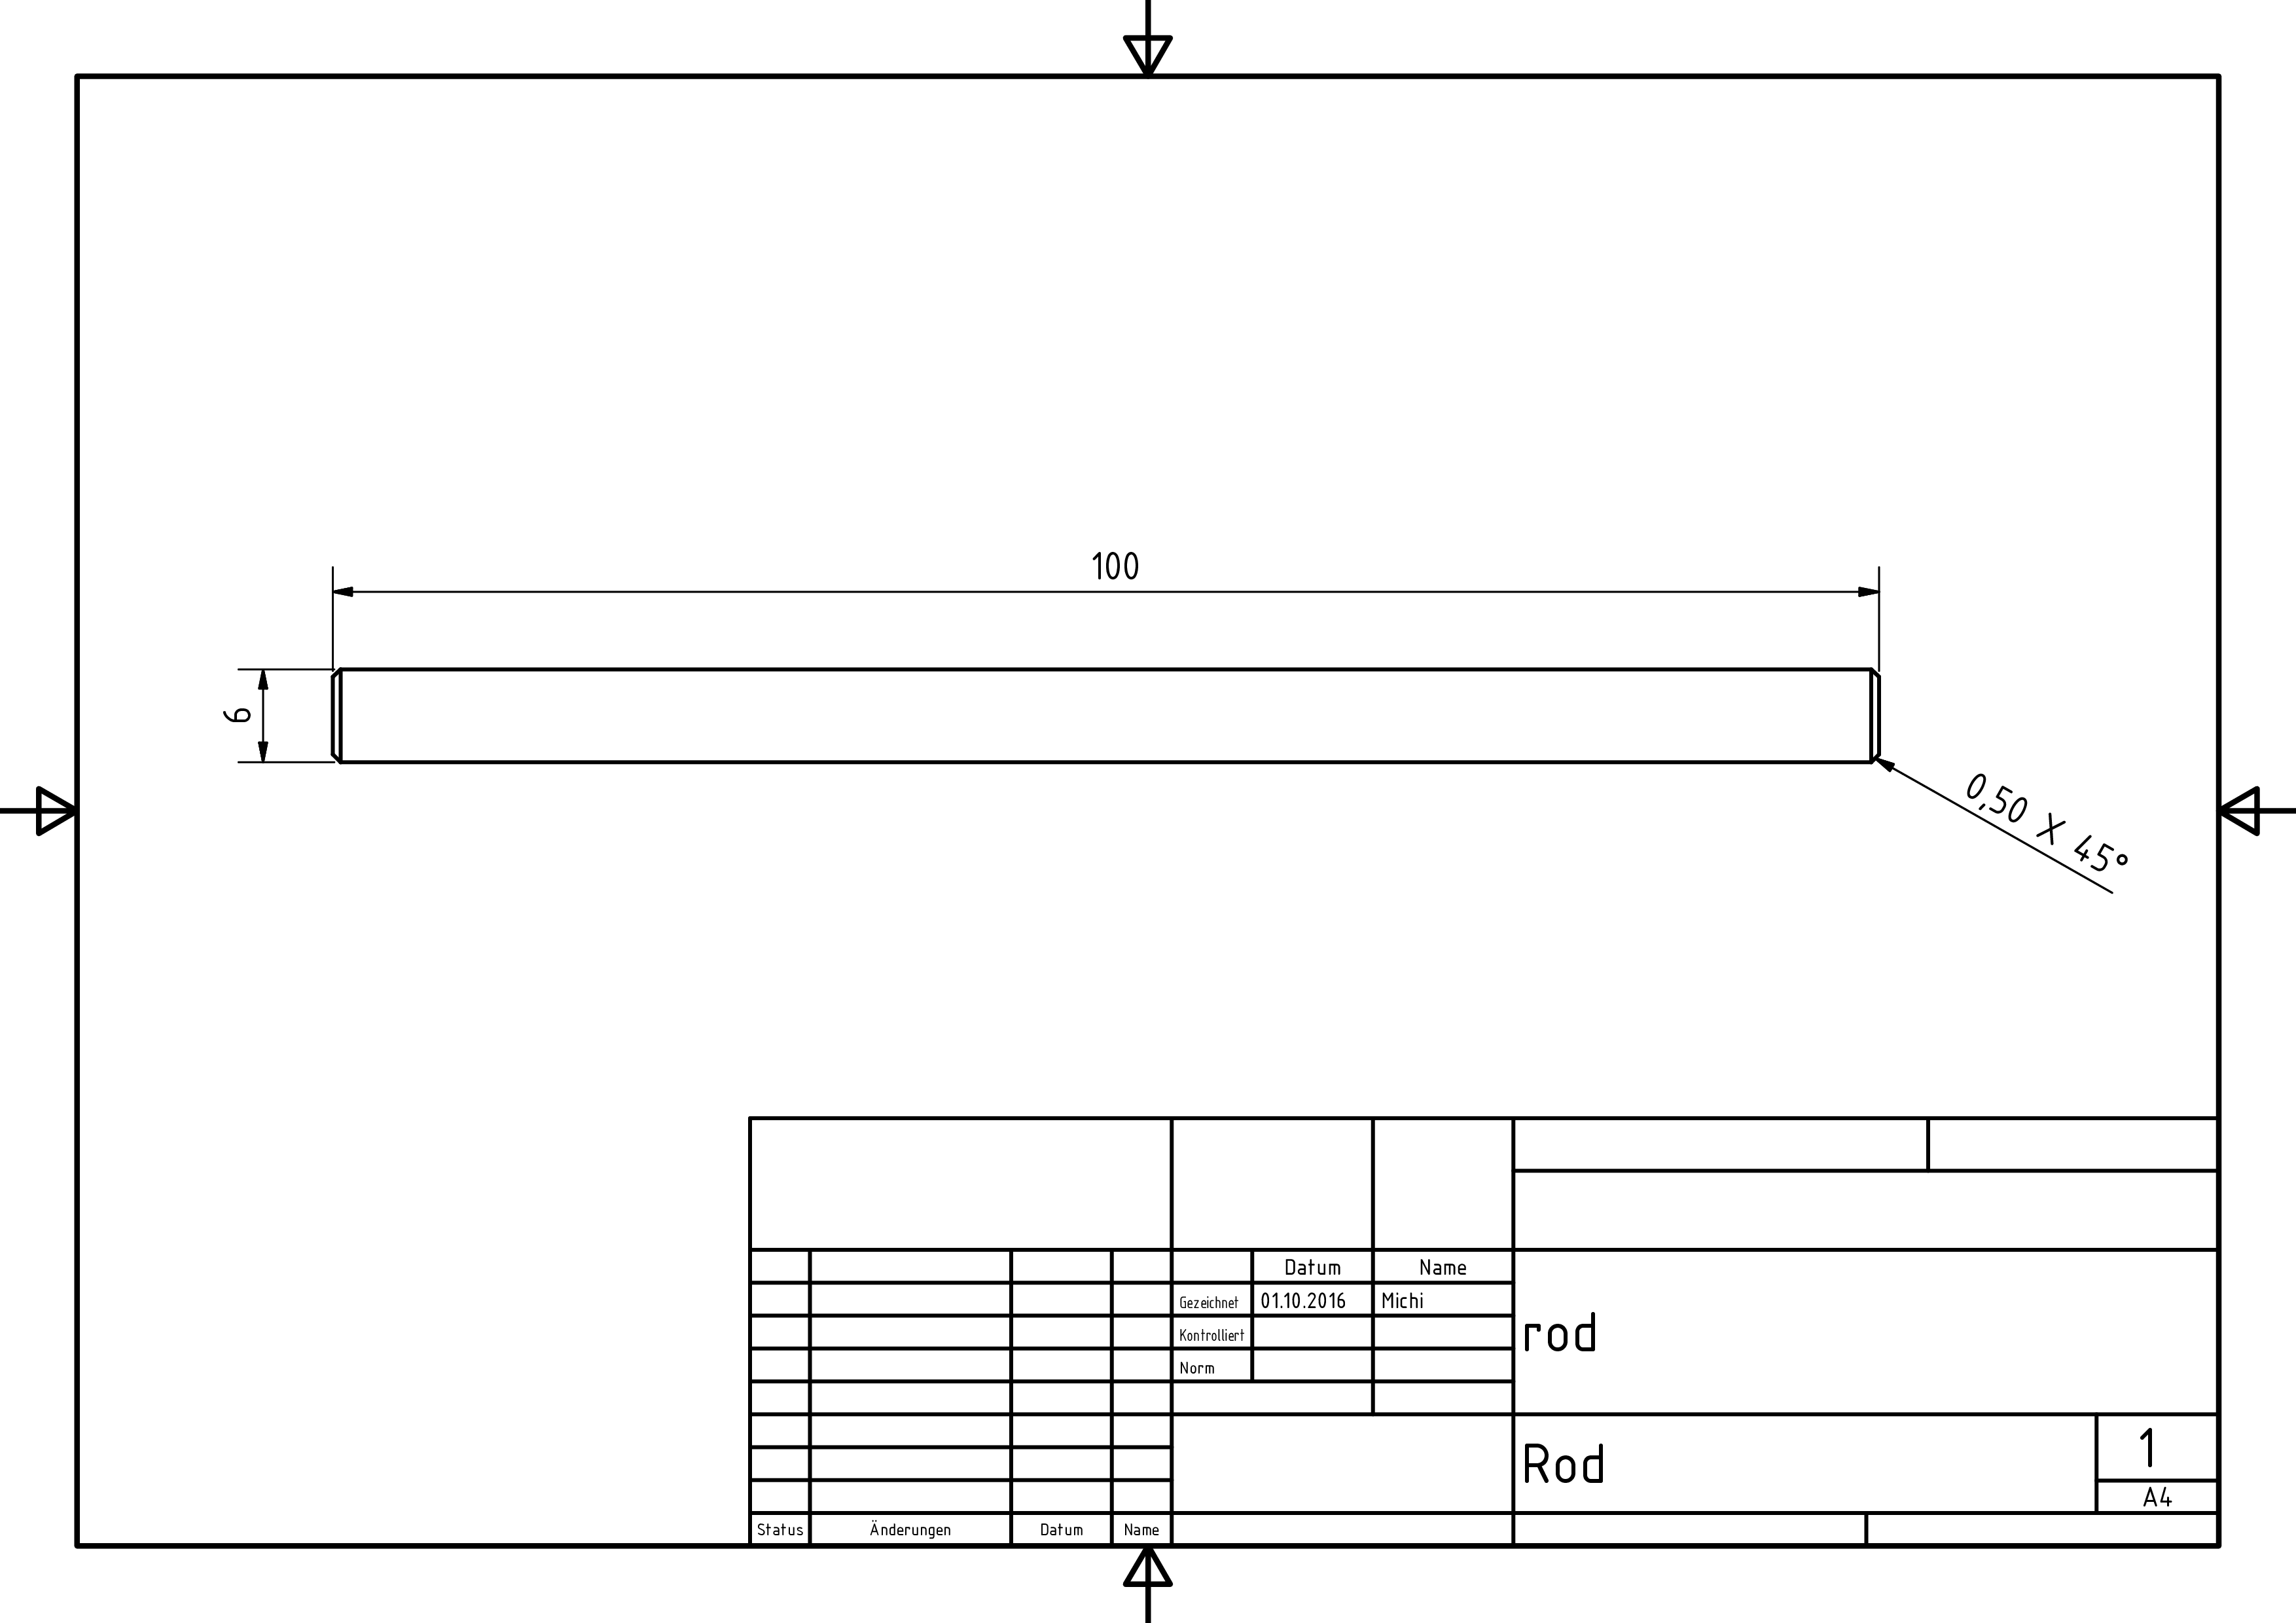
- rods: Steel rods with good surface quality where the ball bearings can glide on and minimize friction.
- cylinder head screws with hexagon socket:These M3x5 cylinder head screws with hexagon socket (DIN ISO 7984) arrest the motor.
- cover: This 3D printed part is solely for aesthetic purposes and covers the motor compartment.
- 3 ml syringe:This is a BD 3ml syringe with Luer-Lok, although all similarily sized syringes should work. This serves as a container for the bioink.
- hooks: These 3D printed hooks can be used to hang the pump to the side of your printer.
Print head
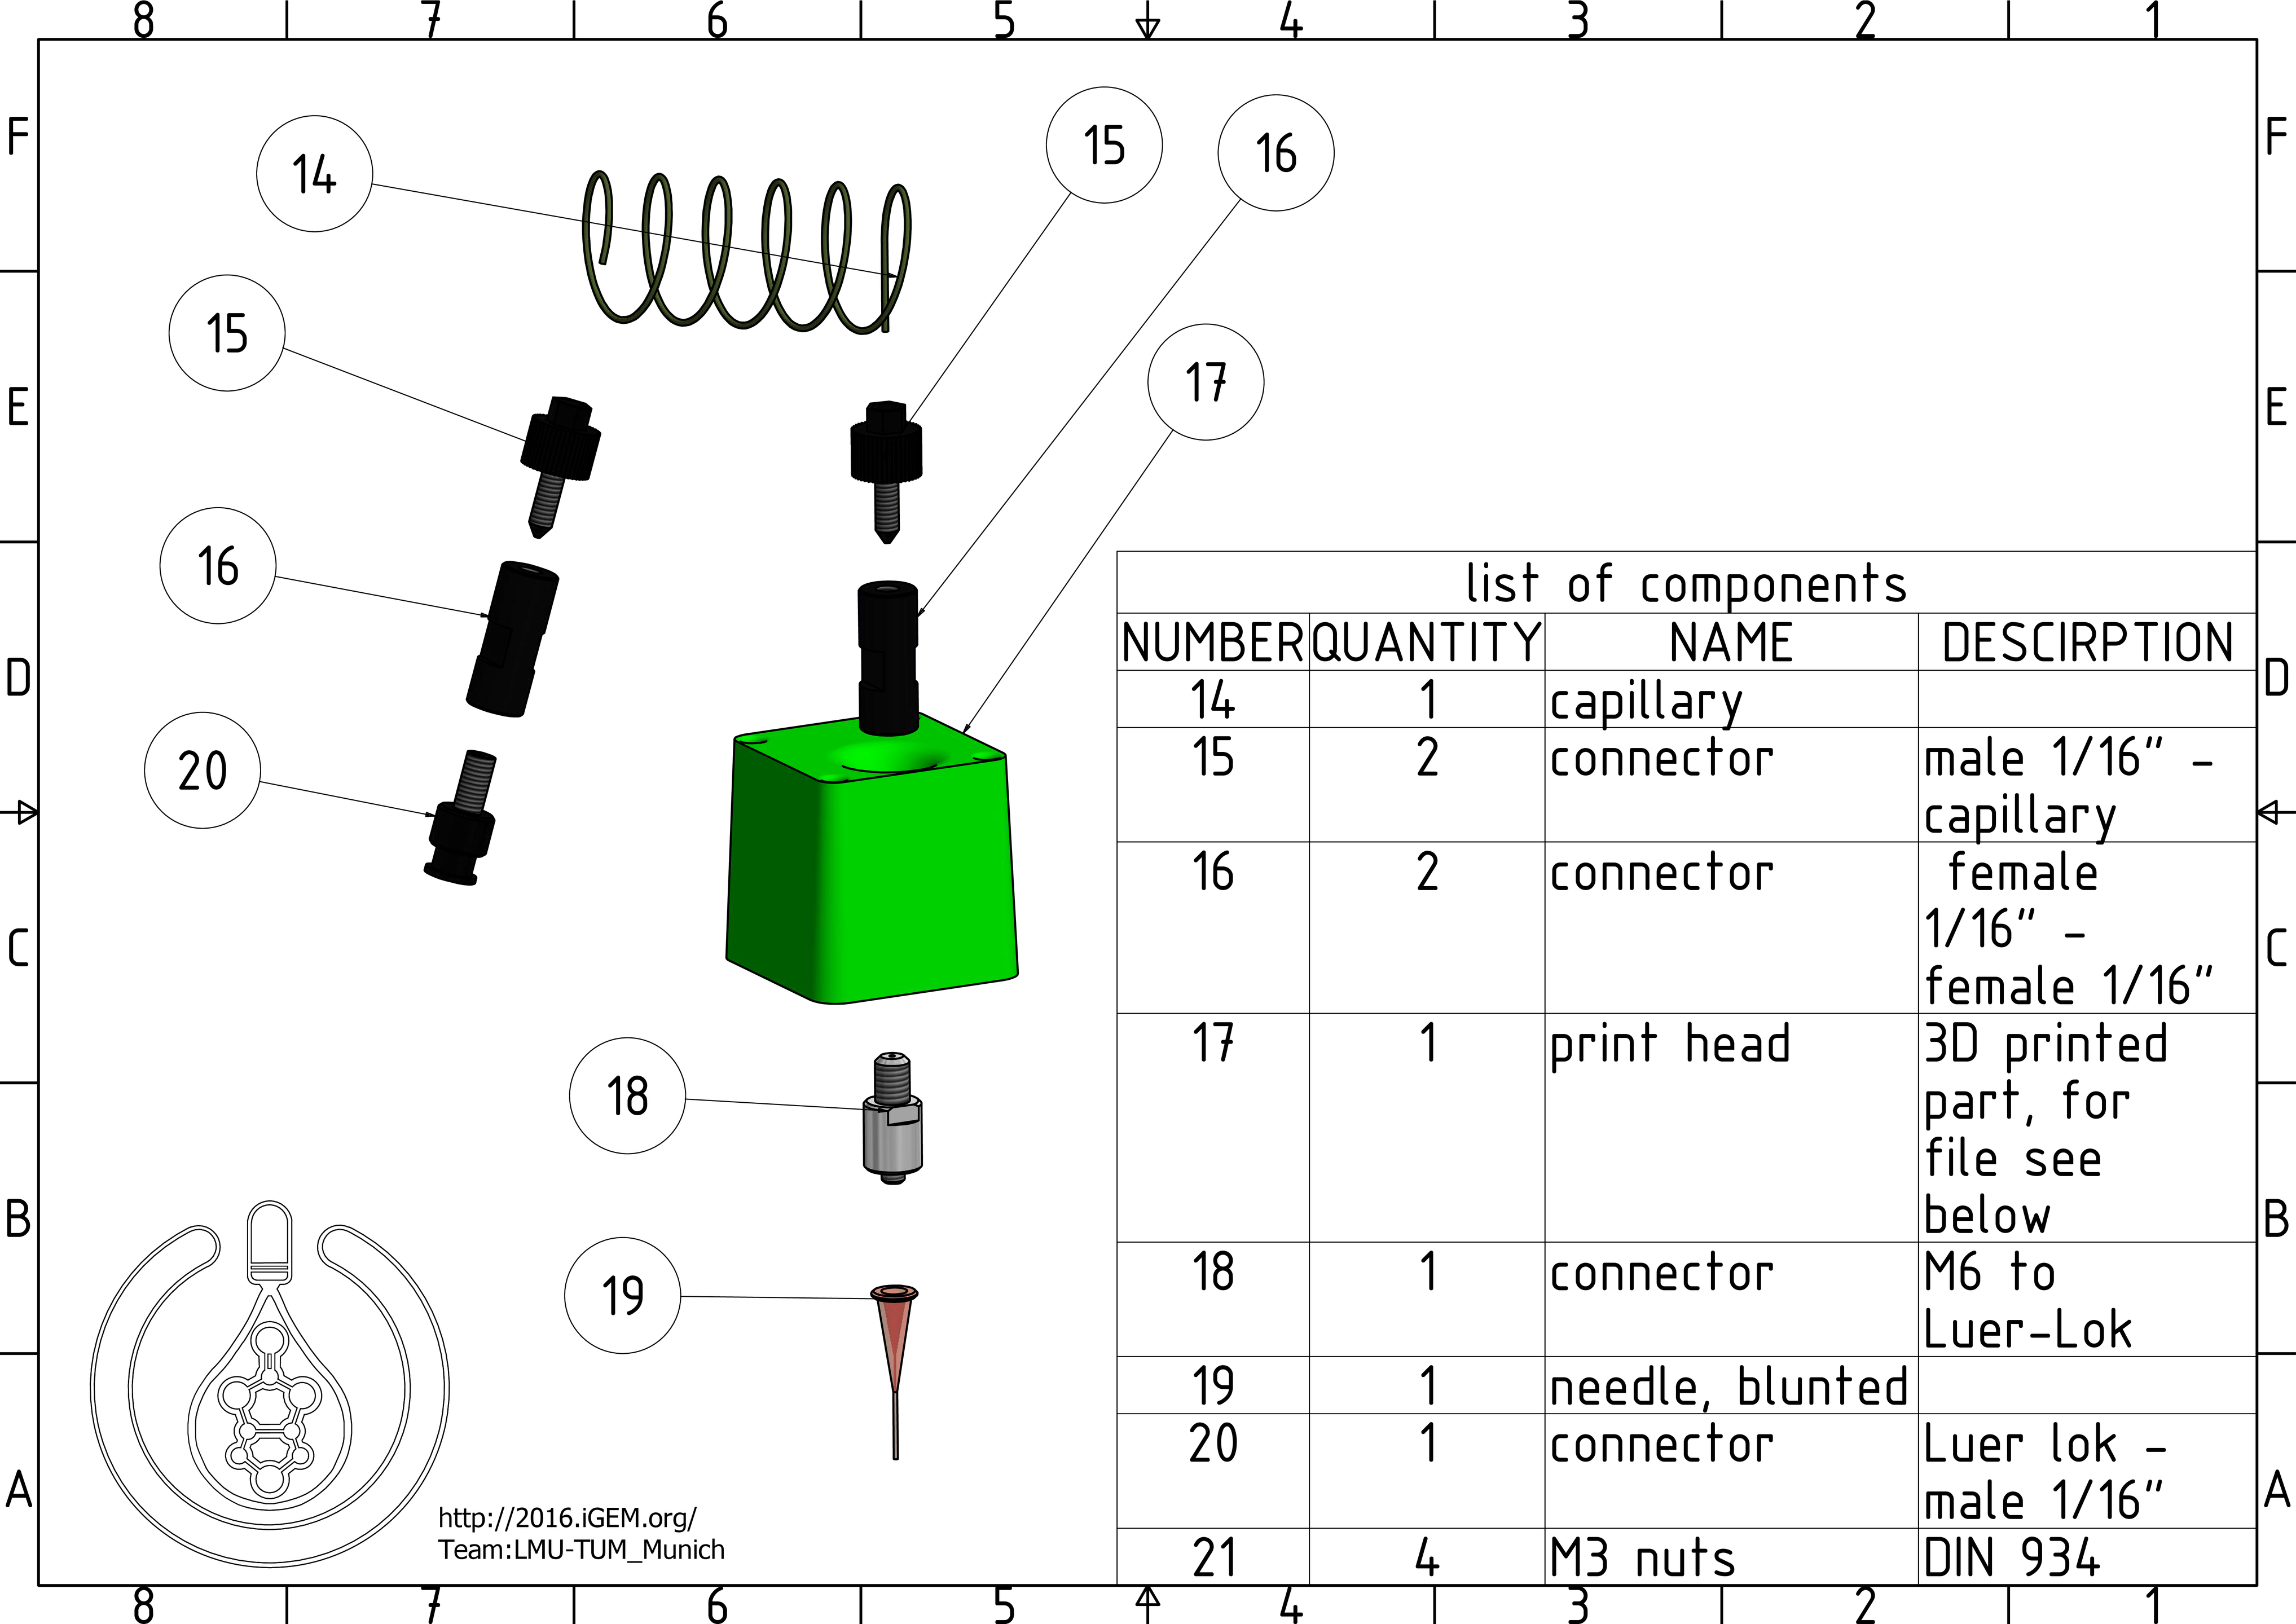
14. capillary: A capillary with a very fine inner diameter to prevent big amounts of dead volume.
15. and 16. connectors: Connectors and adapters that are used to put together the cannula and capillary.
17. print head: A 3D printed part that replaces the printer's original head and holds the cannula.
18. connector
19. needle, blunted: The cannula places the bioink in the dish. It is possible to connect a lot of different diameters for different requirements.
20. connector
21. M3 nuts: M3 nuts (DIN ISO 934) that are used to secure the print head to the printer.
Dish retainer
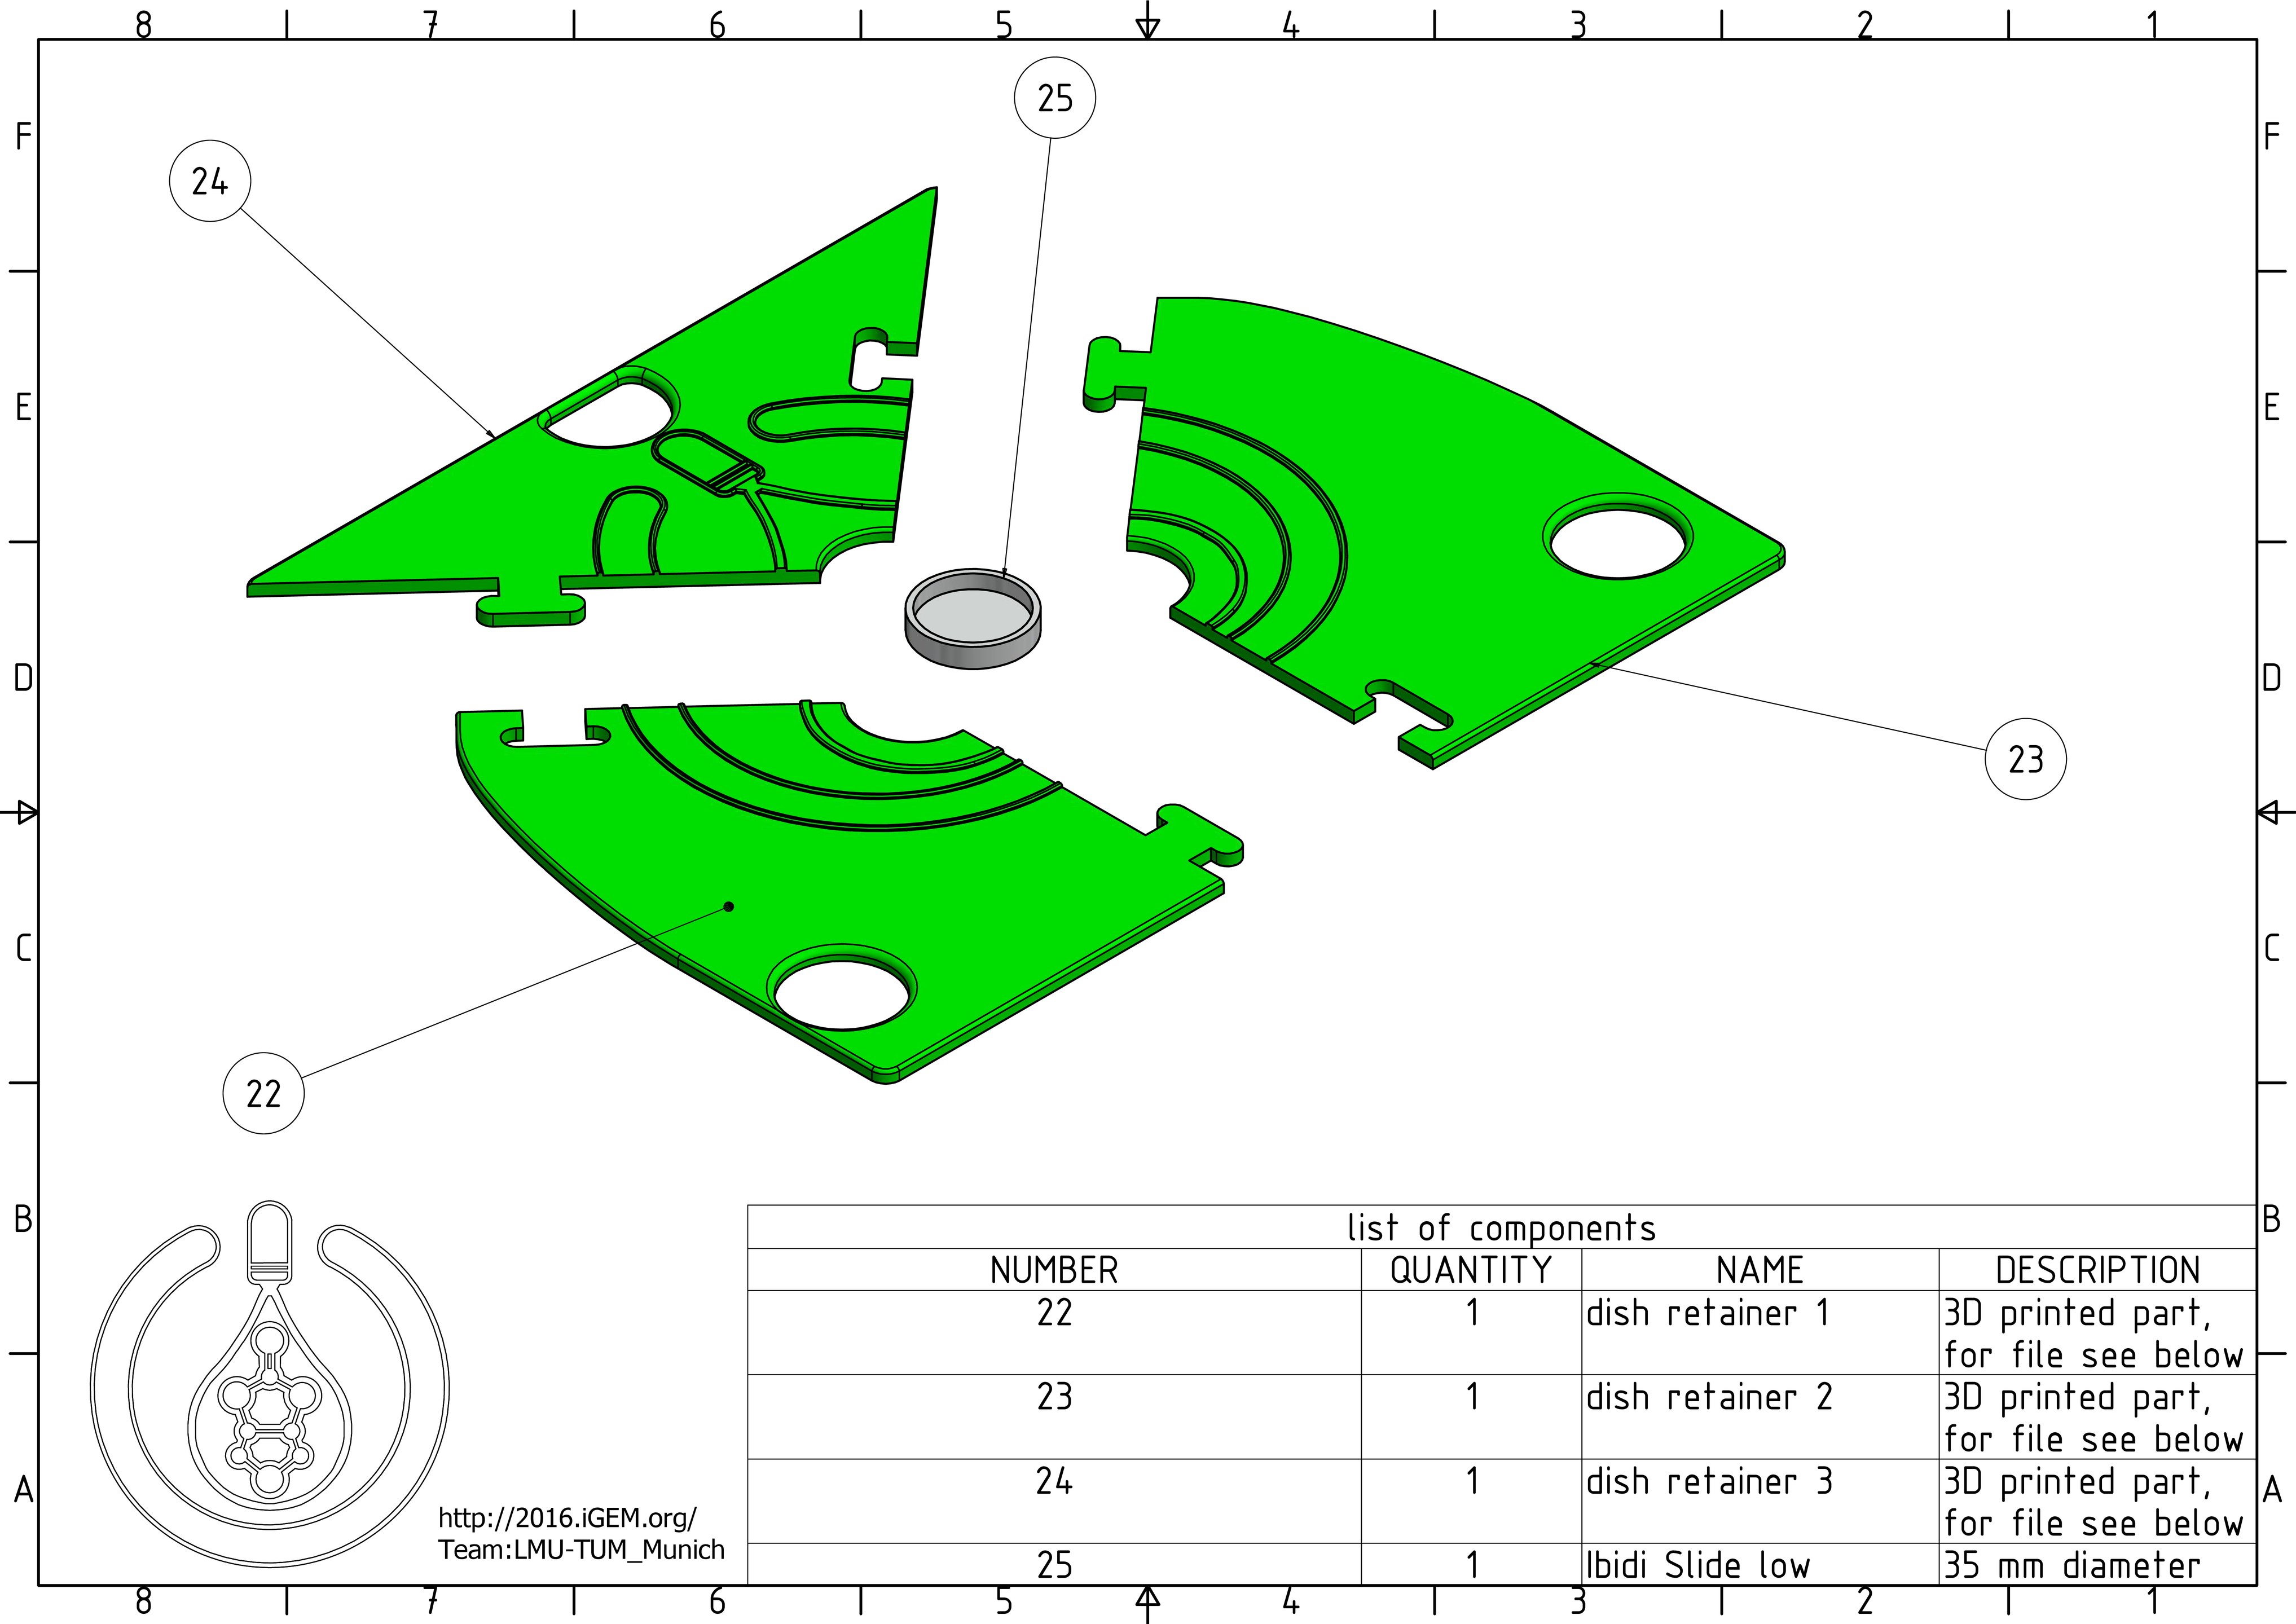
22.to 24. dish retainer parts: These 3D printed parts can be easily assembled like a puzzle. The retainer then replaces the glass on the printer's building plate and holds the ibidi slide in place.
25. Ibidi Slide low: This dish will be printed into.
Printing and assembly
Complete parts list and prices
| Number | Quantity | Name | Supplier | Single Price | Sum |
| 1 | 1 | basplate | 3D printed part | 2.40€ | 2.40€ |
| 2 | 1 | stepper motor (NEMA 17) | https://www.act-motor.com | 6.15€ | 6.15€ |
| 3 | 1 | connector | 3D printed part | 0.11€ | 0.11€ |
| 4 | 1 | trapezoidal threaded spindle (TR8x1.5) | https://www.dold-mechatronik.de | 1.19€ | 1.19€ |
| 5 | 1 | syringe carrier | 3D printed part | 0.36€ | 0.36€ |
| 6 | 2 | linear ball bearing (LM6UU) | https://www.reprapuniverse.com | 1.09€ | 2.18€ |
| 7 | 1 | trapezoidal nut TR8x1.5 | https://www.dold-mechatronik.de | 10.95€ | 10.95€ |
| 8 | 2 | end stop switch | https://www.conrad.com | 0.47€ | 0.94€ |
| 9 | 2 | rod | www.reprapuniverse.com | 1.10€ | 2.20€ |
| 10 | 4 | cylinder head screws DIN ISO 7984 M3x5 | <0.01€ | <0.01€ | |
| 11 | 1 | cover | 3D printed part | 0.35€ | 0.35€ |
| 12 | 1 | 3 ml syringe with luer lok (#309658) | https://www.bd.com | 0.23€ | 0.23€ |
| 13 | 2 | hook | 3D printed part | 0.05€ | 0.10€ |
| 14 | 1 | capillary | https://www.gelifesciences.com | ||
| 15 | 2 | connectors; 1/16" - Capillary | https://www.gelifesciences.com | ||
| 16 | connectors, for correct name, please look at exploded diagram | ||||
| 17 | 1 | print head | 3D printed part | 0,60€ | 0,60€ |
| 18 | connectors, for correct name, please look at exploded diagram | ||||
| 19 | connectors, for correct name, please look at exploded diagram | ||||
| 20 | connectors, for correct name, please look at exploded diagram | ||||
| 21 | 4 | M3 nuts DIN ISO 934 | <0.01€ | <0.01€ | |
| 22 | 1 | dish retainer 1 | 3D printed part | 1.3€ | 1.3€ |
| 23 | 1 | dish retainer 2 | 3D printed part | 1.3€ | 1.3€ |
| 24 | 1 | dish retainer 3 | 3D printed part | 1.3€ | 1.3€ |
| 25 | 1 | Ibidi Slide low | |||
| Sum: |
Printing prices are estimated with Cura, actual cost may differ concerning your choice of filament and such.
How to print
We decided to use ABS plastic because of its better mechanical strength towards PLA. Our print settings are optimized for that. It uses Cura's "high quality" setting with all standard settings, except for the heating bed temperature that was set up to 100°C. We printed with a 0.4 mm nozzle on Kapton foil, which makes the material stick, but also easy to remove when cold. Additionally, we dabbed the foil in acetone dissolved ABS, to make it stick even better. All parts were printed with standard 20% infill, except for the connector, that was printed with 100% infill.
Parts download: https://2016.igem.org/wiki/images/b/b4/MUC16_T--LMU-TUM_Munich--All_Parts.zip
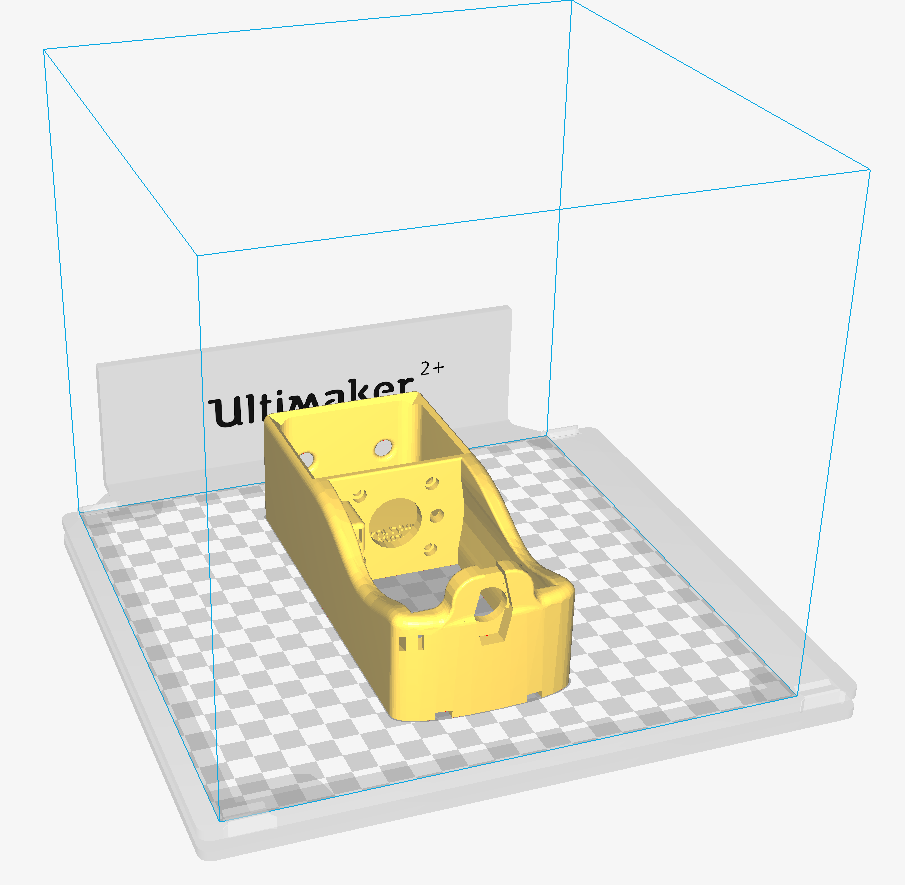
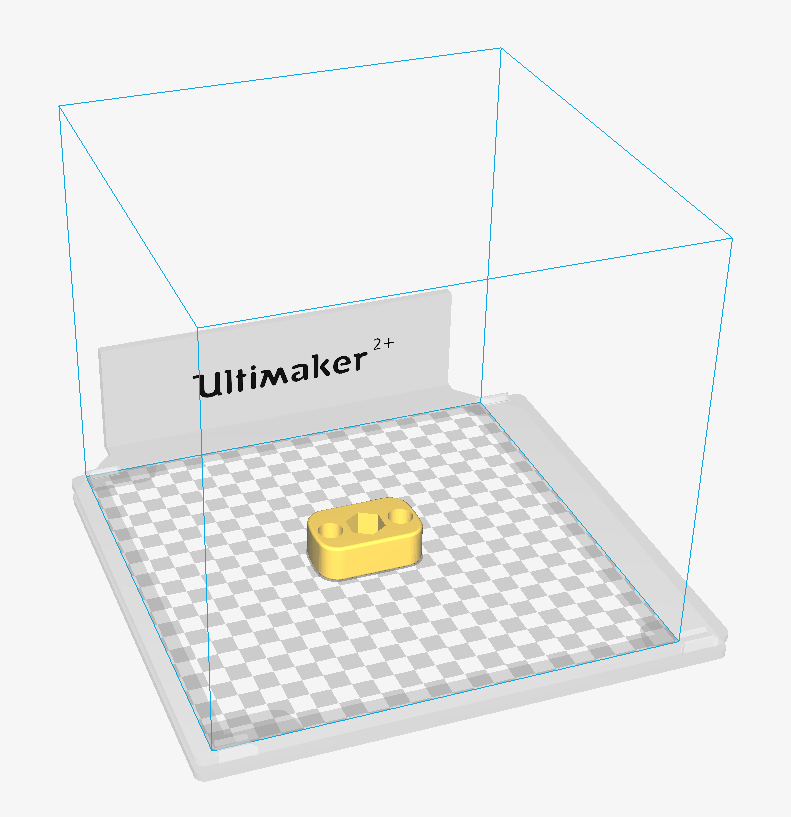
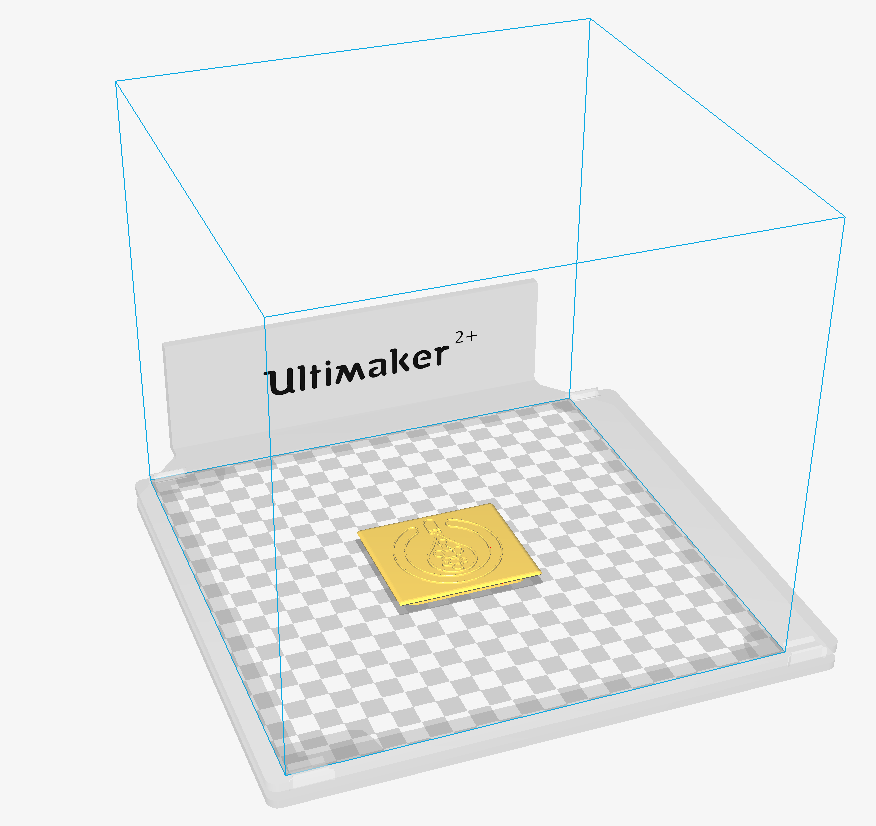
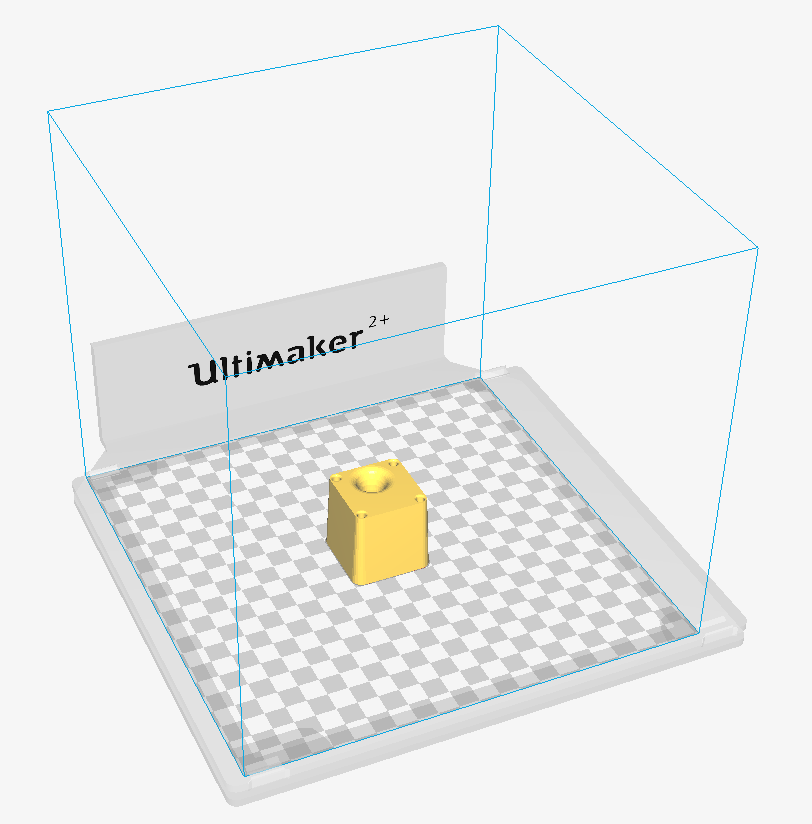
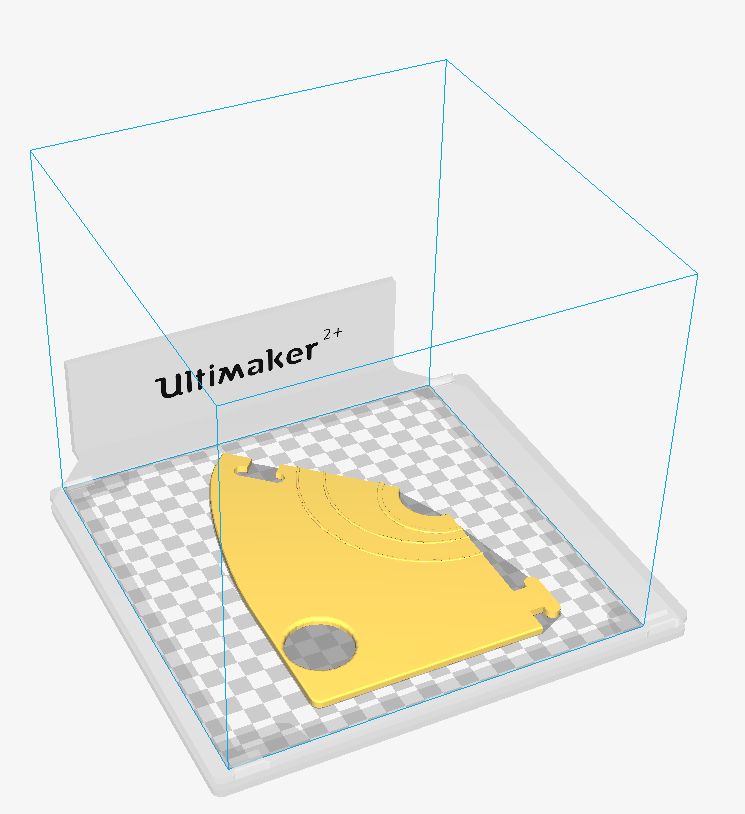
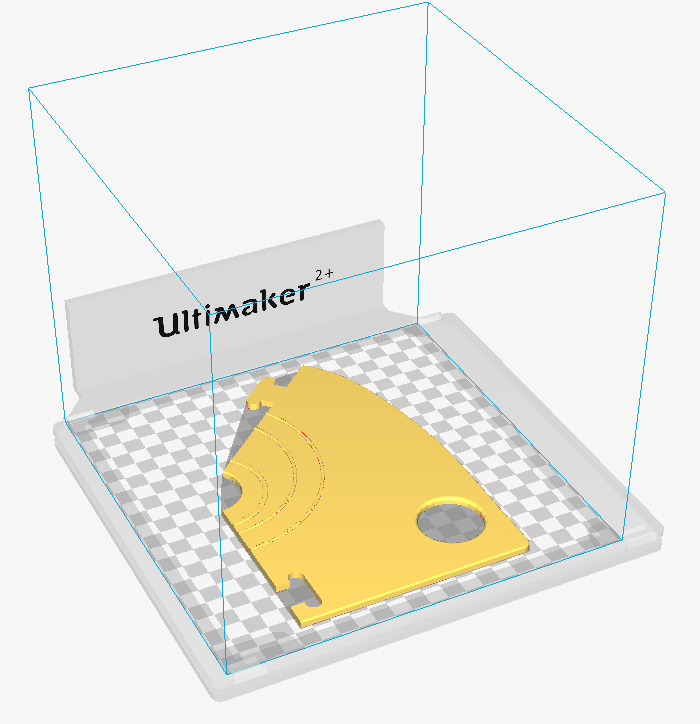
We put a lot of thought into how to avoid overhang and get the best possible printing results. For that, it is important to place the components in Cura with the right orientation. The following graphics show you how to do that.
Printer assembly
The following paragraphs will lead you through the assembly of the different components.
Additionally to the listed components you will need:
- a 2.5mm Allen wrench
- grease
- a file, a mill or an angle grinder
- acetone or glue
- soldering equipment
Syringe pump
- Prepare the spindle (4) and the stepper motor (2) as shown in the manufacturing drawings by using a file, an angle grinder or a mill.
- Glue the linear bearings (6) and the trapezoidal nut (7) into the syringe carrier (5). Since acetone dissolves the used ABS plastic, you can just thinly dab the area with it and quickly insert the components. After the acetone has evaporated, the parts should be sitting tight.
- Cut off two pins on each end stop (8). They must be on the same side. If you’re not sure which pins to select, measure the electrical resistances between them. The value should change when the button is pushed. Cut off the other two. Solder thin wires to the remaining legs and push them through the cable channels. Make sure that they are not touching each other with shrink tubing or isolation tape. Insert the buttons into the provided holes.
- Screw the spindle (4) into the trapezoidal nut (7) until it reaches the middle of the spindle.
- Attach the connector (3) to the spindle (4) with the fitting end.
- Hold the assembled syringe carrier (5) into the baseplate in front of the holes where it’s going to be secured in step 7.
- Insert the two rods (9) into the baseplate (1) through the back holes so that they fit through the linear bearings (6).
- Insert the stepper motor (2) from above into the back of the baseplate (1), insert its axle into the connector and secure it with the screws (10).
- Clip in the cover (11).
- Insert the syringe (12) into the bayonet and secure it by turning it. Make sure that the plunger’s end sits in the syringe carrier’s (5) indentation.
- Hang it to the side wall of your printer using the hooks (13)
- Lubricate the spindle a little with grease
Print head
Only work when the printer is unplugged!
- Remove the original head by removing the four knurled screws and pull off the lower part. Place it somewhere safe. If you leave it plugged in, be aware that the extruder could start heating as soon as the printer is switched on.
- Assemble the print head as shown above, make sure to install the capillary before fasten the head to the printer, if not, you will not be able to reach it anymore.
- Insert M3 nuts into the provided hexagonal holes.
- Slide the print head onto the screws an fasten them less than finger-tight insert, so that the needle faces the left wall, be sure not to bend the capillary too much or it might break.
- Connect the other end of the capillary to the syringe in the syringe pump.
Dish retainer
Assembling it is a child's play - literally. Just assemble the puzzle and replace the glass plate with it. It holds the Ibidi slide in place, which you can place in the middle hole. The other ones are for calibrating the printer's default z value. Make sure that the retainer alignes with the left and the lower edge of the build plate.
Connecting the syringe pump to the Ultimaker
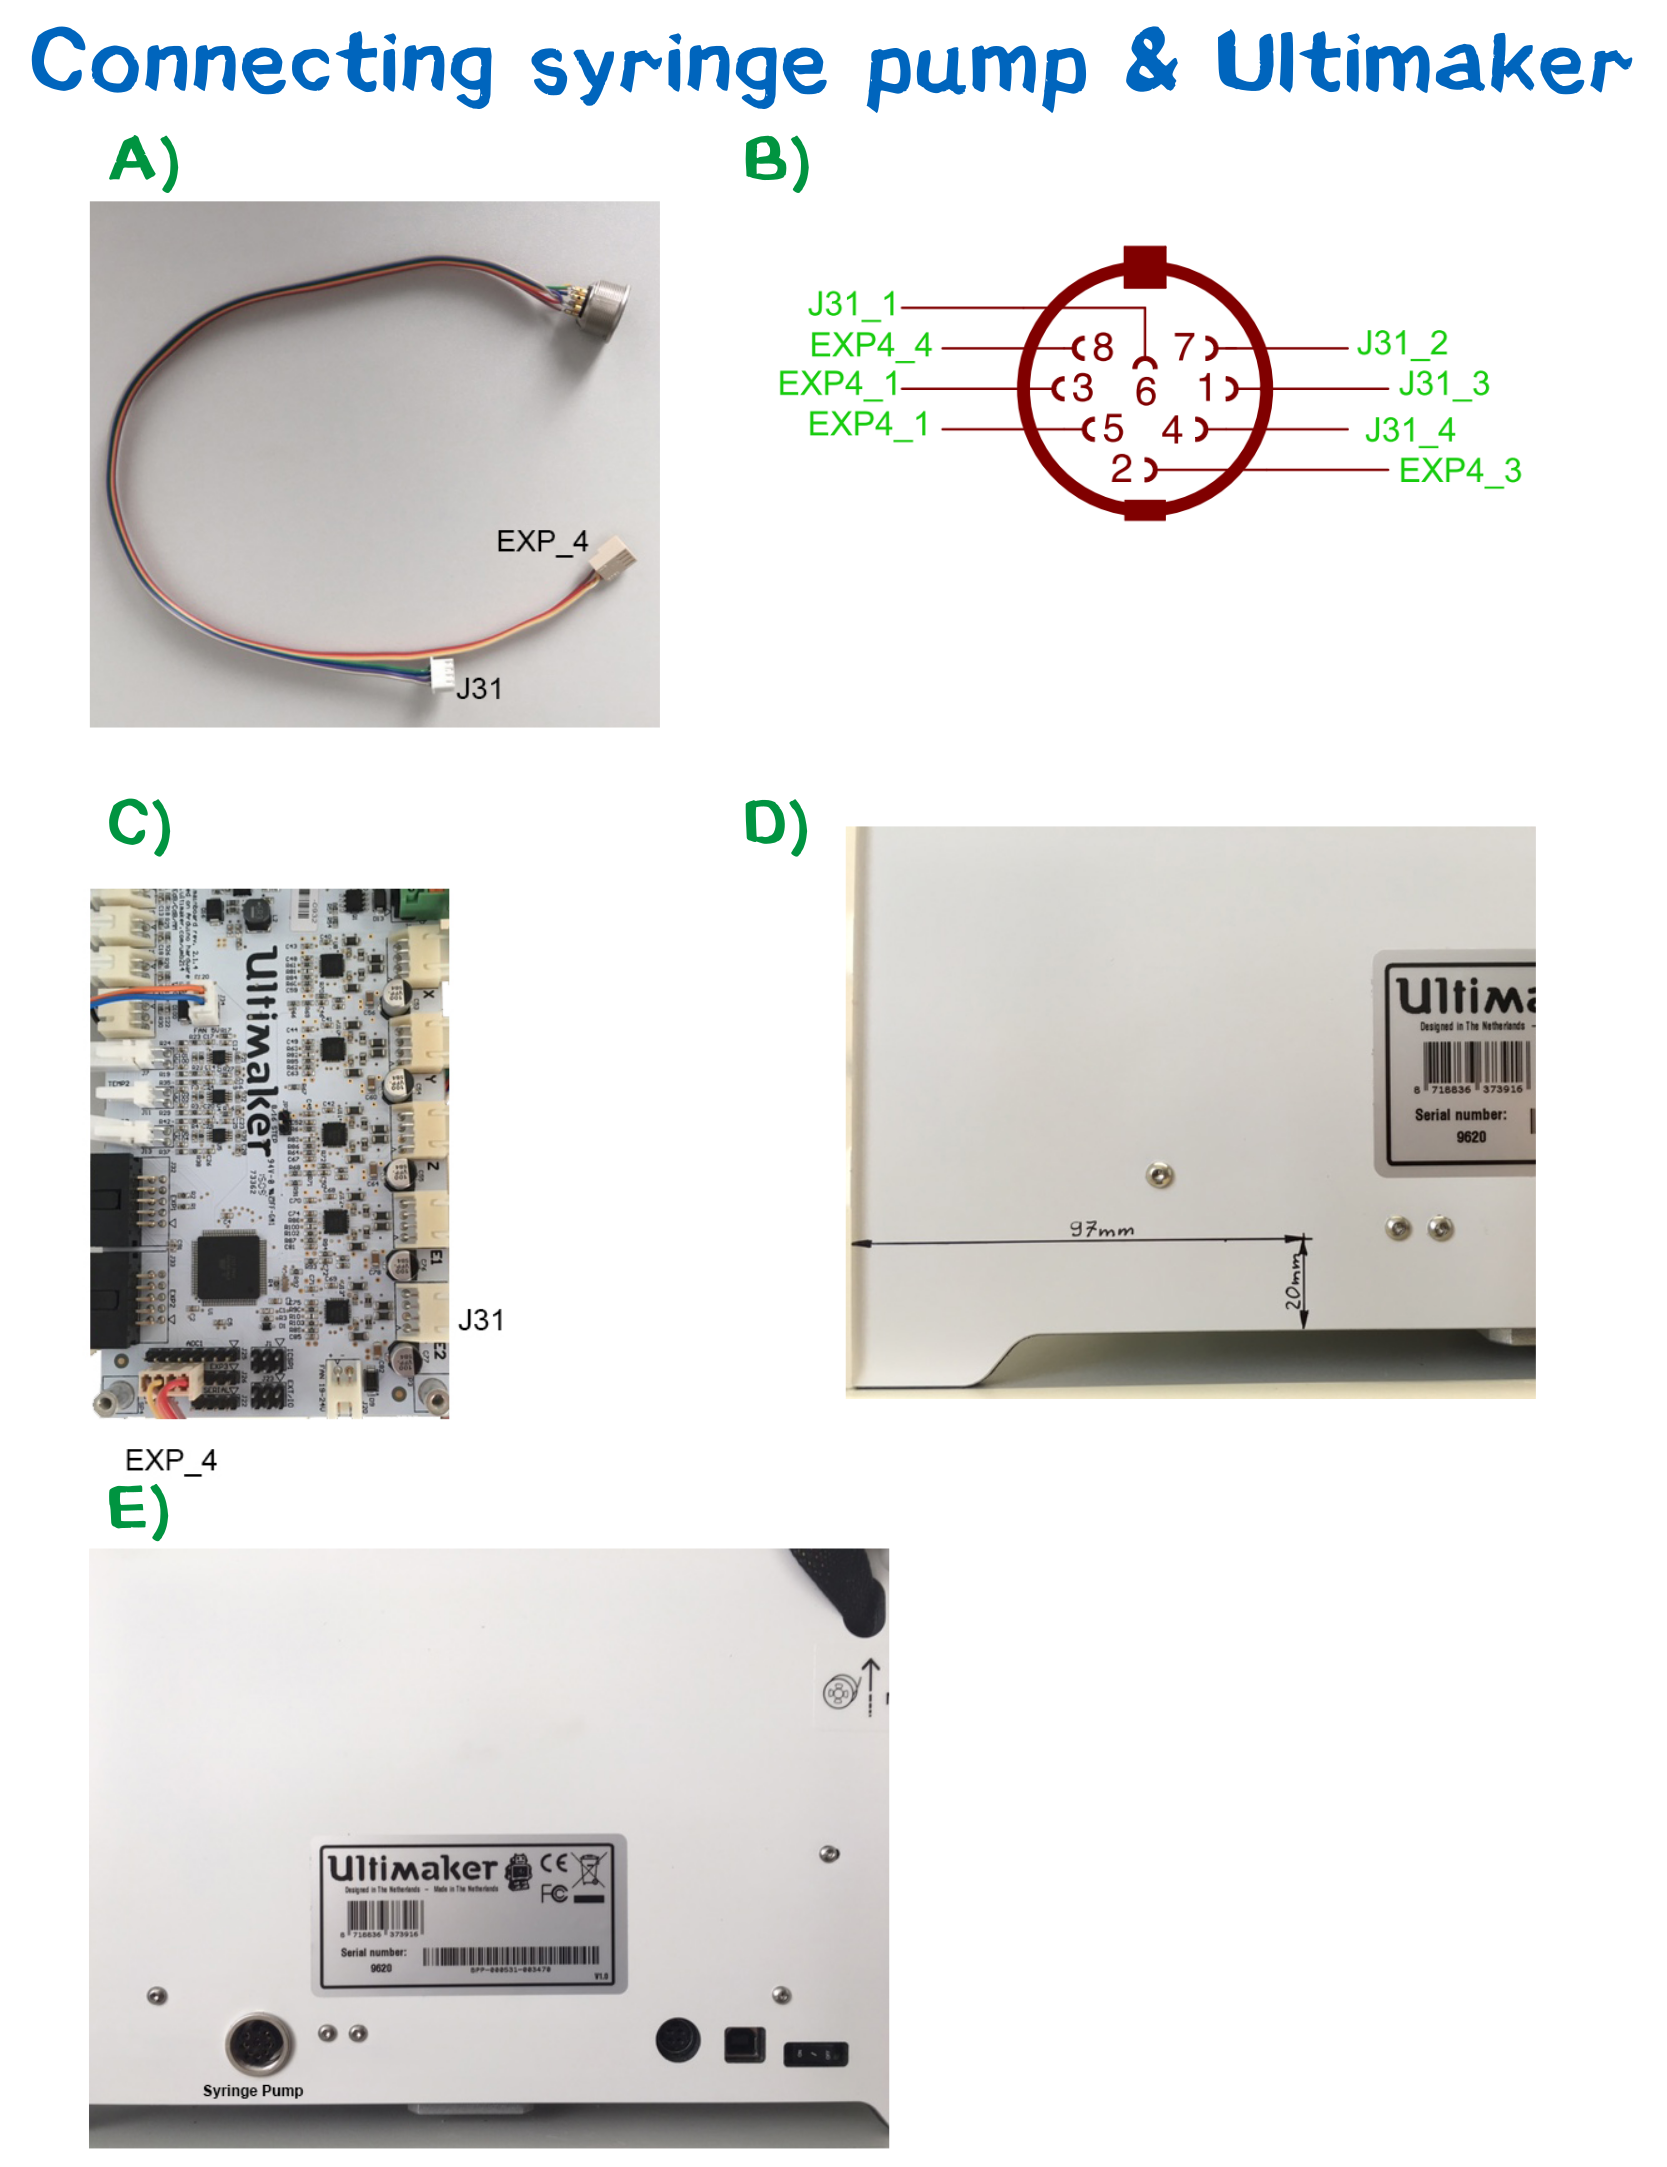
Entering the world of hardware hacking can be a little intimidating for a non-engineer. This instructable will give you a step by step guide to equip the Ultimaker2+ with a connection for a syringe pump. First you have to remove the cable channel behind the printing platform. This will allow you to unscrew the cover from the bottom and gives you access to the main board.
Measure the location of the hole for you 8-PIN DIN connector. If possible, mark exactly where the hole needs to be drilled. Choose the drill size appropriate to your connector.
Plug in the two connectors to the EXP_4 and J31 pins on the main board and fix you DIN-connector on the Ultimaker casting. Reassemble the mainboard cover and the cable channel. Now you have successfully upgraded your Ultimaker with a syringe pump connector.
Development and construction
Challenges when constructing parts for an FDM printer
In most manufacturing techniques like CNC-milling, casting or deep-drawing we are relatively unrestrained when it comes to what forms can be realized with very fine maufacturing tolerances. Industrial CNC mills are capable of the IT6 standard[2], which is in micrometer dimensions. Sadly, 3D printers tend to be inaccurate, not due to their mechanics, but because of the fact that liquid plastic is printed, which still changes its form after stacked on the previous layer until it hardens. This forced us to experiment with different settings and sizes to produce fitting parts like the puzzle of the dish retrainer or the rod's holes in the baseplate. Also, FDM printers are not capable of printing big overhangs for the material just falls down when not having any support. It is possible to print with automatically generated support structures, but the affected areas have to be post-processed, which is not always easy at inaccessible spaces. That is why we need quite some creativity and take unorthodox approaches to some elements. Since we decided to use ABS plastic because it is much stronger than the more commonly used PLA, it also brought more frequent printing flaws with it, that result from thermal expansion. For instance warping, that bends the whole part, or rips between the layers. These issues had to be tackled by optimizing the print settings and constructing reinforcements or even thinning the material at some places, resulting in a lot of prototyping, like 12 different versions of the baseplate were printed.
Calculation and analysis
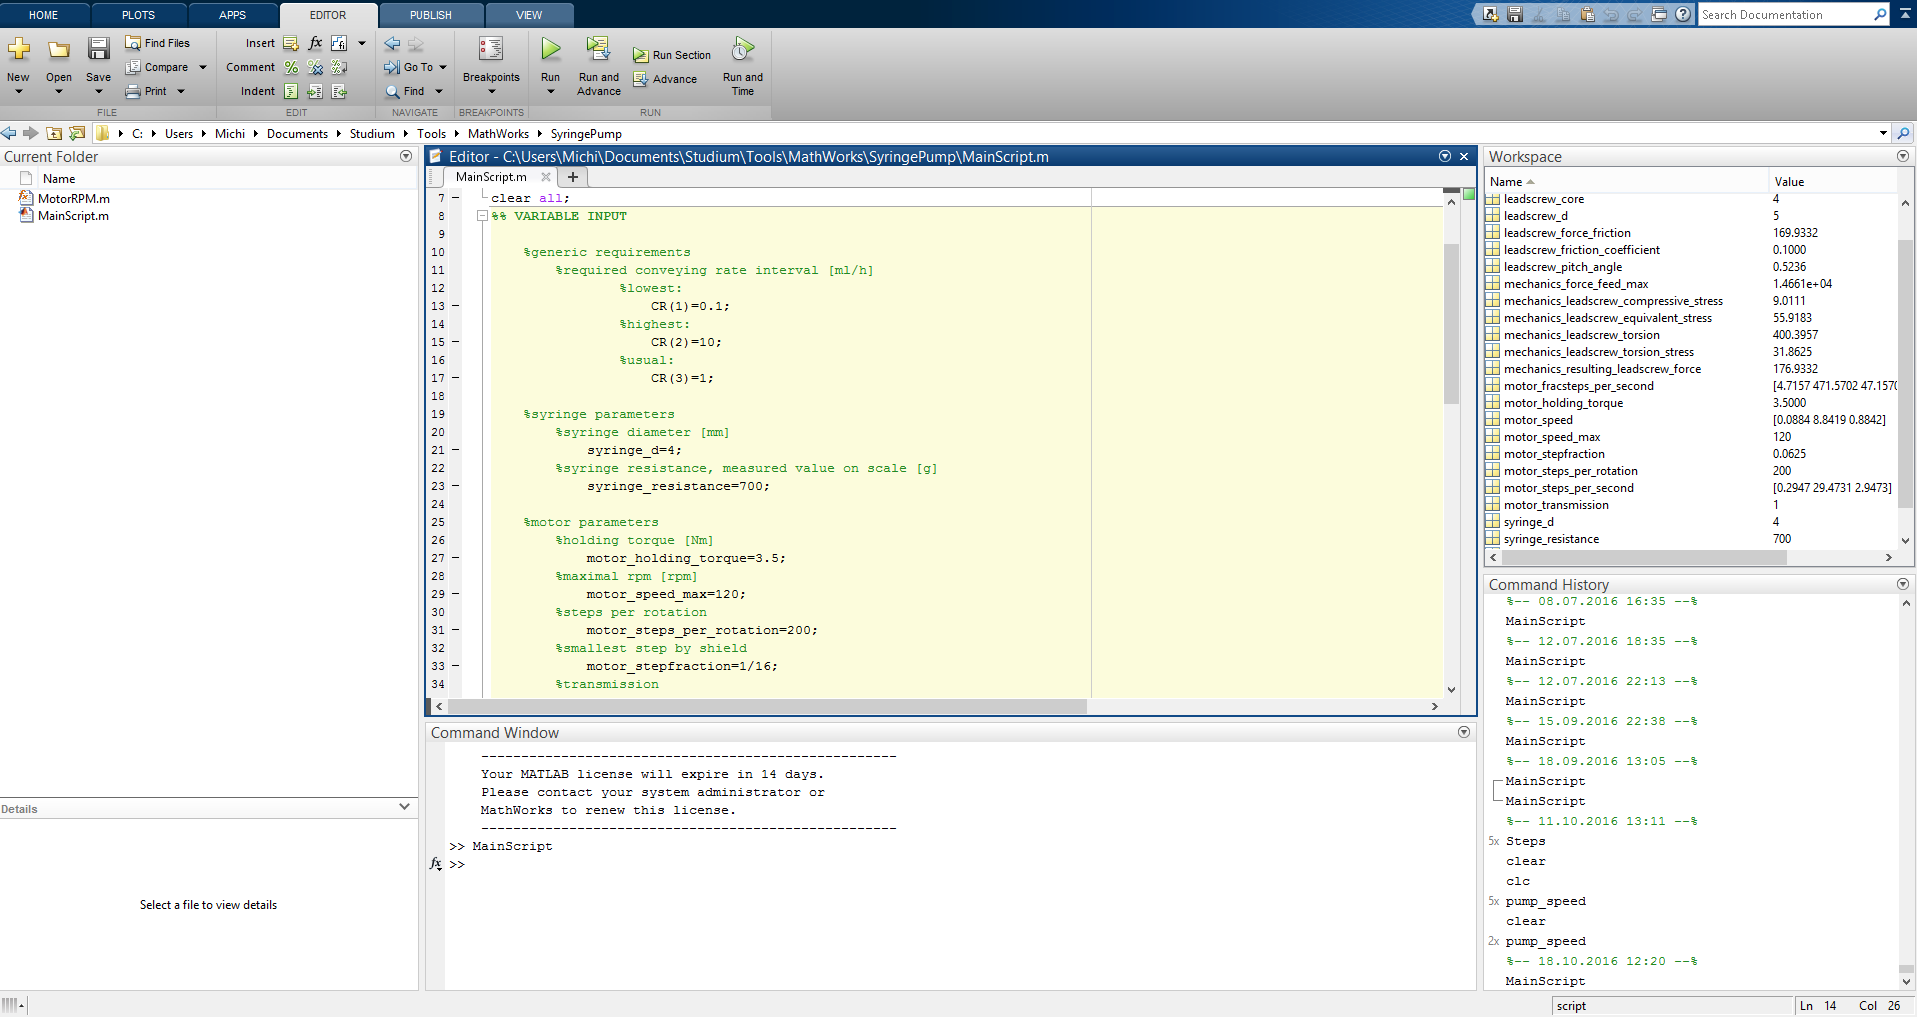
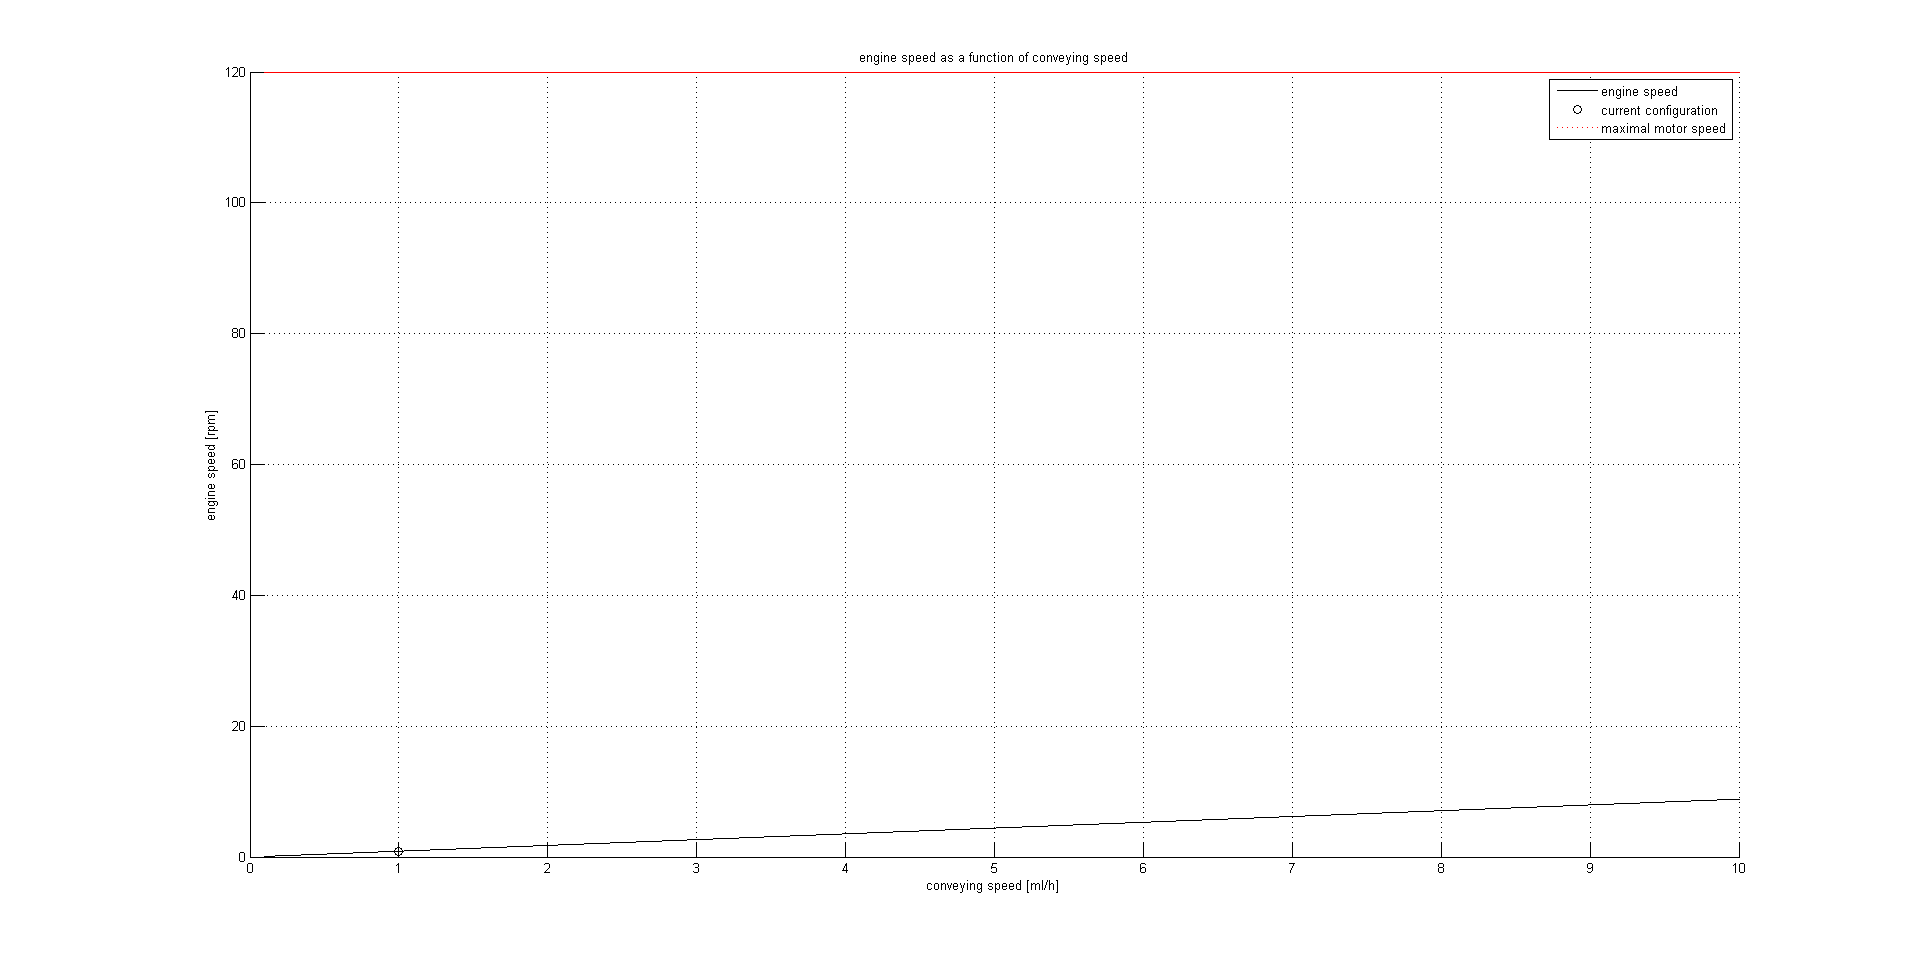
Our first step in developement was taking a look at the aforementioned low cost syringe pump project. The basic mechanics were good, but could still use some work. To get an idea and visualisation of how fast the motor would have to run for certain volume flow rates and how big the occuring forces are, we wrote a Matlab program that calculates all the parameters and visualizes them in diagrams. If you're interested, you can take a look at the code below.
%Date: 19.06.2016
%This script's purpose is to quickly calculate the syringe pump's
%parameters
clear all;
%% VARIABLE INPUT
%generic requirements
%required conveying rate interval [ml/h]
%lowest:
CR(1)=0.1;
%highest:
CR(2)=10;
%usual:
CR(3)=1;
%syringe parameters
%syringe diameter [mm]
syringe_d=4;
%syringe resistance, measured value on scale [g]
syringe_resistance=700;
%motor parameters
%holding torque [Nm]
motor_holding_torque=3.5;
%maximal rpm [rpm]
motor_speed_max=120;
%steps per rotation
motor_steps_per_rotation=200;
%smallest step by shield
motor_stepfraction=1/16;
%transmission
motor_transmission=1;
%lead screw parameters
%lead [mm/1]
lead=1.5;
%diameter M Norm [mm]
leadscrew_d=5;
%core diameter [mm]
leadscrew_core=4;
%leadscrew friction coefficient
leadscrew_friction_coefficient=0.1;
%lead screw pitch angle
leadscrew_pitch_angle=(30/360)*2*pi;
%% MOTOR SPEED CALCULATION output in [rpm]
motor_speed=((4*CR*motor_transmission)/(pi*syringe_d^2*lead))*(50/3);
figure
hold on;
grid on;
x=CR(1):0.001:CR(2);
plot(x,((4*x*motor_transmission)/(pi*syringe_d^2*lead))*(50/3),'black');
plot(CR(3),motor_speed(3),'o black');
plot(x,motor_speed_max,'red :');
legend('engine speed','current configuration','maximal motor speed');
title('engine speed as a function of conveying speed')
xlabel('conveying speed [ml/h]')
ylabel('engine speed [rpm]')
%% MOTOR STEPS PER SECOND
motor_steps_per_second=motor_speed*motor_steps_per_rotation/60;
motor_fracsteps_per_second=motor_steps_per_second/motor_stepfraction;
%% MAXIMAL FEED FORCE (case unlikely due to security system)
mechanics_force_feed_max=(2*pi*motor_transmission/(lead/1000))*motor_holding_torque;
%% LEAD SCREW FORCES
%estimation of syringe resistance force [N]
syringe_resistance_force=syringe_resistance/100;
%leadscrew nut friction force [Nm]
leadscrew_force_friction=
(syringe_resistance_force*tan(atan(lead/leadscrew_d*pi)+atan(leadscrew_friction_coefficient/cos(leadscrew_pitch_angle/2)))*leadscrew_d)*(2*pi/lead);
%resulting force on lead screw
mechanics_resulting_leadscrew_force=leadscrew_force_friction+syringe_resistance_force;
%torque
mechanics_leadscrew_torsion=leadscrew_force_friction*(lead/2*pi);
%compressive stress Force [N/mm^2]
mechanics_leadscrew_compressive_stress=mechanics_resulting_leadscrew_force/((leadscrew_d/2)^2*pi);
%compressive stress torsion [N/mm^2]
mechanics_leadscrew_torsion_stress=(mechanics_leadscrew_torsion*16)/(leadscrew_core^3*pi);
%equivalent stress [N/mm^2]
mechanics_leadscrew_equivalent_stress=sqrt(mechanics_leadscrew_compressive_stress^2+3*mechanics_leadscrew_torsion_stress^2);
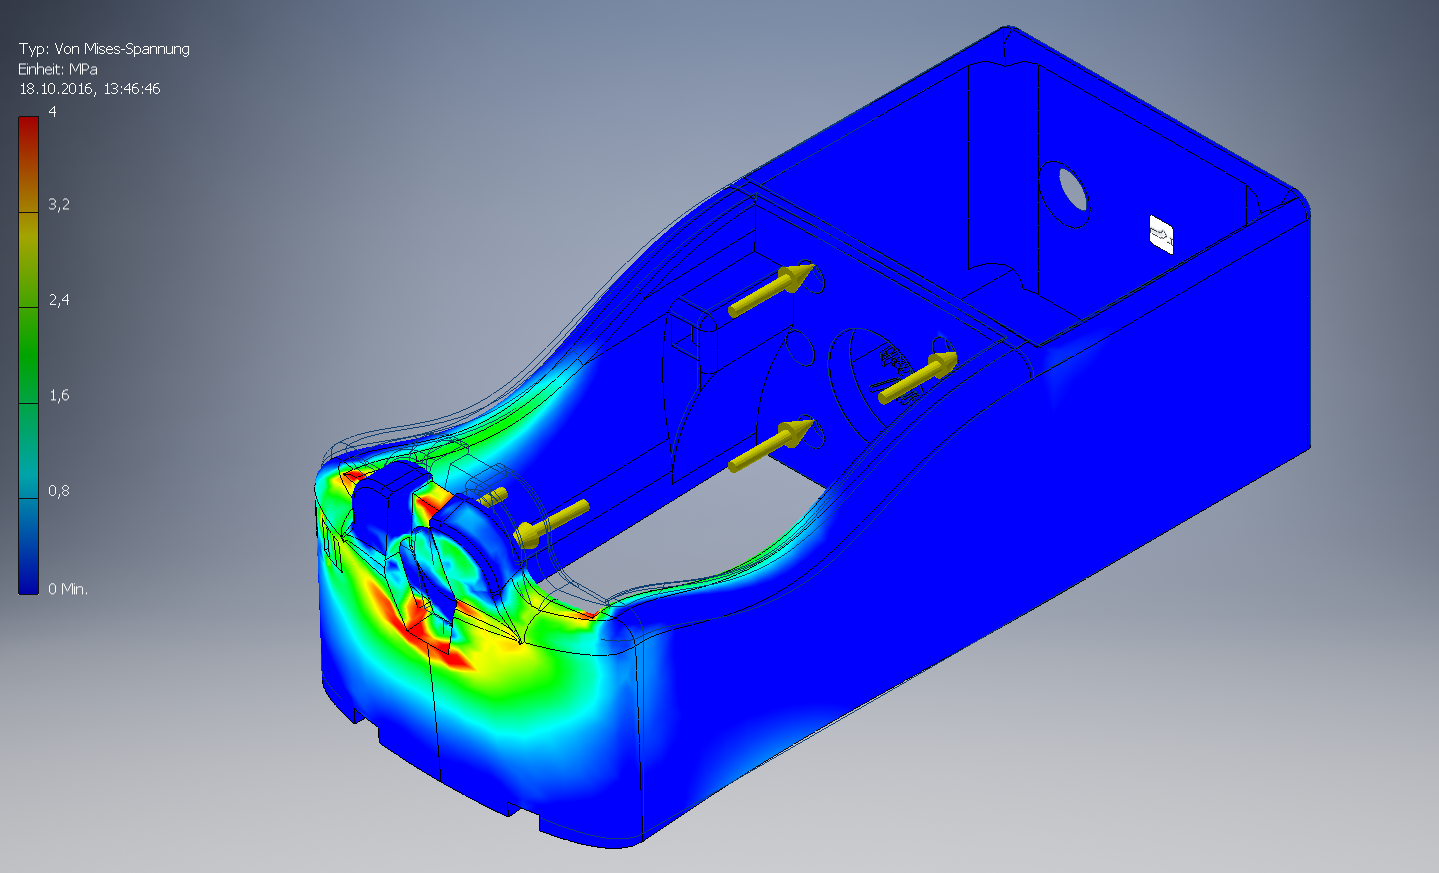
After construction, we conducted a stress analysis to make sure, that the calculations and estimations were right.
We constructed an absolutely new syringe pump, but here is a list of the main differences to the other project:
- The frame's design is unusual for mechanical loads like this. We want our bending moment to be as small as possible, thus we should keep all forces on levers as small as possible. Even though the forces occuring in our system are relatively small, we could save some material by structural optimization.
- We wanted the syringe pump to look more appealing, that's why we made significant changes to the design.
- The teflon coated lead screw in this project is unnecessarily complicated and hard to find. Similar results could be achieved with a simple trapezoidal threaded spindle and lubricant.
- The new baseplate's form enabled us to make a cable channel shaped like a spline. We interpolated it in a way, so that it has the least slope possible. The cable can now simply be pushed through the channel without having to use a large opening.
- Hall sensors as end stops are difficult to calibrate and were replaced by push buttons.
- Instead of the copper bearing that easily wear out, we obtained linear ball bearings.
- The syringe is now mounted with a bayonet that makes it a lot easier to operate
User Feedback from our Collaboration with the iGEM Team TU Darmstadt
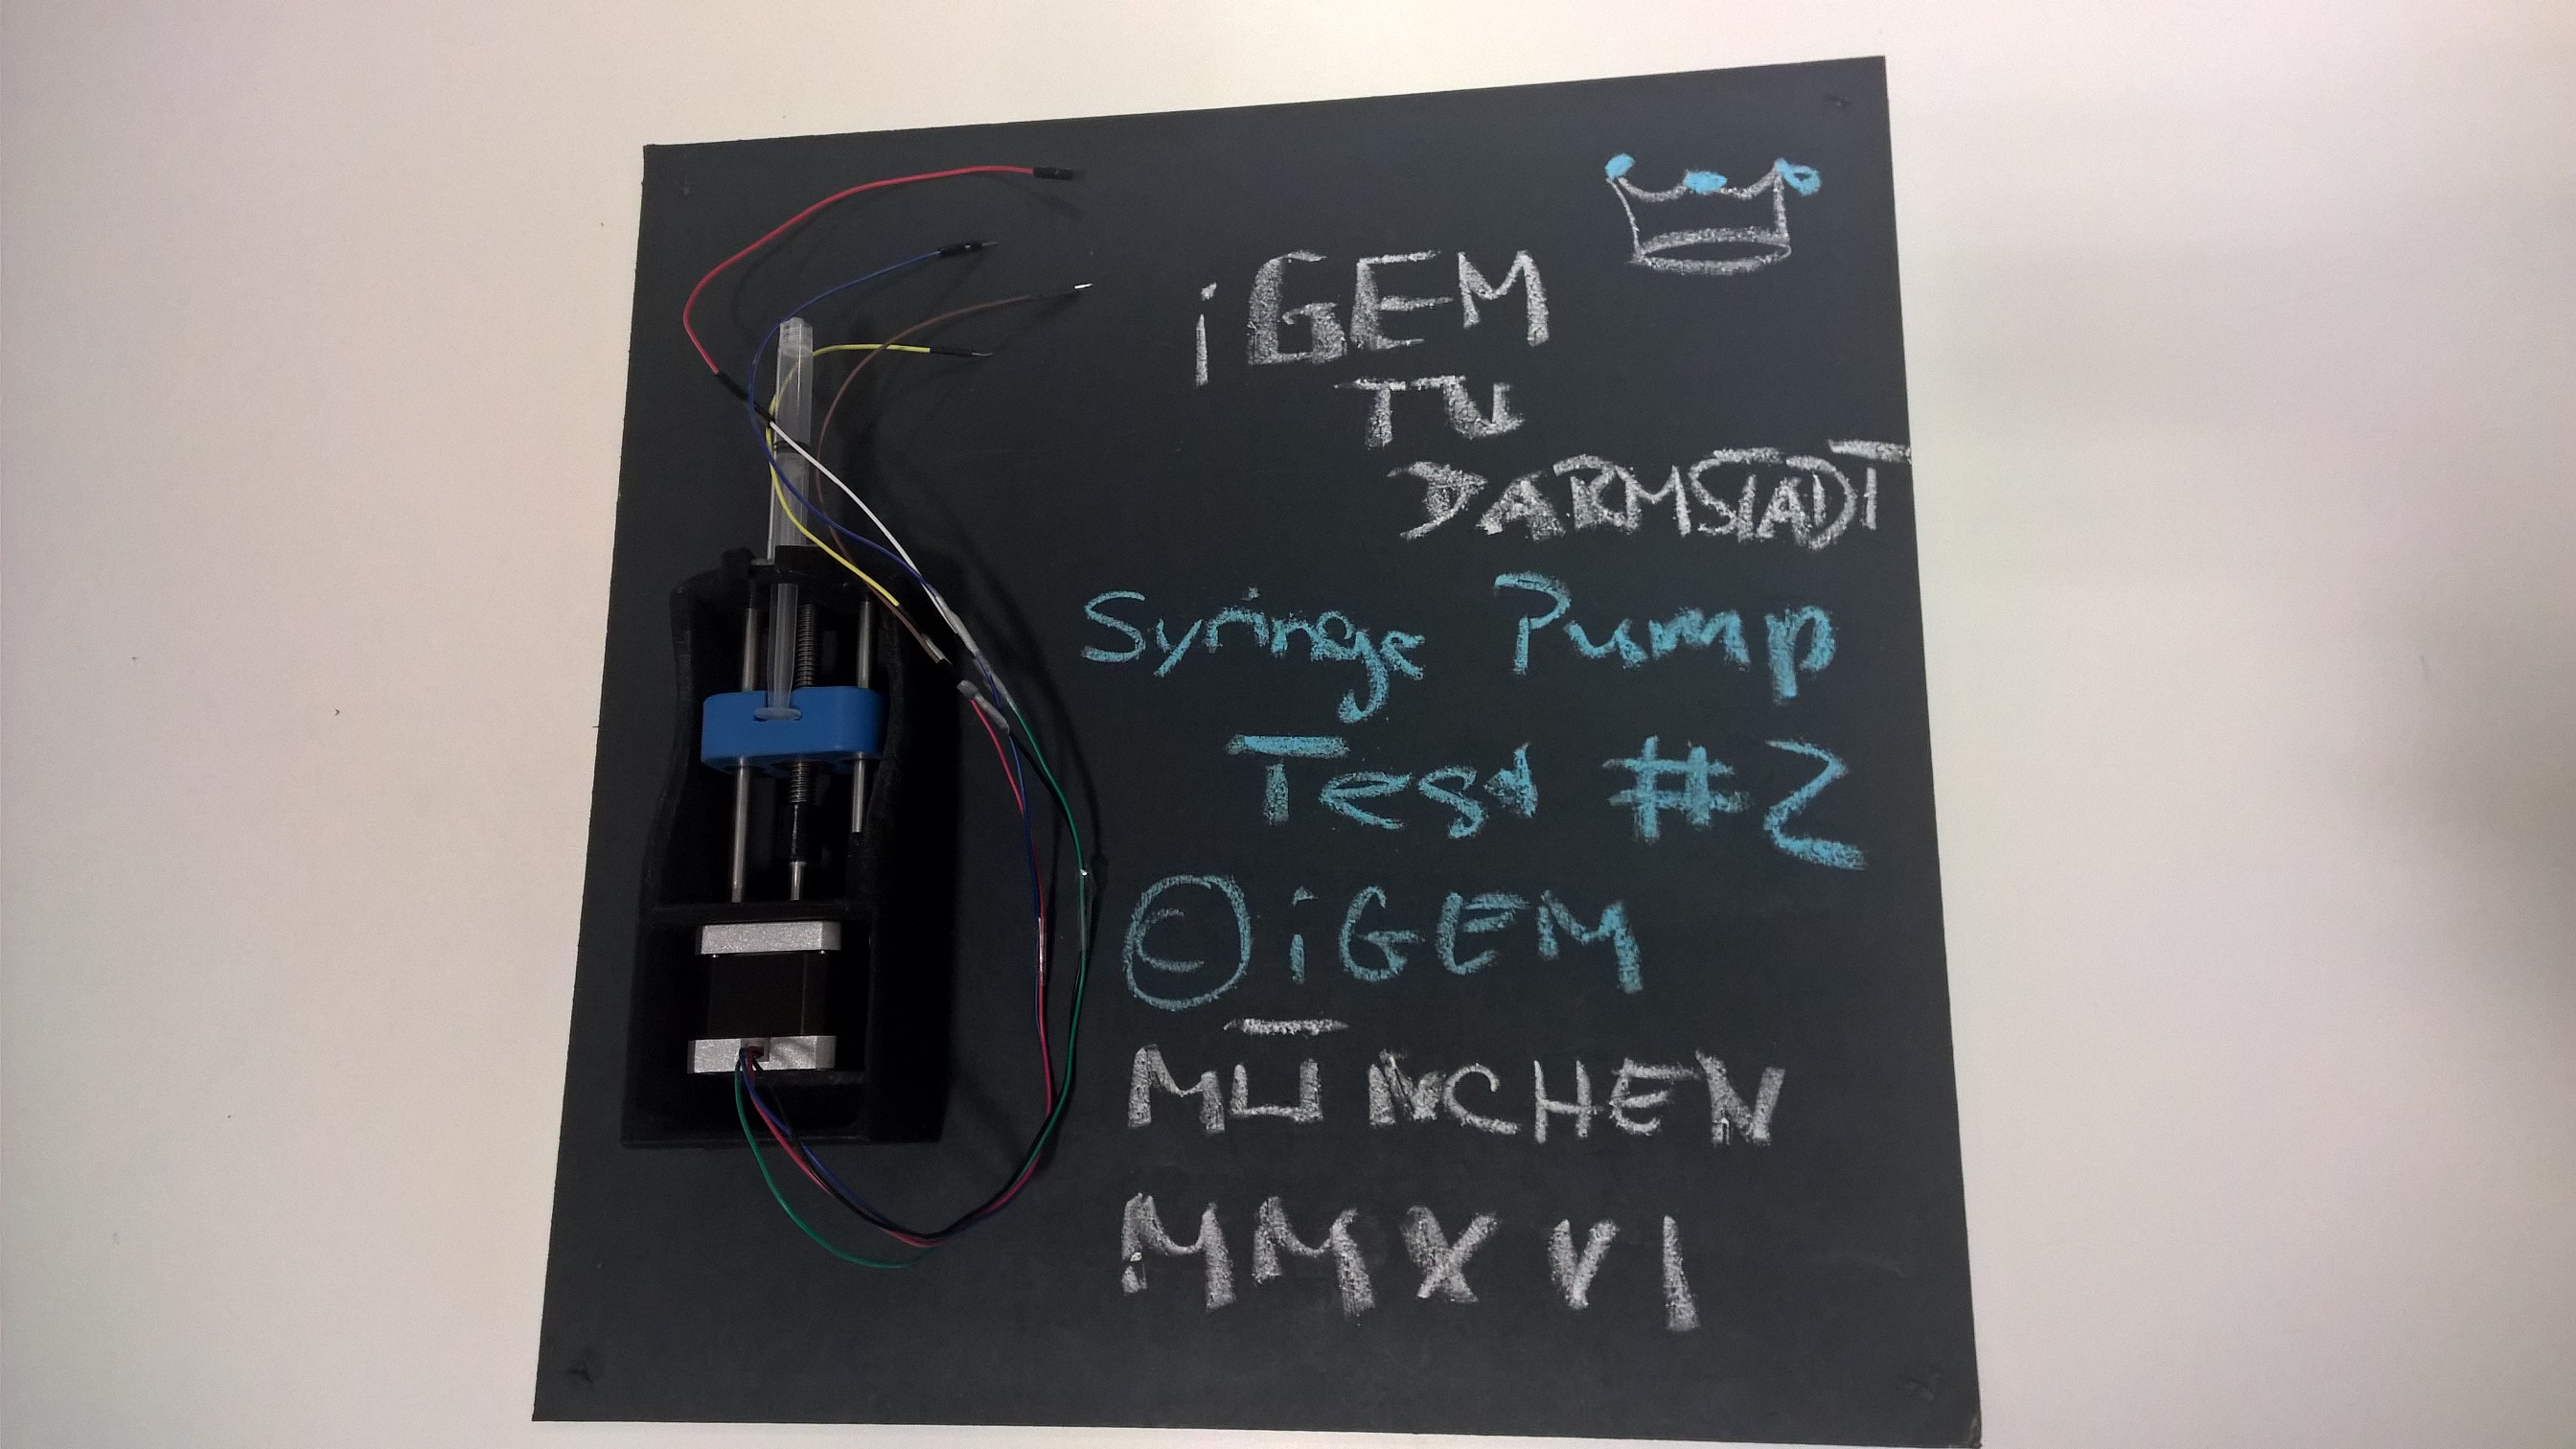
We convinced the iGEM team from TU Darmstadt (also in Germany) to test our syringe pump as beta-testers, so that we can get direct feedback from the iGEM community concerning our most complex part. As all the other parts are far more simple we assume that iGEM students that manage the printing and assembly of our syringe pump will also be able to assemble the whole biotINK bioprinter. Here is their feedback after they assembled our syringe pump:
The pump is neat and stable. The idea of using buttons as end stops is in principle good. You took the necessary holes into account and we were able to assemble it according to the instructions. The click system for the syringe was well made and worked straightaway. The linear bearing could be used right away as well.
We utilized a homemade 3D printer on highest gear for printing the parts. As you might know this leads to relatively many "aberrations" and errors in the prints. They made the assembly difficult and we had to post process several of them.Your construction is designed quite closed, which renders it difficult for any passionate tinkerer to make adaptations after the printing. For instance we noted that you had sent us a printed clutch though the stepper motor was not shortened and did not fit. Therefor we drilled a hole in the front, enlarged the clutch and clued the parts together. In general there are different stepper motors in use in the DIY community, hence we suggest to concept a more general clutch to ease this problem. Furthermore the suspension device for the syringe could be improved, though the varying design of DIY printers makes finding a "good" solution rather difficult.
References


